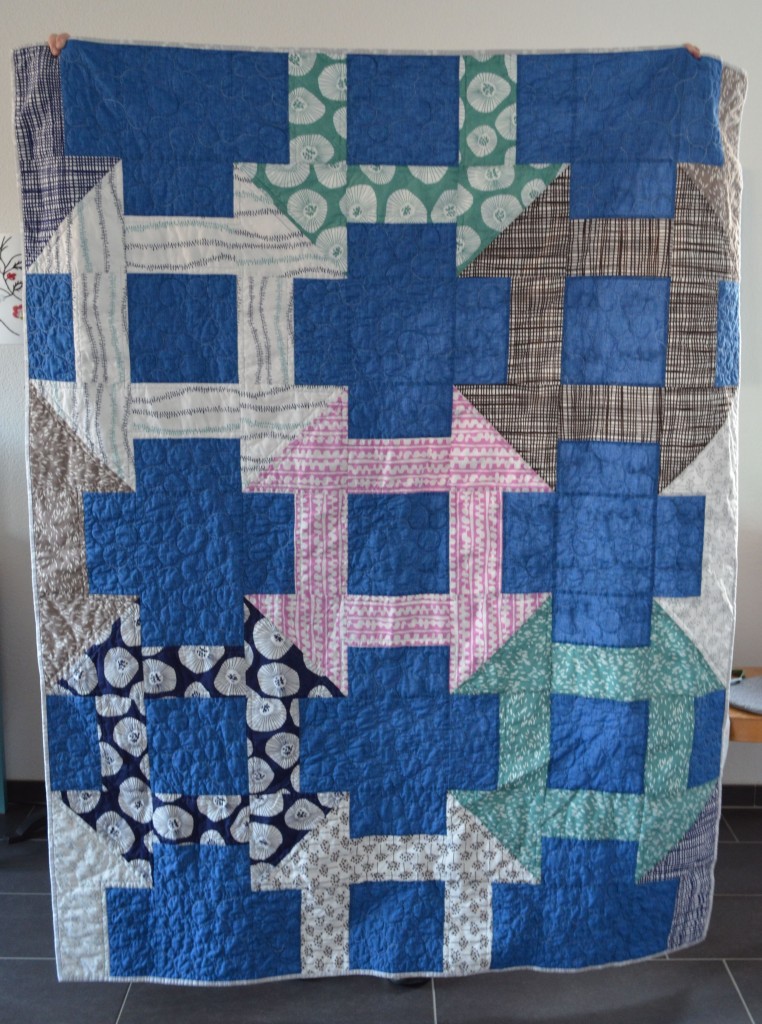
While I was sewing my churn dash quilt, a Dashing Echo, I always thought of it as a ‘modern churn dash’ and somehow this name stuck. The churn dash block is a traditional block and I love the look of it. Changing it up a bit felt a little strange but I love the new look. When I showed my quilt on the blog I was asked if I could write a little how-to for it and I’m happy to oblige.
I’m sorry to say that I cannot remember how much of the background fabric I used but believe I started with two meters and had some left over. For the churn dashes I used 10 different fat quarters.
Cutting
- Background: 15 x (8.5″ x 8.5″) and 32 x (4.5″ x 8.5″)
- Five whole churn dashes: 2 x (9″ x 9″) cut diagonally and 4 x (4.5″ x 8.5″)
- Two 3/4 churn dashes: 1 x (9″ x 9″) cut diagonally and 2 x (4.5″ x 8.5″)
- two half churn dashes: 1 x (9″ x 9″) cut diagonally and 1 x (4.5″ x 8.5″)
- Four 1/4 churn dashes: 1 x (9″ x 9″) cut diagonally and 1 x (4.5″ x 8.5″) Note: you only need one of the triangles
Once you’ve cut all your fabrics lay out your churn dashes starting with the one in the centre.
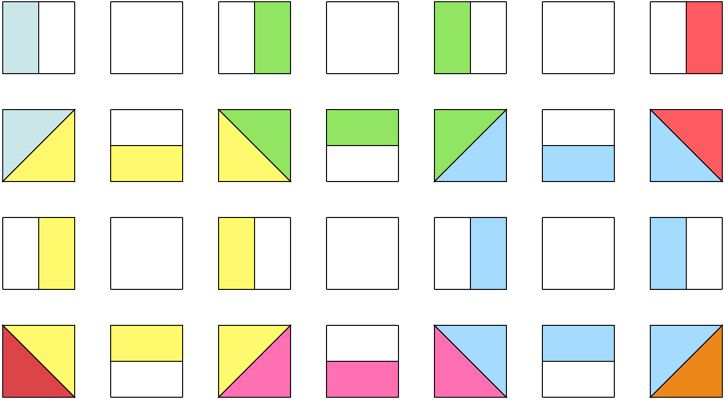
The difference between the traditional churn dash and this version is that it’s not sewn in blocks but in rows. The pattern is a repeat of four different rows. My quilt is constructed from nine rows; rows 1, 2, 3, 4, 1, 2, 3, 4, 1.
Each row can be split up into blocks.
Sewing
- Sew the half square triangles (HSTs) making sure you do not jumble up the colours. Pick two triangles from the first row, sew together and press. I like to press the seams open. Trim to 8.5″ x 8.5″, put them back in the correct place and grab the next pair. Sew all the HSTs together.
- Now sew together the rectangles. They consist of one background rectangle and one coloured one and can therefore easily be chain pieced. Press and put back in the correct place.
- Sew the blocks into rows.
- Sew the rows together.
- Baste, quilt and bind your quilt.
- Snuggle!
And if you turn the blocks sewn from rectangles 180 degrees you end up with some positive doughnuts…
If you have any questions regarding this how-to please don’t hesitate to ask.


Thanks so much for doing this tutorial, Elisabeth!!!! I’m so grateful…
Ha one tutorial, two great blocks! Thank you for the tutorial. A lot more challenging than the idea of making the blocks and adding a square in between!