On the Edge

How do you make sure your English paper pieced quilt has a nice edge that’s easy to trim and bind?

I used to get folded over bits of fabric and little holes but after a while I found an easy way to get a nice straight 1/4″ edge. I simply add a 1/4″ to the template and cut it out. I always cut the seam allowance at a 90º angle.


When I wrap the fabric around the papers I leave that edge unwrapped and trim the fabric flush with the paper.

Then I sew the pieces together with my usual whipstitch and end up with a wonderfully flat edge that is easy to bind without losing any of my points.

I hope that helps.

Happy sewing!


Like to Read?

I love to read and although I have a Kindle that I absolutely love, I also still enjoy a ‘proper’ book. My sister and I (and a few friends) like to swap books and I also often go to the secondhand shop to get books. There isn’t a great choice in English books but I usually find one or two and I never have a problem finding a few good German ones.

Over the years I have used lots of different bookmarks: bought bookmarks, photos, scraps of paper, paperclips, pencils and miscellaneous bits and bobs that are lying around. One thing most of them have in common is that they fall out when you chuck your book in a rucksack or bag. So I decided to make bookmarks that wouldn’t fall out. I used fabric scraps and a bit of elastic to make my first ones.

I sort of liked it and didn’t like it. So I thought it might be the elastic that was bothering me and went off to get some wider elastic. These are the next two bookmarks I made:

One in green for myself and one in blue for my daughter.

Although I really liked those I felt that they were a little difficult to get right. Some books were just too big to fit the bookmark and we soon stopped using them.

So I thought I needed to go back to the thin elastic which is super stretchy and fits easily around lots of the books. I just needed to hide the ugly knot.

This was the result. I really love these bookmarks. They stay in the book if it falls on the floor or is rudely thrown into a bag. They’re fun and colourful and I love the little beads around the edge. The best thing is that you can easily use up your favourite scraps.

Would you like to make one too? I’m going to show you how I make a round one (which is my favourite) but it’s easy to adapt the shapes. I’ve made ovals, hearts, circles and even a slightly wonky exclamation mark.

Materials:

scraps of fabric

16″ of thin elastic

pelmet (e.g. Vliesline S320) or some thin cardboard

batting

beads

scissors, needle and thread

First, draw the shape you have decided on -I’ve gone for a circle- onto your pelmet or thin card. Cut out twice. Do the same with the batting. I like to use wool batting as it’s got a high loft but in this tutorial I’m using some cotton batting.

Lay the pelmet on your piece of fabric and cut out twice with a 1/4″ seam allowance. You can also make a template with some paper or card to fussy cut the fabric.

Sew a running stitch around the edge of your fabric piece, then lay first the batting and then the pelmet on top and pull on the thread. Secure the thread once you’re happy that your fabric is taut. Don’t pull too hard as you don’t want to bend your pelmet or card. Do that twice.

I realised that I made a mistake and had the batting on top of the pelmet rather than the other way around. Don’t make the same mistake as it makes the bookmark very flat. Luckily I realised it before I finished the bookmark and was able to rectify my mistake but it’s still wrong in the picture.

Now, take your elastic and knot it together. Attach the elastic to the back of one of your shapes with a couple of stitches. Then lay the second shape on top and sew together with a ladder stitch or whip stitch.

Next, sew the beads on the edge of the shape. I like to use a back stitch to attach them all on a quarter of the circumference and then go through all the beads so they line up beautifully.

Done. Now, go and enjoy a cup of tea and a good book!


Oakshott Lipari Blog Hop

Hello! Today is my day on the Oakshott Liparis Blog Hop organised by Lynne from Lily’s Quilts. I feel very flattered that I was chosen to be part of this and would like to thank both Lynne and Michael from Oakshott for letting me play with these beautiful fabrics.

Lipari2016_range_ruched1

The Oakshott Liparis are absolutely gorgeous and can’t truly be described, they have to be seen. Each of the eighteen colours are woven with black thread to give a dark and rich palette. They are 54″ wide so go a lot further than regular quilting cottons which is great as you get quite a lot of fabric in a Fat Eighth bundle. Find out more about the inspiration for this collection here.

The minute I realised that I was going to be part of the blog hop I sat down and designed a quilt.

Persimon QuiltObviously there was no chance of making it with a Fat Eighth bundle so I thought I’d just miniaturise it and make a mini quilt. However, when the fabrics arrived and I started playing with them, I came back to the same colour combination again and again, blue, green and orange, red. I then found it difficult to cut the beautiful Liparis into small strips so decided to keep all the stripes at the same width and make the wallhanging quite big. Because it ended up as a wallhanging, not a quilt as planned it has a backing, some lush Lipari Marina, but no batting and no quilting. I was worried that the batting and quilting would make the wallhanging too rigid and that it then wouldn’t shimmer in the light as much.

This is what I ended up with:

Persimon Quilt 'Heaven and Earth'

The stylised ‘persimon’ are English paper pieced and then appliquéd onto the quilt.

Persimon Quilt 'Heaven and Earth'

This quilt/wallhanging is quite striking but easy to make. I will give you the measurements I used but it would be easy to resize from small to large.

You will need

8 Fat Eighths of Oakshott Lipari for the background, I used Stromboli, Lisca, Dattilo, Lentia, Porticello, Salina, Scari, Volcano Bleu

3 Fat Eighths of Oakshott for the ‘persimon’, I used Milazzo, Basiluzzo and Pollara

1 m of backing fabric, I used Marina

Persimon Templates

Thread for basting and sewing, I use cheap thread for basting and Aurifil for sewing and appliqué.

  1. Cut a 5.5″strip from each of your background fabrics and sew together. I went from deep red to blue to get my heaven and earth feel.
  2. Cut out the templates for the three ‘persimon’, you will need twelve of each shape
  3. Pin the templates onto your chosen fabric, cut out with a 0.25″ seam allowance and thread baste onto the paper template. P1020327
  4. Sew the small triangular shapes onto the big wedge shape, then sew the wedge shapes together to get a ‘persimon’. Pollara Persimon
  5. Lay the ‘persimon’ onto your background and pin into place. I ironed a line into the background about 8.5″ from the edge and centred my ‘persimon’ on it. Pin into place leaving the papers in.
  6. Appliqué the ‘persimon’ onto the background with small stitches starting with the inside. Once they are sewn on it’s easy to take the papers out of the small and big shape before pinning the outside down again and sewing around.
  7. Trim your top to get nice clean edges. Mine ended up at 25.5″ x 40.5″.
  8. Lay out your backing fabric and lay your top face down onto it. sew around with a 0.25″ seam allowance leaving an 8″ gap so you can turn it inside out. Press well and close the gap with a ladder stitch.
  9. To hang, I sewed a bamboo stick onto the backing.

You could of course also quilt and bind it the traditional way.

Persimon Quilt Heaven and Earth

The Oakshotts look different in different lights, they are absolutely fascinating. I’ve hung my  ‘Heaven and Earth’ wallhanging over my bed and I love how goes from very dark to shimmering like a jewel depending on the time of day.

Persimon Quilt Heaven and Earth

I’ve absolutely loved working with the Oakshott Liparis!

5 May     Allison Dutton       allison-sews.blogspot.com
10 May   Nicholas Ball         quiltsfromtheattic.wordpress.com 
12 May   Helen Purvis          archiethewonderdog.blogspot.com
17 May   Lynn Harris            thelittleredhen.typepad.com
19 May   Kitty Wilkin           nightquilter.com (Now moved to 2nd June)
24 May   Jessica Skultety      www.quiltyhabit.com 
26 May   Karin Jordan           www.leighlaurelstudios.com
31 May   Elisabeth Vaughan  sharksdinner.ch

The ‘Not Going Anywhere’ Pin Cushion

I’ve shown you my newest pin cushion earlier and now I’m giving you a little tutorial on the improved version (or take three, as I call it). I have to apologise for the quality of the pictures; it was a dark and rainy day today. I wonder where the summer scampered off to as it most definitely has skipped Switzerland this year.

1. Decide on the size you would like your pin cushion to be. I wanted mine to be a little bit narrower than the width of my machine which is about 4.5″ so I settled for 4.25″. I also wanted my pin cushion to not take up too much space and decided that I wanted it to be 2.5″ high. I then added 0.5″ seam allowance and ended up with a rectangle 4.75″ x 5.5″ (4.25 + 0.5 = 4.75 / 2.5 x 2 + 0.5 = 5.5).

Pin Cushion Tutorial

2. I pieced my pin cushion but that isn’t necessary. I’m sure it would look great made in one print too. If you are piecing your pin cushion remember that you won’t be able to see the back so don’t put a treasured scrap at the top or bottom of your rectangle (guess how I know?!).

Pin Cushion Tutorial

3. Sew the short sides together leaving a gap in the middle so you can turn your pin cushion inside out later.

Pin Cushion Tutorial

4. For the ties measure around the side bit of your machine. As you can see my total is 22.5″. Now subtract the width of your pin cushion, then add 3″ for seam allowance and overlap then divide all of it by two. In my case that is (22.5 – 4.25 + 3 ) : 2 = 10.625. I decided to round up to 11″. I cut the fabric for my ties 2″ x 11″, folded in 0.5″ on one side, then folded it lengthwise in half and pressed it well. Then I folded the outer edges into the centre crease and pressed again giving me a tie which is 0.5″ wide. Top stitch close to the edge.

Pin Cushion Tutorial

5. Pin the ties onto the sides of your pin cushion about 0.5″ from the top.

Pin cushion Tutorial

To make sure that you don’t catch the ties in the seam poke them through the gap in the back of your pin cushion.

Pin Cushion Tutorial

6. Sew down the sides of your pin cushion. Clip the corners and turn it inside out.

Pin Cushion Tutorial

7. Fill your pin cushion with poly fill and sew the gap closed with a whip stitch or ladder stitch. Pin Cushion Tutorial8. Hold your pin cushion in place and mark where you need to put your popper or velcro to give a nice tight fit. I used a turquoise popper.

Pin Cushion Tutorial I added 4″ when I calculated the length of the ties but realised it was more than I really needed and this is why I changed it to 3″ in this tutorial.

9. If you’d like to add a little scissor holder, you need to mark where on the tie you’d like to put it.

Pin Cushion Tutorial

10. Cut a piece of fabric 1.5″ x 2″. Fold it in half, press, then fold the edges into the centre and press again to give you a piece that is 0.5″ x 1.5″ big. Top stitch close to the edge. Fold about 0.25″ in on both sides, pin onto your tie and sew close to the edge.

Pin Cushion Tutorial

Attach your pin cushion to your machine and get sewing.

Pin Cushion Tutorial

If you have any questions regarding this tutorial, please don’t hesitate to ask (This tutorial was written while I was sitting on the sofa with a nasty cold feeling very sorry for myself and not thinking clearly so I might have to edit it a bit once I’m feeling better).


Modern Churn Dash: A Quick How-To

While I was sewing my churn dash quilt, a Dashing Echo, I always thought of it as a ‘modern churn dash’ and somehow this name stuck. The churn dash block is a traditional block and I love the look of it. Changing it up a bit felt a little strange but I love the new look. When I showed my quilt on the blog I was asked if I could write a little how-to for it and I’m happy to oblige.

Modern Churn Dash

I’m sorry to say that I cannot remember how much of the background fabric I used but  believe I started with two meters and had some left over. For the churn dashes I used 10 different fat quarters.

Cutting

  • Background: 15 x (8.5″ x 8.5″) and 32 x (4.5″ x 8.5″)
  • Five whole churn dashes: 2 x (9″ x 9″) cut diagonally and 4 x (4.5″ x 8.5″)
  • Two 3/4 churn dashes: 1 x (9″ x 9″) cut diagonally and 2 x (4.5″ x 8.5″)
  • two half churn dashes: 1 x (9″ x 9″) cut diagonally and 1 x (4.5″ x 8.5″)
  • Four 1/4 churn dashes: 1 x (9″ x 9″) cut diagonally and 1 x (4.5″ x 8.5″) Note: you only need one of the triangles

Once you’ve cut all your fabrics lay out your churn dashes starting with the one in the centre.

Modern Churn Dash

The difference between the traditional churn dash and this version is that it’s not sewn in blocks but in rows. The pattern is a repeat of four different rows. My quilt is constructed from nine rows; rows 1, 2, 3, 4, 1, 2, 3, 4, 1.

Modern Churn Dash Row

Each row can be split up into blocks.

Modern Churn Dash Blocks

Sewing

  • Sew the half square triangles (HSTs) making sure you do not jumble up the colours. Pick two triangles from the first row, sew together and press. I like to press the seams open. Trim to 8.5″ x 8.5″, put them back in the correct place and grab the next pair. Sew all the HSTs together.
  • Now sew together the rectangles. They consist of one background rectangle and one coloured one and can therefore easily be chain pieced. Press and put back in the correct place.
  • Sew the blocks into rows.
  • Sew the rows together.
  • Baste, quilt and bind your quilt.
  • Snuggle!

And if you turn the blocks sewn from rectangles 180 degrees you end up with some positive doughnuts

Positive Doughnut

If you have any questions regarding this how-to please don’t hesitate to ask.


In The Woods

I was playing around with TouchDraw, a brilliant app for the iPad that lets you draw patterns and design wonderful things. Thinking about Le Challenge (this month is ‘Geometrics’) I designed an easy geometric English Paper Pieced block, got a some lovely fabrics in muted spring-like colours and started stitching.

Tuesday was a lovely day here in Cambridgeshire so Little Miss Bossy-Boots and I spent it outside in the garden. While she was running around, climbing up and down the slide and playing with her toy kitchen (making yucky stews from leaves, flowers and some water) I took my scraps and paper pieces and got busy.

EPP in the GardenI showed my progress on Instagram that evening.

In the Woods ProgressAnd then finished it yesterday evening.

In the Woods FinishedEagle-eyed people might have noticed that I had to take the centre out and tilt it by 45 degrees. Actually I tilted it quite a bit more as I fell in love with the little hedgehog and wanted him at the top. Little Miss Bossy-Boots asked me to turn it into a quilt for her dolls. I was going to use it for a pocket on a tote but might turn into ‘nice mum’ and make it into a little doll quilt.

Anyway, in the end I decided not to use it for Le Challenge. I’ve designed a different piece which I’m going to make totally out of solids. I’ll post a sneak peek once I get going.

Interested in using the templates/paper pieces I designed? Click here to download In The Woods.


Athea

Here we go! I’ve finally managed to scan in the templates for my EPP pattern which I have called ‘Athea’. Réalt Glas was made with the first set of templates. It was then I realised that I would have to re-work them as I literally had to shoe horn the grey pieces between the two green stars. This has made the inside star very pouffy. As this little mini was always supposed to live here with me, I didn’t really mind. However, when a few people asked me for the templates I realised that I would have to go back to the drawing board.

Réalt Glas Finished

Enter the Spring Version. I still had a little bit of an issue with a few of the pieces not wanting to slot in without a fight so I realised I would have to make another one. Enter a long ‘sigh’ at this point.

Réalt Glas and Spring

Voilà, Blossom! I really like how different the three versions are and I do hope that some people will use the Athea Templates. If you do, please show me your version as I’d love to show it off here as well.

Réalt Glas, Spring and Bossom

These templates were drawn by hand and are therefore not totally uniform. I do apologise for that and for the rather blurry picture of the pattern. Because I didn’t design the pattern with the intention of putting it on the blog I cut up the pattern sheet to make Réalt Glas. The only thing that remains is this blurry picture. You might think that I could have redrawn the pattern and you would be right but, to be honest, I’ve already spent so much time on this and have so many new ideas I want to explore. Furthermore, I’ve bought a wonderful app called TouchDraw for the iPad with the help of which I might even be able to give you templates that are accurate and all the same size. So think of Athea as a trial run.

Having said all this, if you do decide to have a go at ‘Athea’ and run into any kind of problems, please don’t hesitate to contact me (sharksdinner [at] sunrise [dot] ch) and I will be happy to help you as best I can.

EDIT

Here are the templates I drew on Touch Draw. Click on the link to download.

Athea

Portable Pincushion

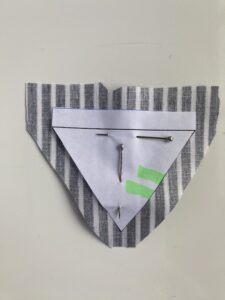
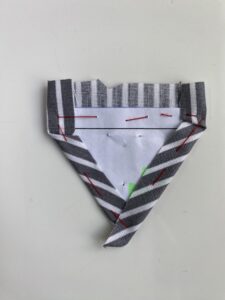
As you all know I love my English Paper Piecing (EPP) as it’s portable and small. I can follow Little Miss Bossy-Boots around the house and bring it on outings and holidays. When I baste the fabric onto the paper templates I use one pin and one needle and I’m forever sticking them into my trousers or the arms of my sofa; and then I’m looking for them as I’ve moved again.

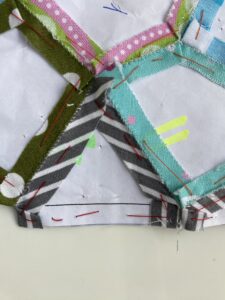
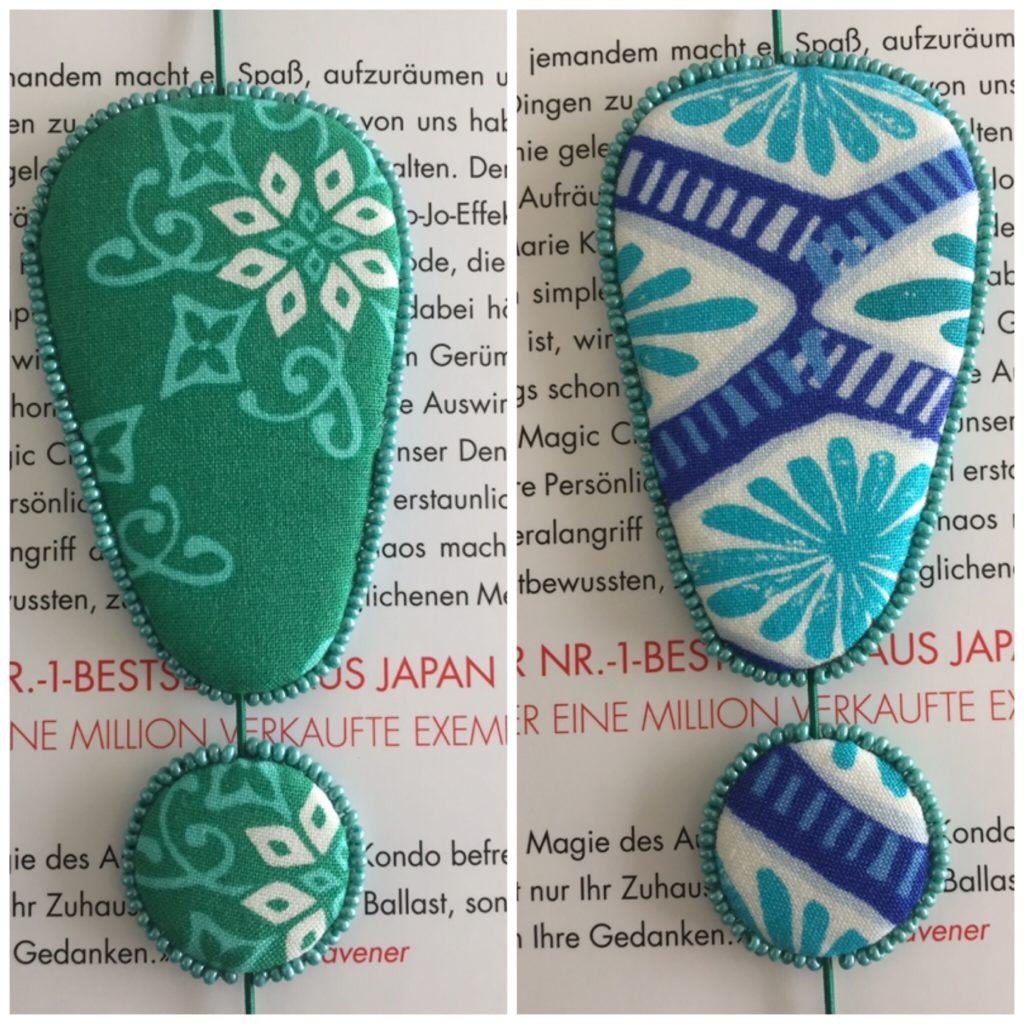
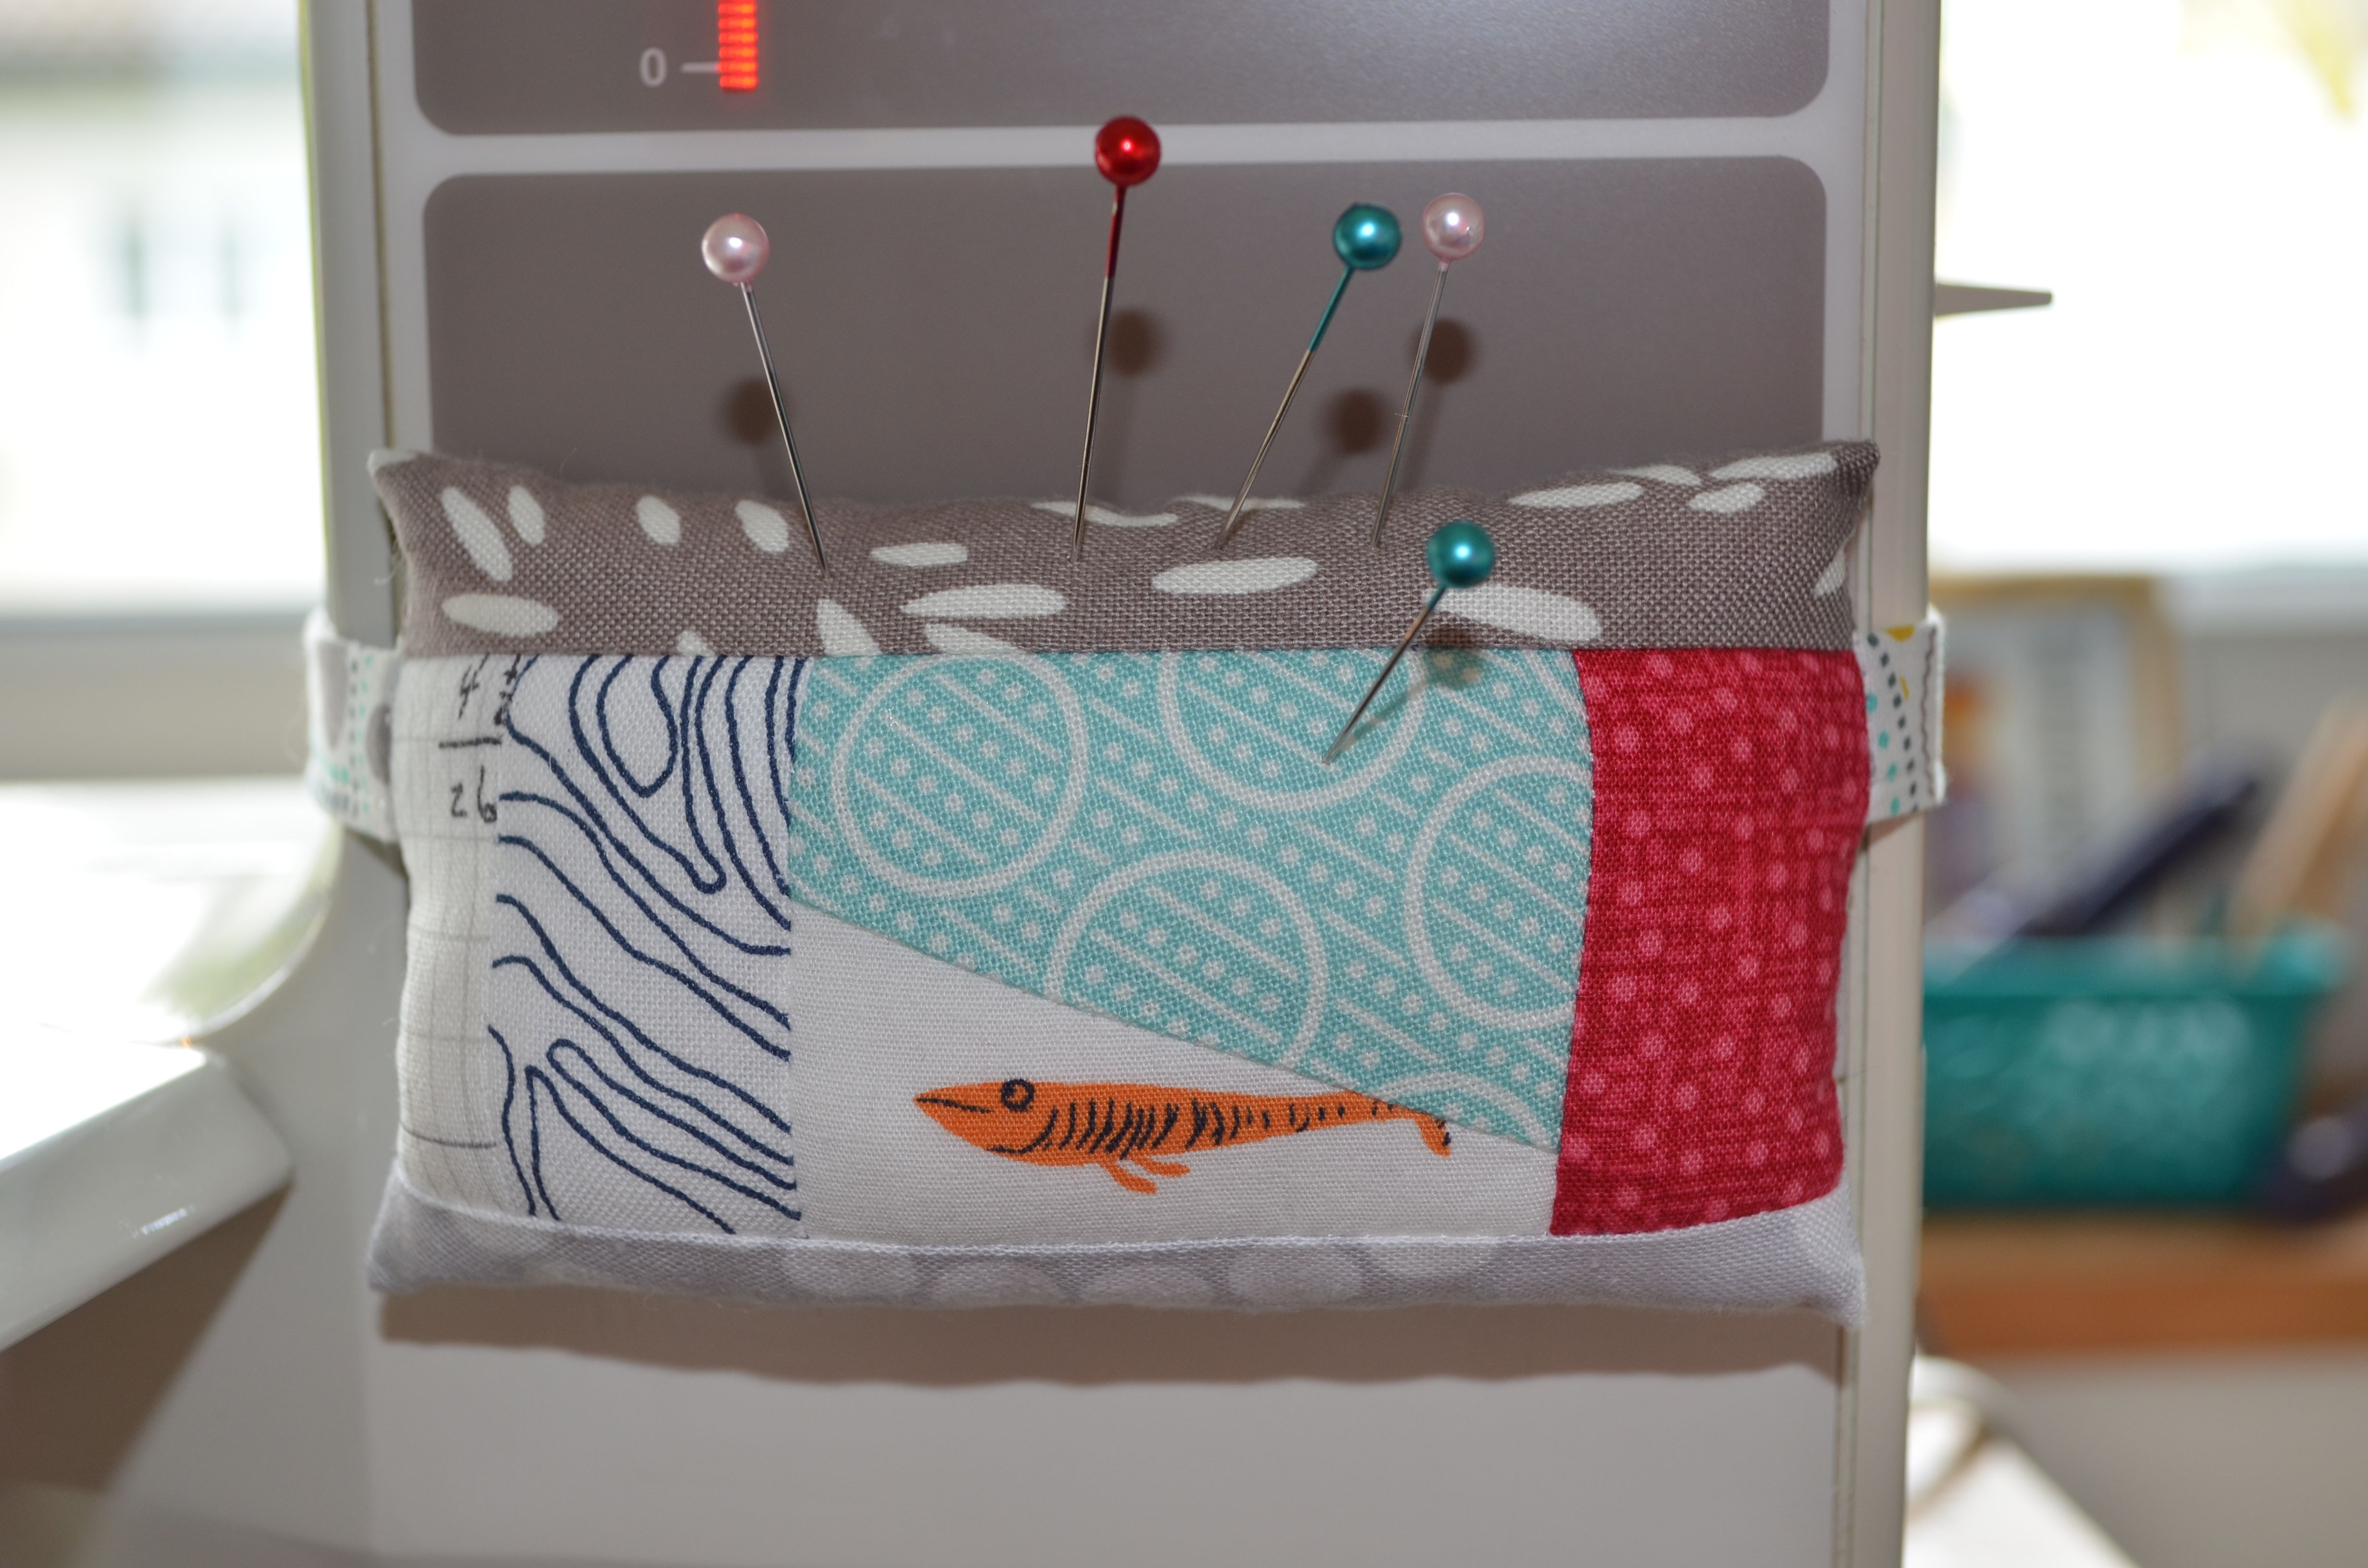
When I showed a picture of my latest EPP you might have noticed a small pincushion in the foreground. Just in case you haven’t here it is again:

I made it literally ten minutes before leaving the house and although it’s incredibly practical and has been used lots already it’s not very pretty (the hot glue shows on the side as I was a bit generous, the button is vintage and quite heavy and the elastic….what’s not wrong with the elastic).

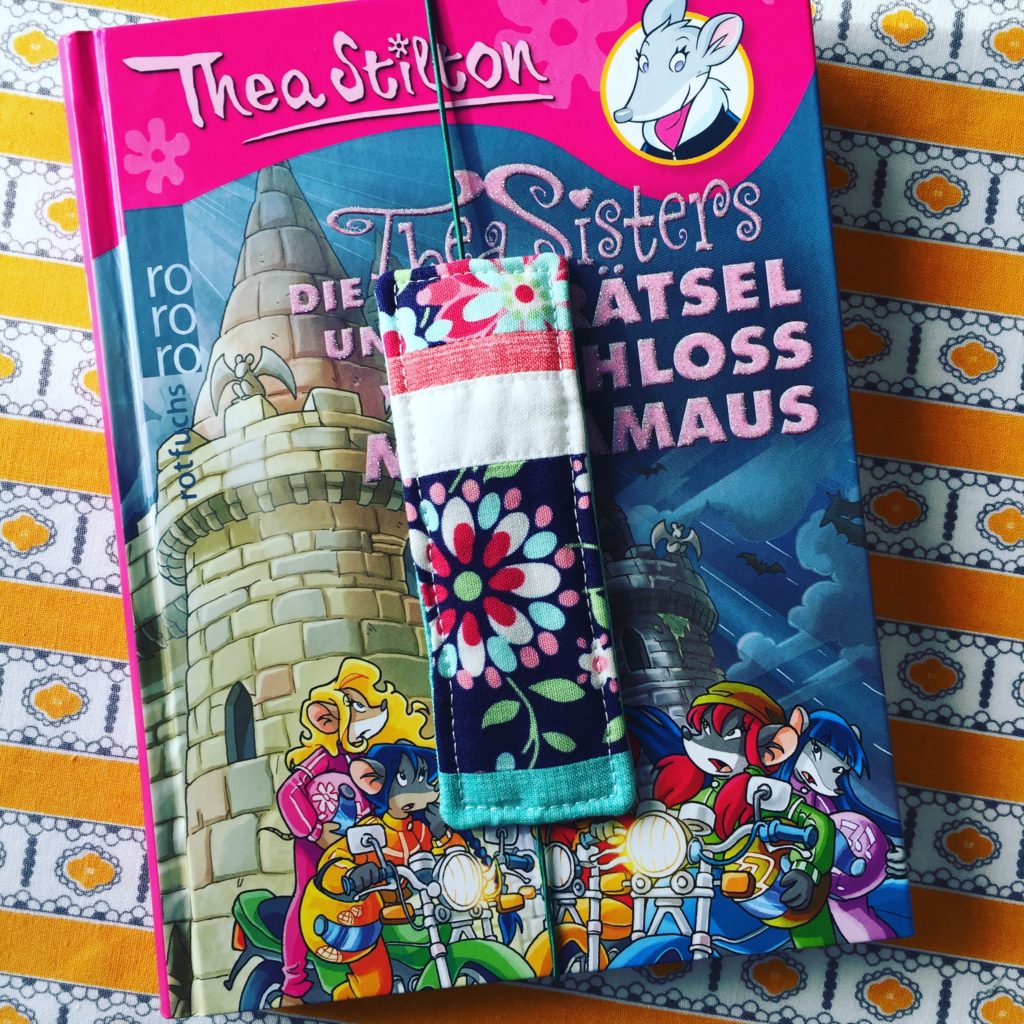
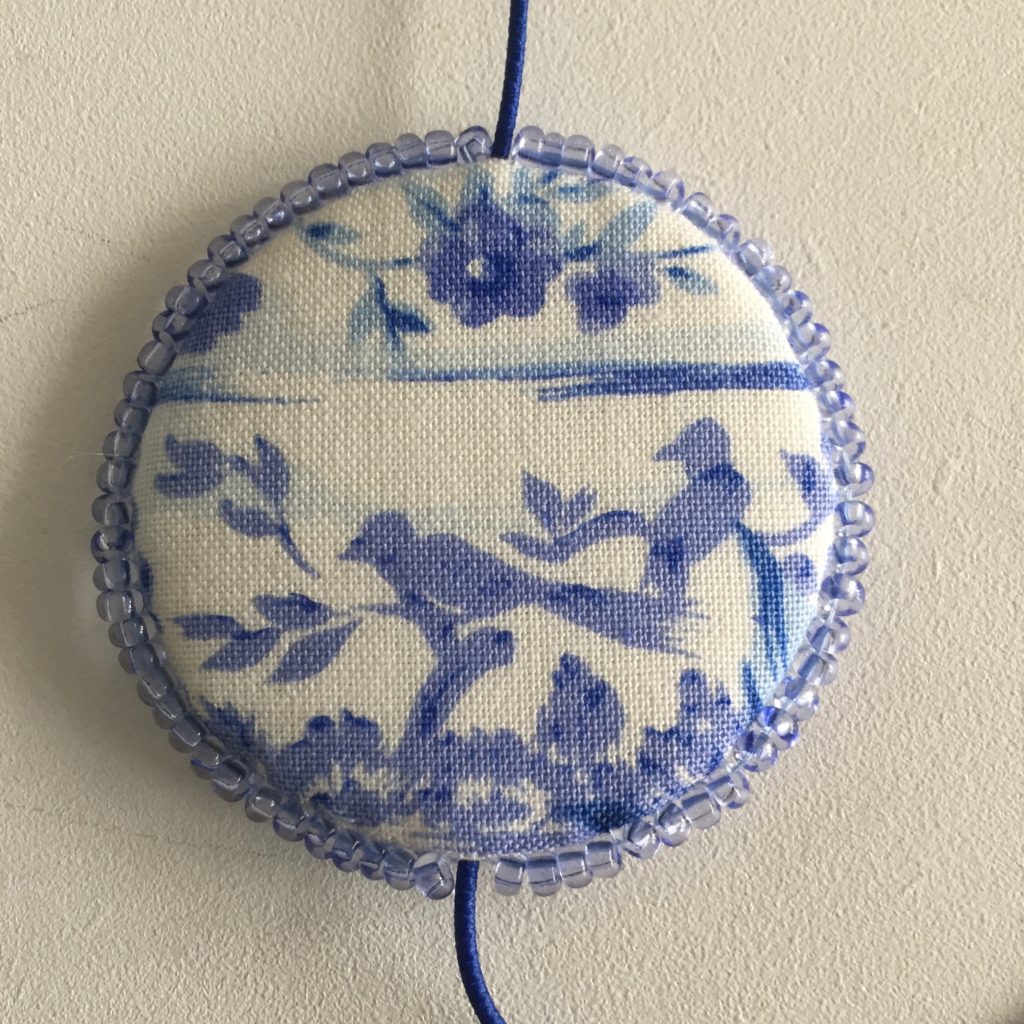
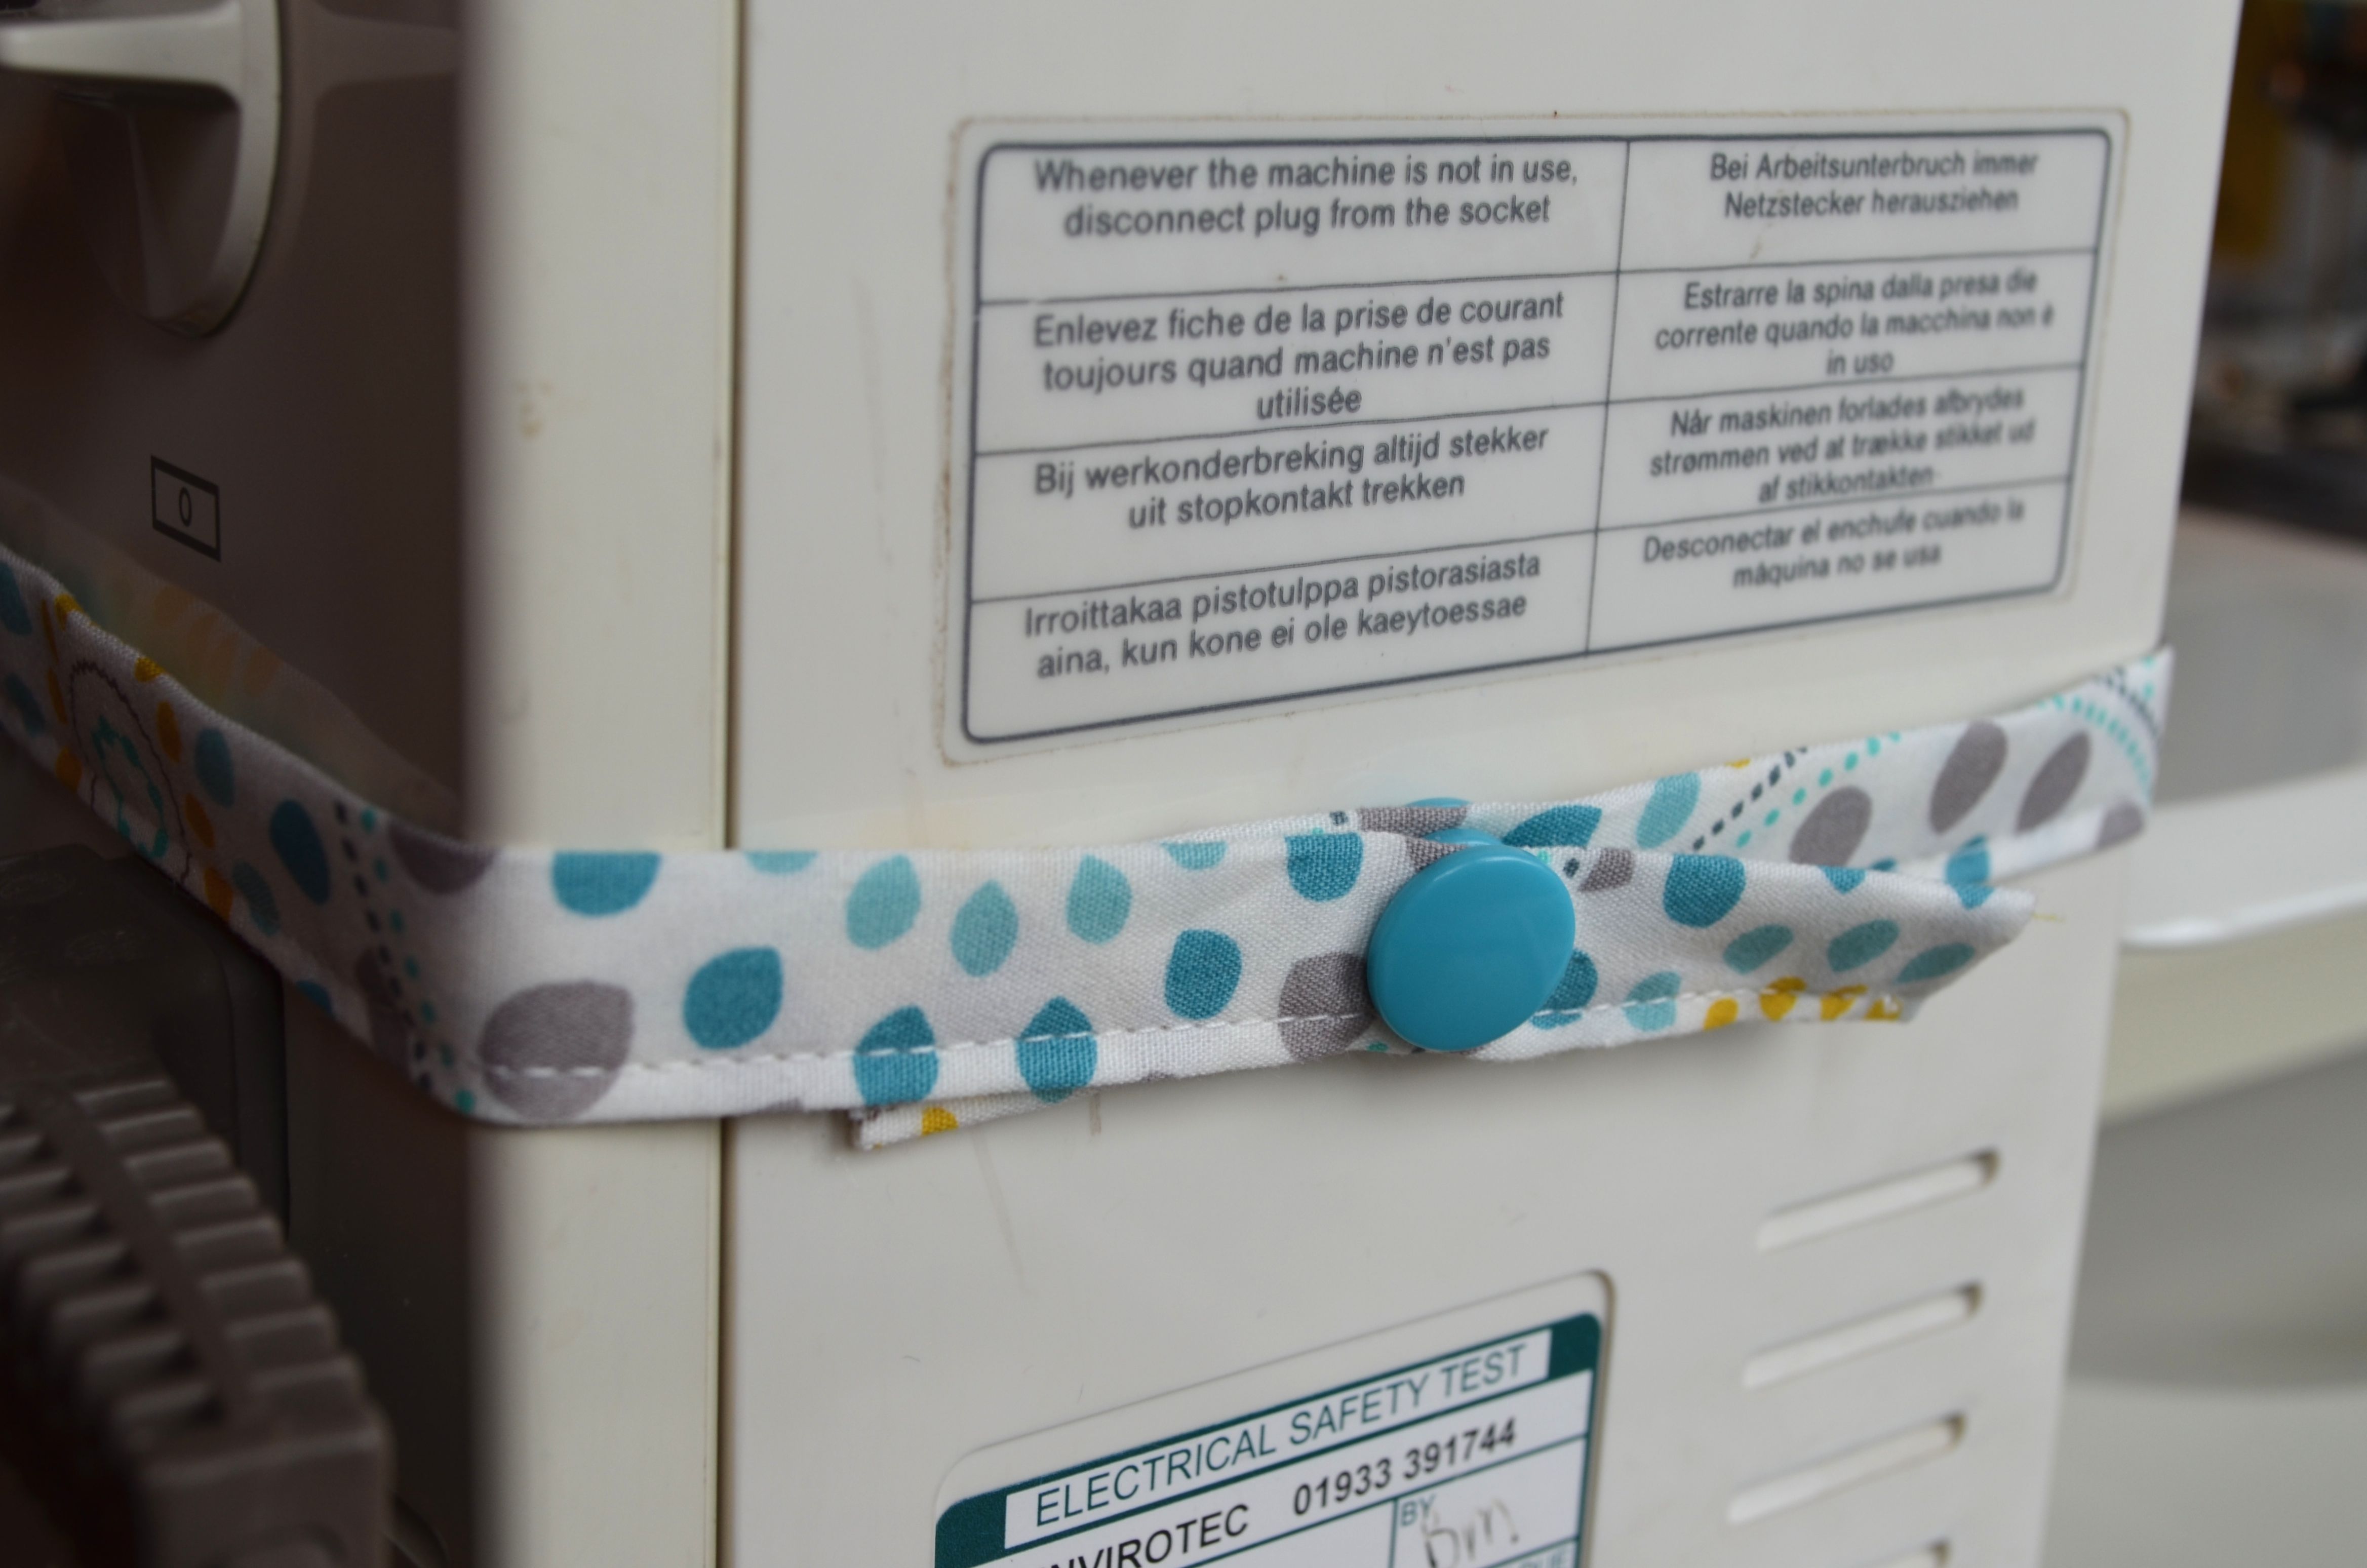
Last Sunday I went to the craft section of our local garden centre and when I saw some big self-cover buttons inspiration struck. So here’s my new and pretty portable pincushion:

The fabric is ‘Good Fortune’ by Kate Spain, which I absolutely love. The button makes sure that my pins don’t end up in my finger (yep, been there, done that).

Would you like to make one of these pincushions? Ok, here goes:

1. Find some big self-cover buttons. Mine are 38mm and cost £1.19 for two. You could, of course, also use smaller buttons for a cute little pincushion.

2. Find some scraps or use a charm from a charm pack. I used some Good Fortune by Kate Spain for both my pincushions.

3. Cut out a circle that’s 2cm bigger in diameter than indicated in the instructions. In my case the circle I cut out was 8,5cm rather than 6,5cm. The extra 2cm are needed to accommodate the stuffing.  If you’d like a bigger pincushion just make the circle a bit bigger again.

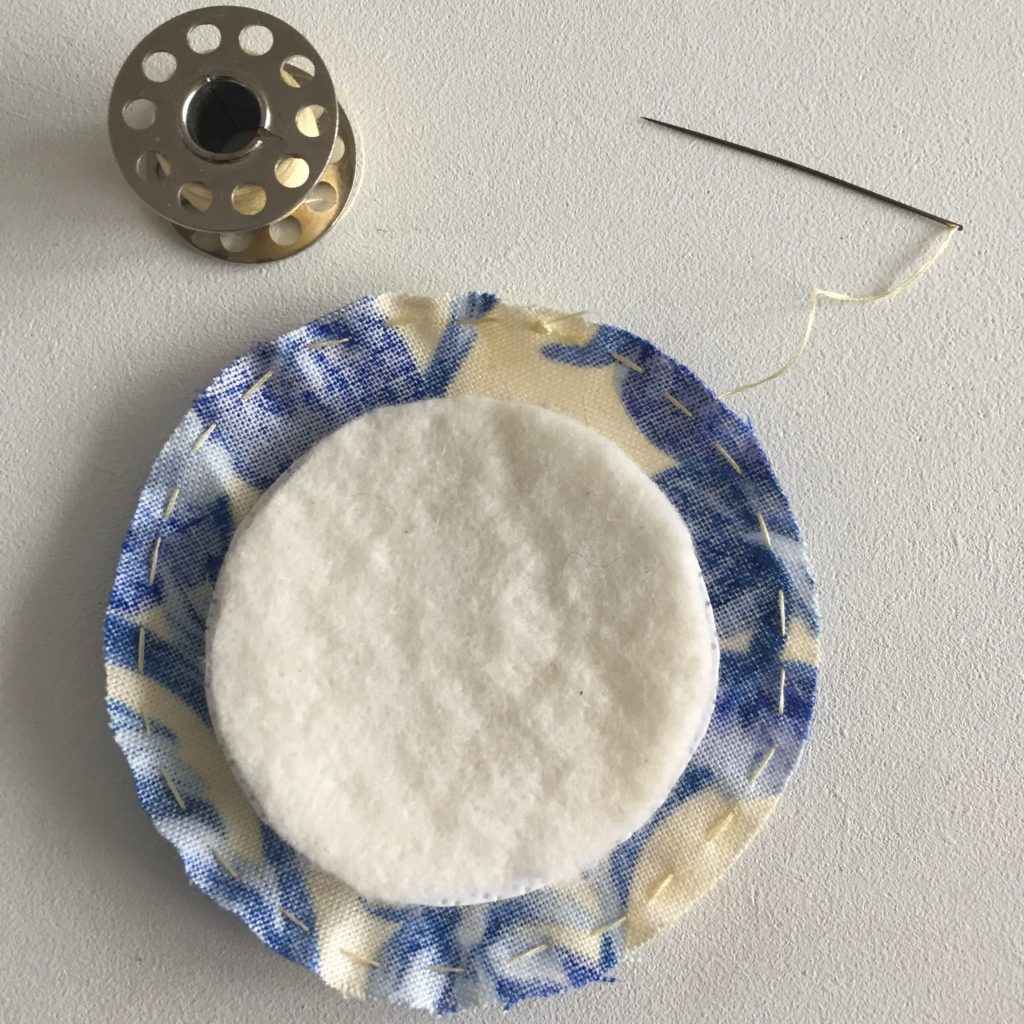
4. Gather your circle with small running stitches.

5. Take a small ball of stuffing and place in lightly gathered circle. I like to roll the stuffing in my hand so that I get quite a dense ball. Gather your circle and before the hole gets too small place your button inside.

6. Tighten the circle, checking that the gathers are fairly regular and fasten off your thread making sure that your stitches don’t come undone. If you are worried about your fabric fraying and your pincushion falling apart this is the time to put on some fray check or fray stoppa. Then put on the back of your button. It was a bit of a squeeze to get mine on so I didn’t worry about it coming undone again. If yours is a bit loose just add some hot glue.

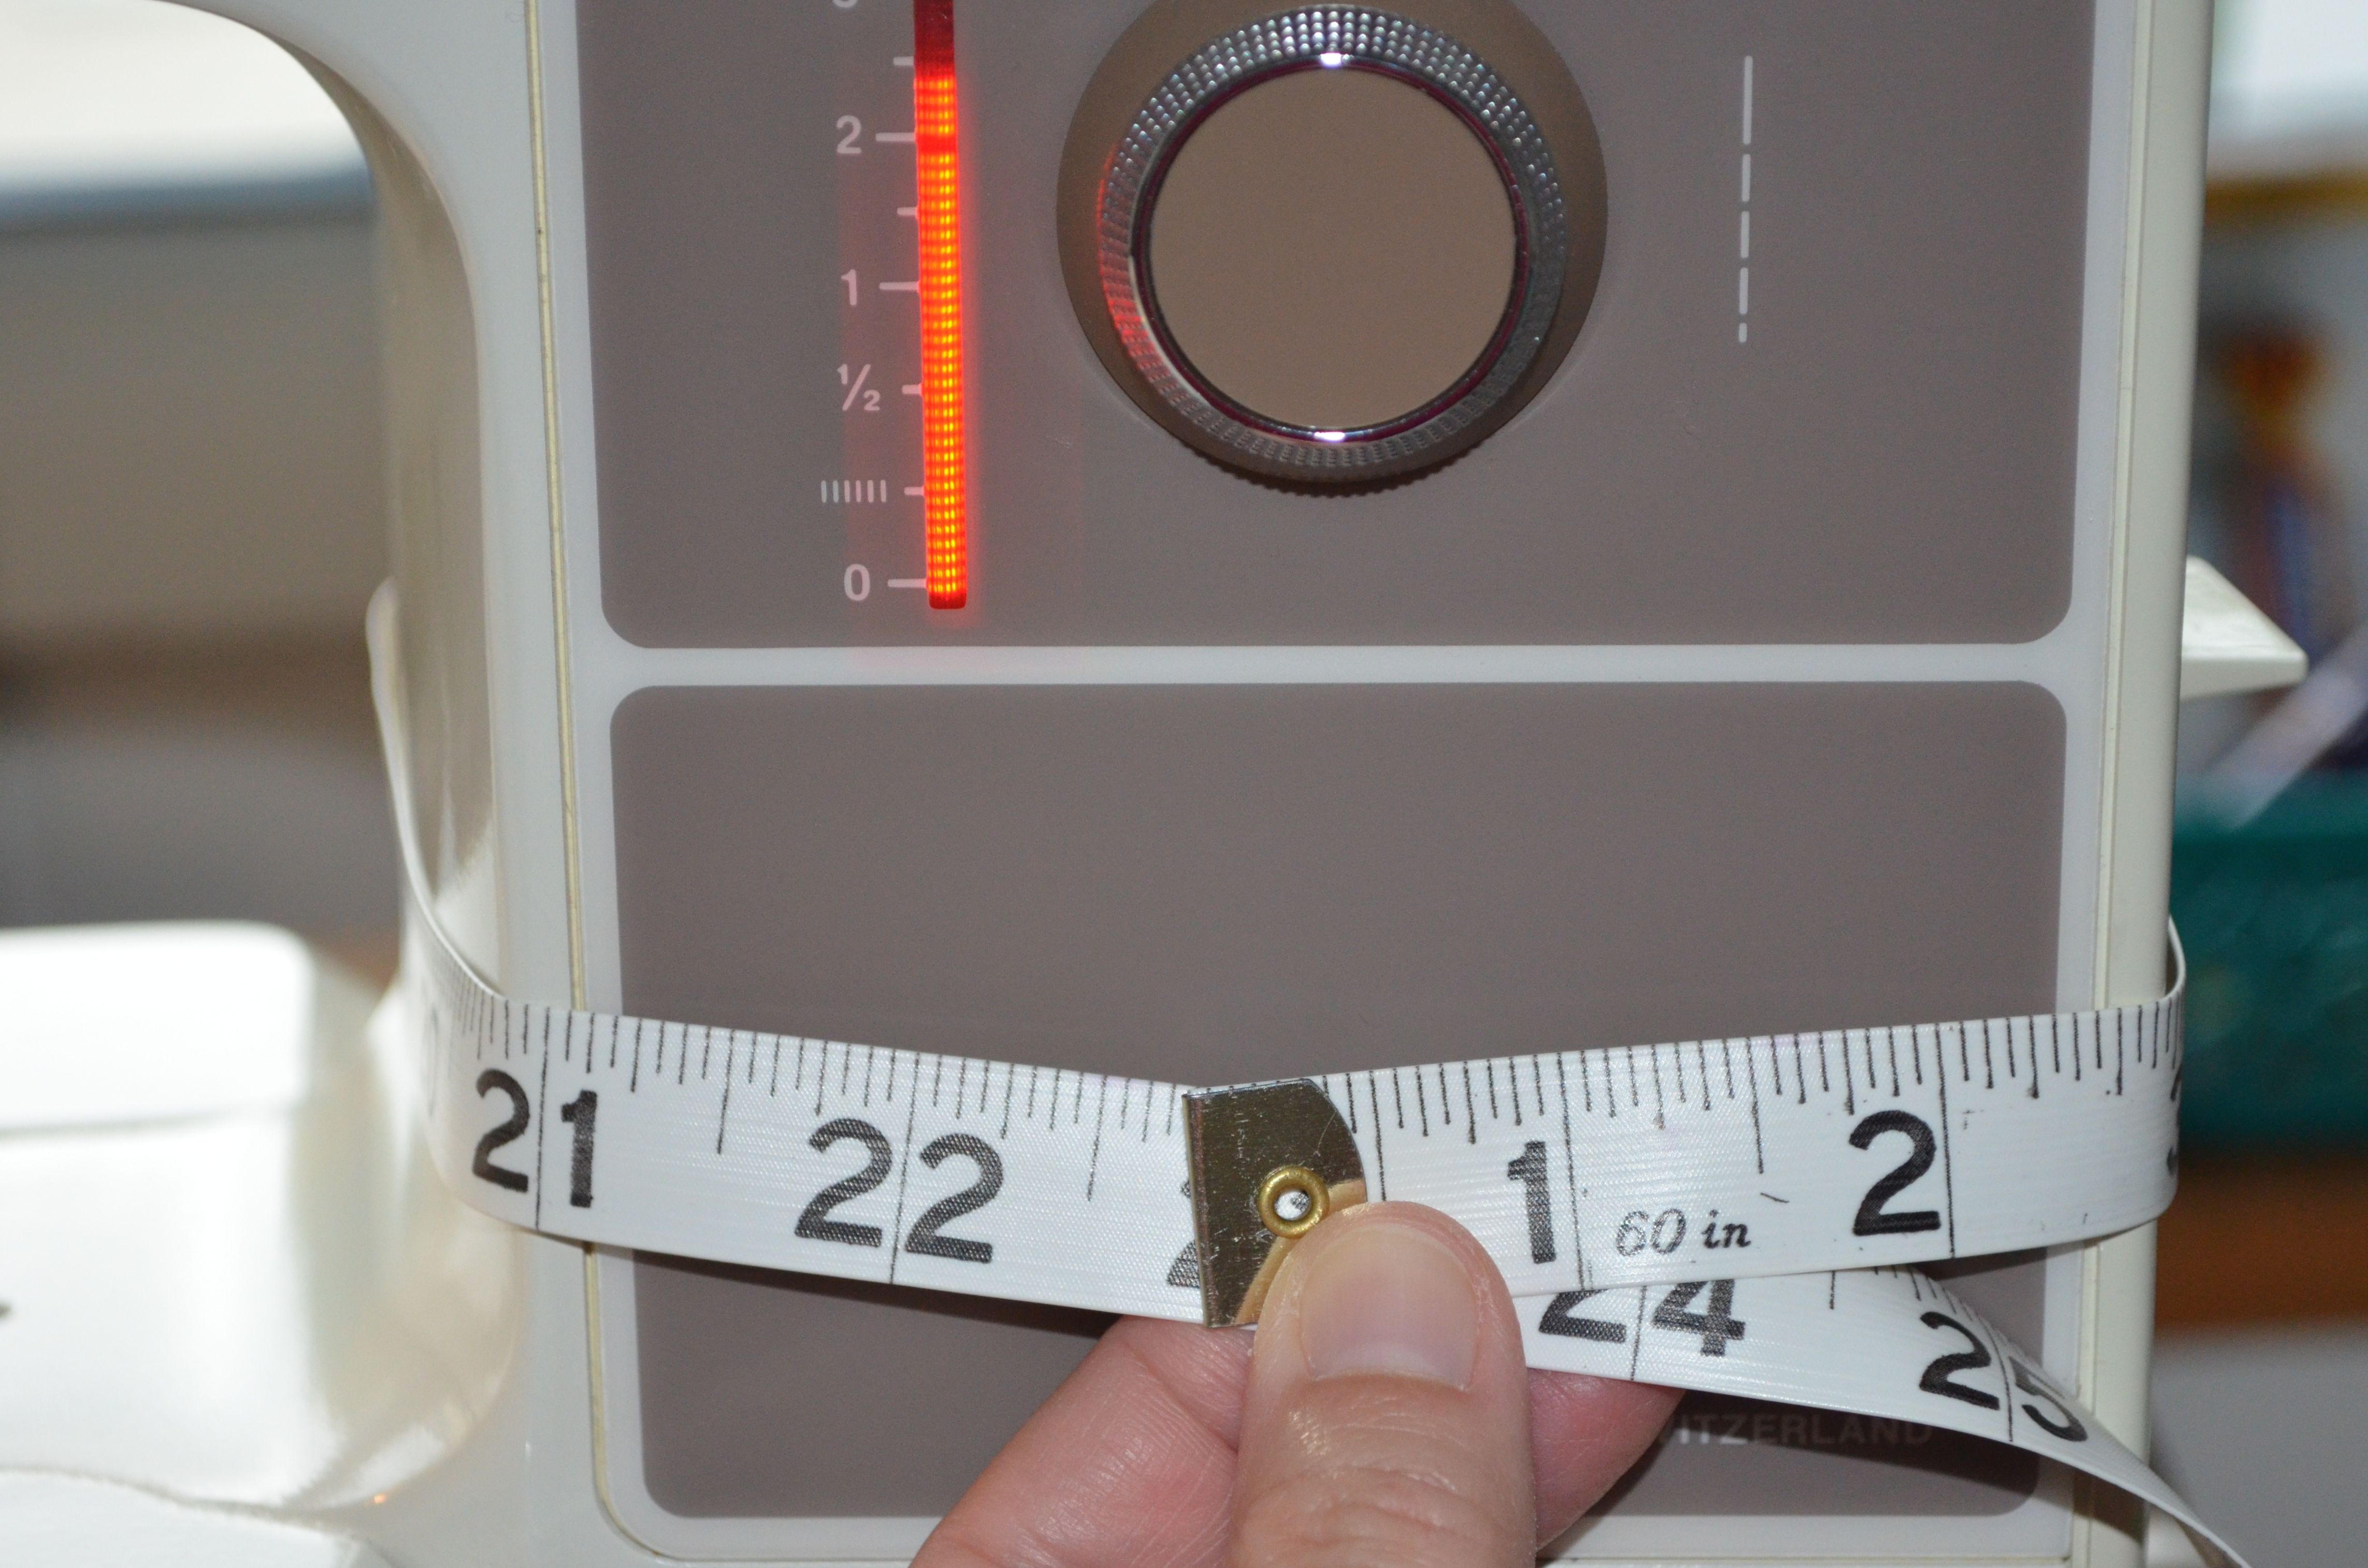
7. Now let’s make the ring. First measure your finger, in my case 6cm.

8. Add 2cm to this measurement and cut some elastic; mine was 1.3cm wide, which is really comfortable. Then cut out a strip of fabric which is one and half times the length of your finger measurement plus 2cm seam allowance and three times the width of your elastic. My strip of fabric ended up being 11cm x 4cm. If you’d like the ring to be more gathered just double your finger measurement but leave the width the same.

9. On the short sides fold in 1cm, then fold in 5mm on the long sides. I whip stitched the long sides together but you could also machine stitch the long sides (still folding in 1cm on each short side) to create a tube, which you will then have to turn inside out. I just find it easier to do this step by hand.

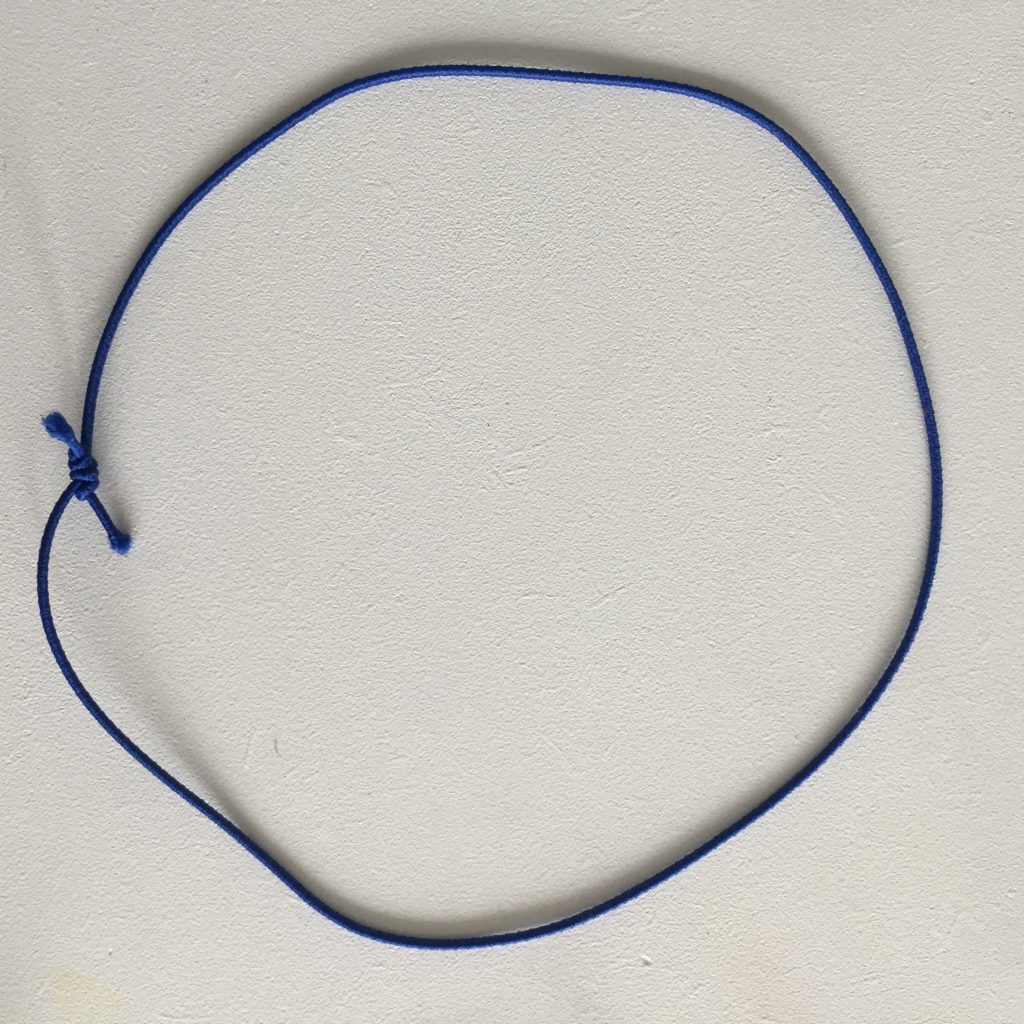
10. Once you’ve whip stitched the long side together, lay the tube down so that the seam is in the middle. Take your elastic and thread through with a safety pin, gathering the fabric.

11. Now take your elastic, overlap by 1cm and sew together.

12. Pull your fabric tube over the elastic to enclose it completely and sew together with a ladder stitch.

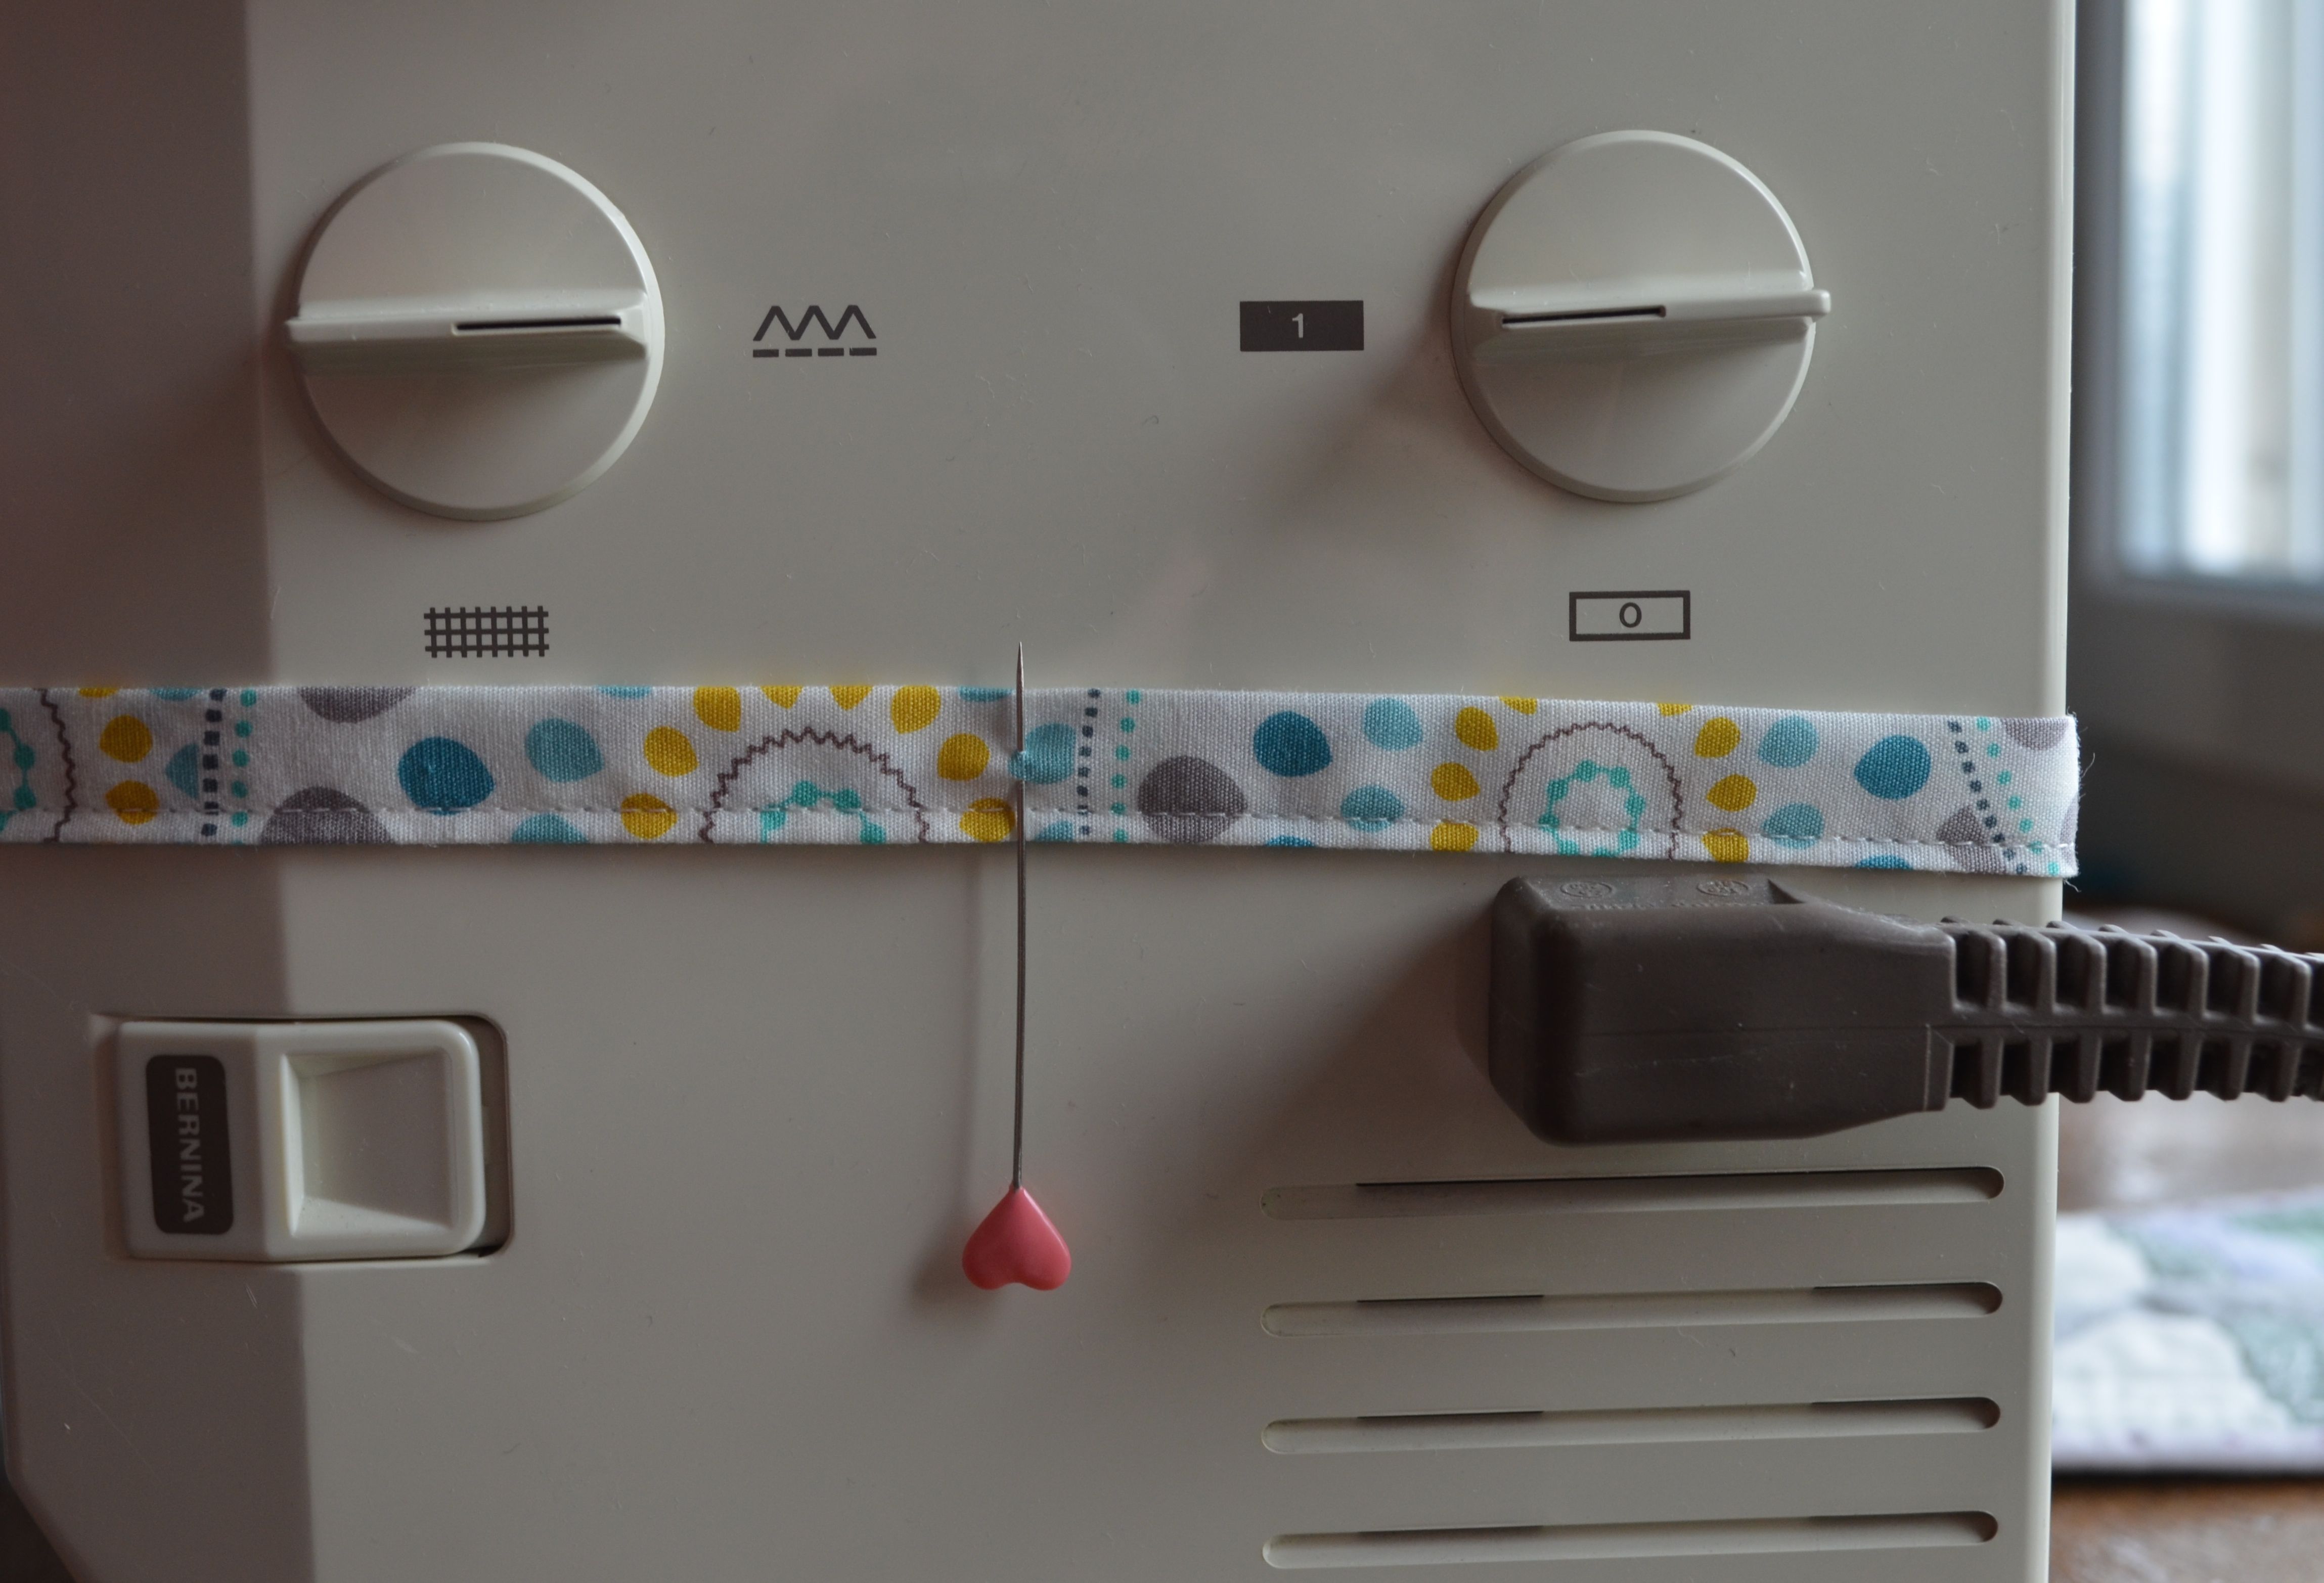
13. Ok, almost done. Now take your lovely button and sew it onto your ring making sure the seam of the ring is on the inside. I have found that it helps stabilise the button if you go all the way through the elastic to the other side when you sew on the button.

14. Enjoy your pretty and portable pincushion!


Please let me know if you have any questions or queries about this tutorial and I’ll do my best to clarify my instructions.


Ribbon Flower Hair Clips

Today I made some hair clips and ties in preparation for my next stall at the end of March. As the mother of a little girl who believes that blue, green, brown, yellow, white, etc are all colours for boys and only pink and purple are for girls I went for pink and red for my trial run. Just in case they don’t sell and stay with us. The plan is to take them with me to various outings and ask the mums if they would buy them if I made loads and made them in various colours (after all, not every girl is like Little Miss Bossy-Boots).

Hair clips with ribbon flowers:

All you need for them is some ribbon, buttons, two hair clips, a needle and thread and a hot glue gun. Don’t worry if you haven’t got a hot glue gun, you can sew your little flowers onto the hair clips too.

Continue reading Ribbon Flower Hair Clips