BOM 2019: January

Hello! I’m really excited to start the Block of the Month 2019 with templates for not one but two tiles. My thinking behind this is that first of all people are usually most enthusiastic about a project at the beginning of it and secondly you then have the whole of December to finish off the quilt.

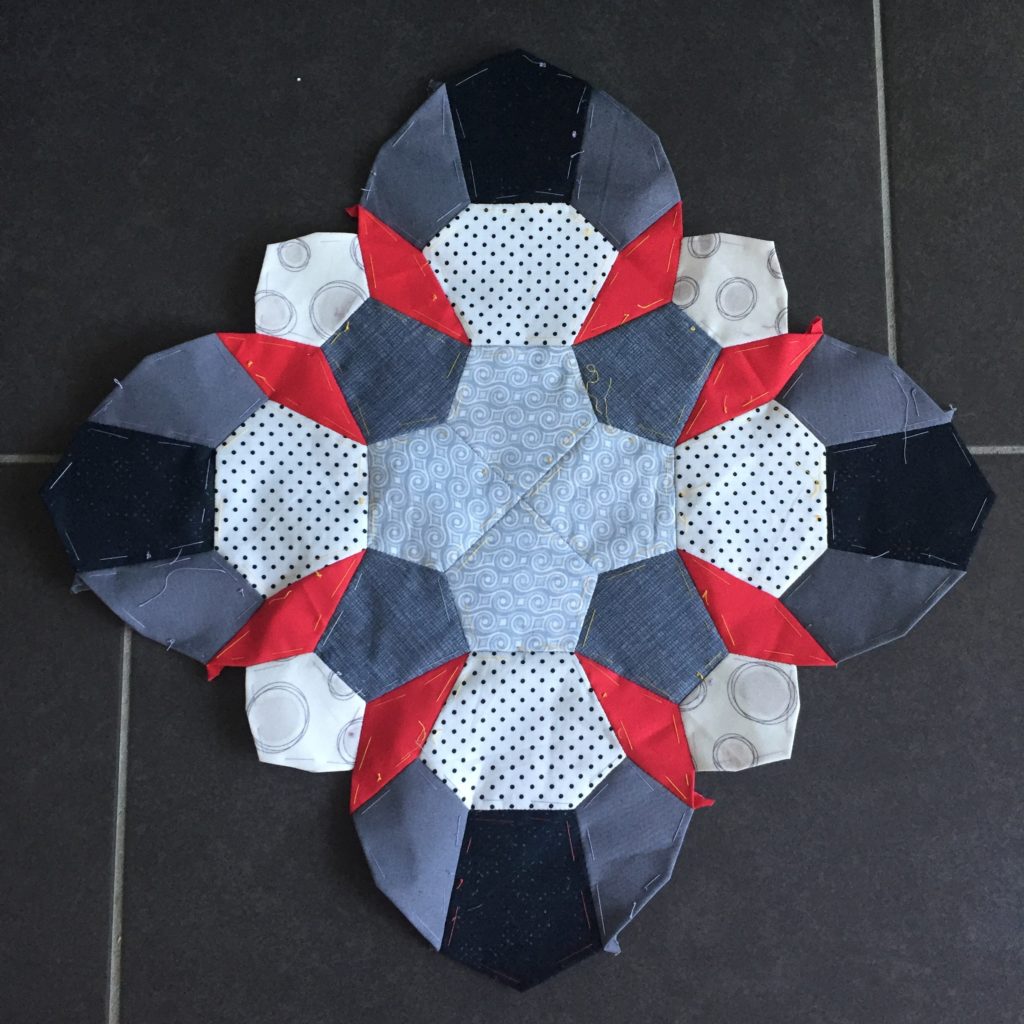
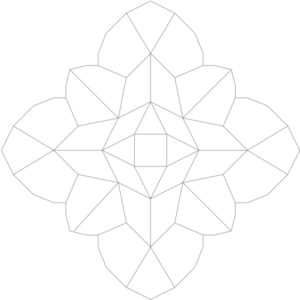
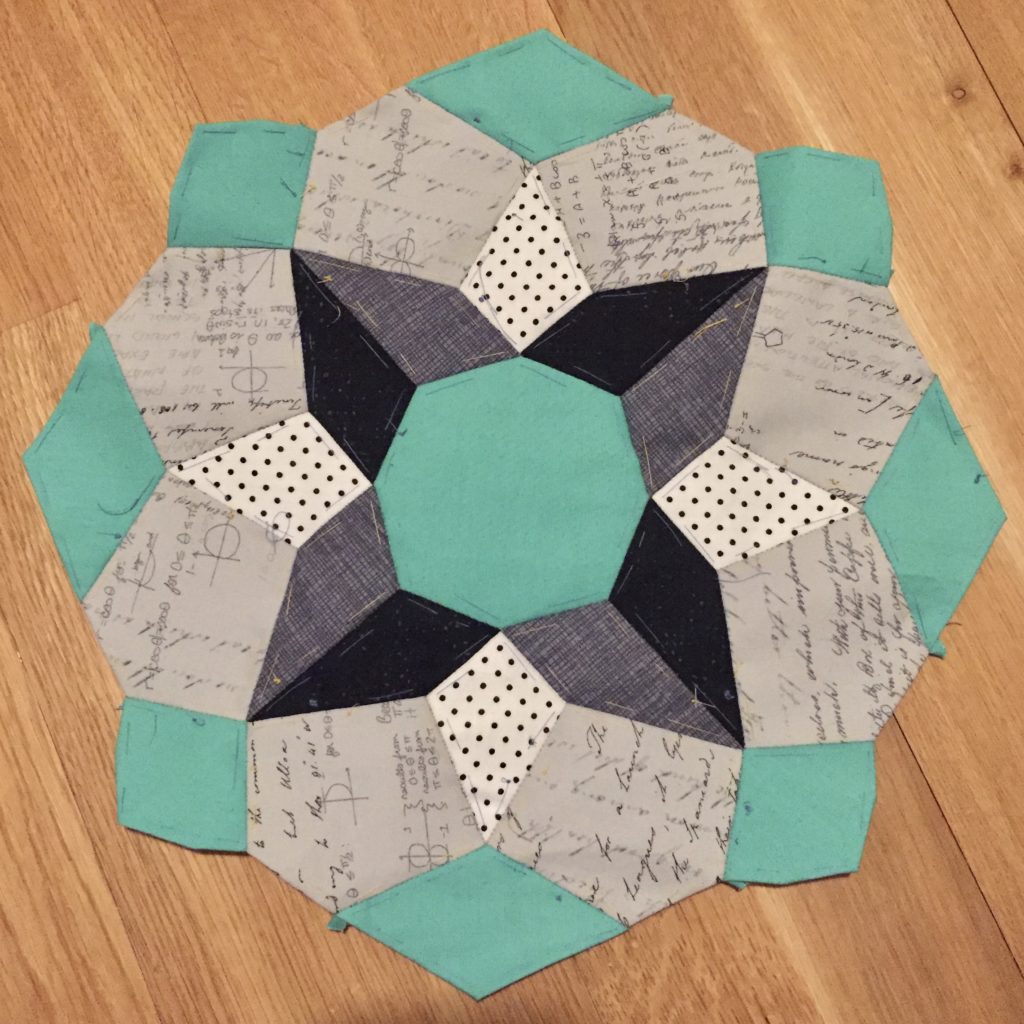
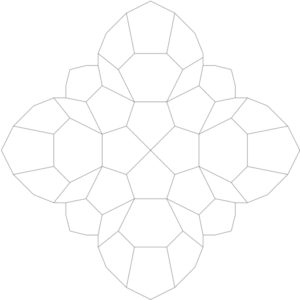
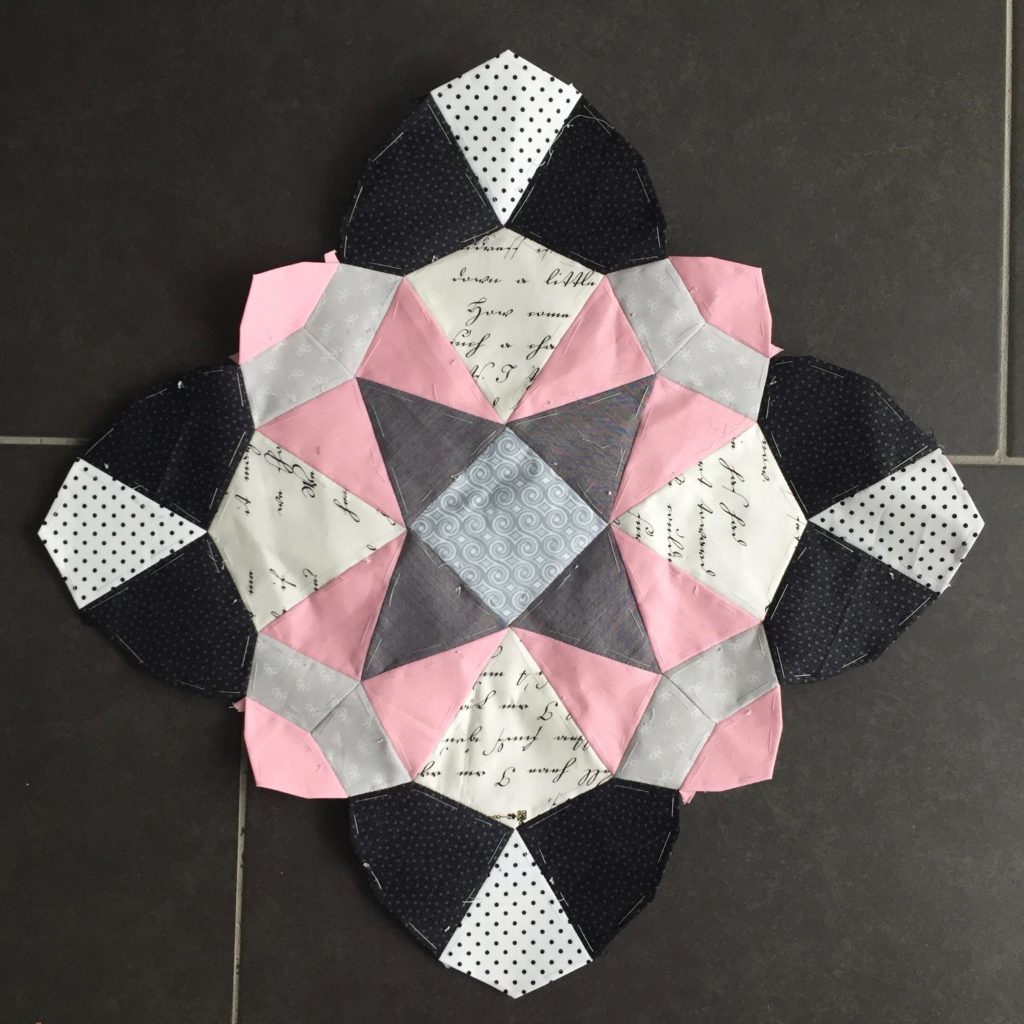
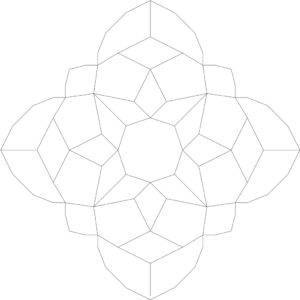
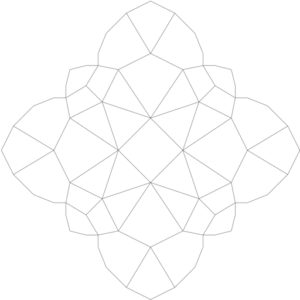
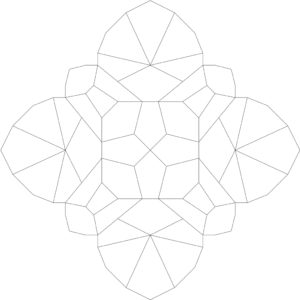
First up are these two tiles:

To download the templates for the first two blocks click on the links below.

Template 1a, Template 1b

Template 2aTemplate 2bTemplate 2c

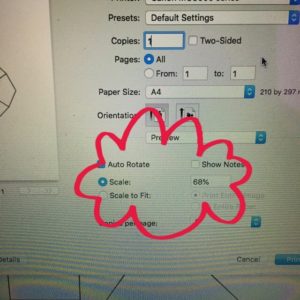
You need to print out each template four times. However, for tile 2 you can then discard three of the centre pieces as you only need one. When you’re printing, make sure your printer is set to 100% rather than ‘fit to page’ or any other setting as the tiles otherwise may end up different sizes.

If you’d like to print out the whole tile so you can colour it in and try different options you can click on the links below.

Tile 1

Tile 2

I’ve printed out my templates and can’t wait to start. I’m still dithering about fabrics and colours, though, which makes it rather difficult. I love scrappy, colourful quilts and I’ve already done a few so I’m wondering if this time I should go for a more uniform look. One of my ideas is to go for a black, white and grey theme, maybe with some colour thrown in for the background.

If you’re joining in and are on social media, could you please add the hashtag #sharksdinnerbom2019 to your pictures? It’ll make it easier for me to find your pictures and enjoy your progress. Thank you!

If you need any tips and tricks for EPP, check out my next blog post. The templates for the next tile will be uploaded on February 1st 2019. Get sewing!

BOM 2019

I love EPP (English Paper Piecing) and have lots of WIP (works in progress) so what in the name of the quilting gods has made me think it’s a good idea to start another quilt? I have no idea but I’ve designed a quilt based on my ‘Three’ quilt which Missy has claimed:

I’ve designed twelve tiles which include the three first one. I’m thinking of actually doing this one as a sort of quilt-as-you-go. I find it tedious to quilt a big quilt on my domestic machine so doing twelve quilted squares which I then sew together sounds like a really great idea right now.

The templates for the tiles will be posted on here every first of every month, so if you’d like to sew with me I’d love to see your version of this quilt.


Holiday

I’m lucky enough to go on holiday soon to enjoy a bit of warmth and sunshine before the cold winter arrives for good. This means, of course, that I need something nice to wear.

I bought this remnant a while ago to make Little Miss Bossy-Boots some pyjama bottoms. However, I think I liked it more than she did so I decided to make a quick holiday dress to go to the beach in. I based it on the Mandy Boat Tee, a free pattern by Tessuti Fabrics. It’s really wide and very comfortable.

I really wanted to make another one and when I spotted a quirky fabric with dogs on in the remnant bin (yes, that’s right) and there was enough for another dress I had to have it.

I only realised when I got home that the fabric wasn’t the same width as the flowery one, so I got out some paper and started adapting the pattern to make it fit. I think I love this one even more than the other one but I’ll see what they’re like once I wear them.

For this one I used different coloured threads for the seams as I’d run out of black thread and I’m in love with this little detail.

I saw another fun jersey with cute cats on. Just saying…

Doughnuts

Do you like doughnuts? I do, although since I’ve started reducing sugar in my diet the last couple of years I haven’t had many. However, I don’t really mean the edible kind but rather the quilty one. I’ve started sewing a new quilt which I call the positive doughnut (#SDpositivedoughnutquilt on Instagram).

This block is, I believe, called the Greek Cross, but to me it looks a bit like a doughnut. The difference is that the hole in the middle looks like a plus sign. I’m using blue and low volume fabrics from my stash.  Sometimes I’m not sure whether I have enough of one fabric for a whole doughnut or the background of one quilt so to help me with that problem I’ve cut the pieces from paper which I can lay on the fabric to check.
I’m enjoying these blocks tremendously as they are big (12.5″ unfinished) and easy. There are no corners and no points that need to match and no bulky seams. In fact, I believe this is the perfect block for a beginner or a quilting bee.

Since taking this picture I’ve made another three blocks which means I’m halfway there.

I’m thinking of writing a tutorial for this block but that won’t be tomorrow as I’m off to IKEA to buy some more of the numbers fabric for the back. TTFN!


Let’s Try This One More Time

This poor blog has been sorely neglected for quite a while now. When I started it I was living in England and wanted a way to show my family what I was up to. Now that I’m in Switzerland and living close to my family I seem to forget about blogging. Add to this the fact that I love Instagram (@lemonshark) and am very active over there and it’s a bit of lose – lose situation for my poor little blog. I’m going to give it one more shot and see if I can get back to making this little space my happy place.

I have been busy sewing even though I haven’t been blogging and am back to working on my Spring Carnival quilt. This quilt was started after the first Fat Quarterly Retreat in 2012 and is still not finished.

I ran out of the stripy fabric and for ages couldn’t find anything I could replace it with to make the quilt bigger (it’s about lap size at the moment). Hence, it’s been lurking in a box under the bed for at least two years. However, not long ago I found the perfect fabric to add: Michael Miller’s Dumb Dot in white and dark grey. I’ve already sewn a few wheels and love the change from stripes to dots.

I’ve happily been working on this quilt in the evenings and have added lots more wheels since I took this picture. After five years of working on it it’s really time to finish it, don’t you think?

Thread Catchers

Last week I attempted to make a little thread catcher but as I wasn’t concentrating it didn’t turn out great. I normally cut the lining a little smaller than the outer to make sure it doesn’t end up baggy. You’ve guessed it, I didn’t do it this time and ended up with a  baggy lining I couldn’t live with.

Thread Catcher

As I was looking at it and complaining Little Miss Bossy-Boots arrived and looked at it. When she realised that I wasn’t happy with it she asked if she could have it. Of course she could.

Panda


Missy turned the thread catcher into a hat for Panda and I think he looks absolutely fetching!

I didn’t give up, however, and made another, even smaller, thread catcher. It’s a little 2″ cube. This time, however, I used a completely different technique: EPP and iron on pelmet. I’m very happy with this one which is going to a  new home this week.

Thread Catcher

I added a magnetic needle minder and a little pin cushion just for fun. The fabrics I used are some of my all-time favourites: some Oakshott, some Lu Summers and some Liberty Lifestyle Bloomsbury Collection. I used Aurifil to sew it together and loved every second making it.

I’m already making another one…. With polka dots….


Magical Diamonds

I like having an EPP (English Paper Piecing) project on the go at all times and I am constantly designing new ones in TouchDraw on my iPad. This summer I went off to Norway and decided to start ‘The Big One’, a quilt for me which Little Miss Bossy-Boots has named ‘Magical Diamonds’. It’s going to fit my queen size bed and I’m using some of my all time favourite fabrics, Denyse Schmydt’s Florence and Oakshott shot cottons in blues and greens.

Magical Diamonds

I wasn’t sure at first how to place the fabrics but then decided to use the Oakshotts as a sort of frame for the prints. I was so excited about this project that I started before travelling and ended up with two very quickly. Each segment is 10″ x 14″, so they’re quite big.

Once I arrived in our cabin in Norway I set up my little work station outside. I was blessed with the most wonderful weather.

img_6765

I continued sewing a little every day if I wasn’t reading or cycling to the shops or the beach.

img_6789-1

This is what they are going to look like: 48 of those segments sewn together like this. I’m still thinking about colour placement but as I have a few more – 41 to be exact- to do, I have some time to think about it.

img_6764

This, by the way, was my view while sewing. I have to admit that I was distracted every now and again. Especially when big boats were passing.

It was a most wonderful and relaxing holiday. I managed to sew five segments which was less than I had hoped for but I also read four books and cycled quite a few kilometres. Bliss!


Oakshott Lipari Blog Hop

Hello! Today is my day on the Oakshott Liparis Blog Hop organised by Lynne from Lily’s Quilts. I feel very flattered that I was chosen to be part of this and would like to thank both Lynne and Michael from Oakshott for letting me play with these beautiful fabrics.

Lipari2016_range_ruched1

The Oakshott Liparis are absolutely gorgeous and can’t truly be described, they have to be seen. Each of the eighteen colours are woven with black thread to give a dark and rich palette. They are 54″ wide so go a lot further than regular quilting cottons which is great as you get quite a lot of fabric in a Fat Eighth bundle. Find out more about the inspiration for this collection here.

The minute I realised that I was going to be part of the blog hop I sat down and designed a quilt.

Persimon QuiltObviously there was no chance of making it with a Fat Eighth bundle so I thought I’d just miniaturise it and make a mini quilt. However, when the fabrics arrived and I started playing with them, I came back to the same colour combination again and again, blue, green and orange, red. I then found it difficult to cut the beautiful Liparis into small strips so decided to keep all the stripes at the same width and make the wallhanging quite big. Because it ended up as a wallhanging, not a quilt as planned it has a backing, some lush Lipari Marina, but no batting and no quilting. I was worried that the batting and quilting would make the wallhanging too rigid and that it then wouldn’t shimmer in the light as much.

This is what I ended up with:

Persimon Quilt 'Heaven and Earth'

The stylised ‘persimon’ are English paper pieced and then appliquéd onto the quilt.

Persimon Quilt 'Heaven and Earth'

This quilt/wallhanging is quite striking but easy to make. I will give you the measurements I used but it would be easy to resize from small to large.

You will need

8 Fat Eighths of Oakshott Lipari for the background, I used Stromboli, Lisca, Dattilo, Lentia, Porticello, Salina, Scari, Volcano Bleu

3 Fat Eighths of Oakshott for the ‘persimon’, I used Milazzo, Basiluzzo and Pollara

1 m of backing fabric, I used Marina

Persimon Templates

Thread for basting and sewing, I use cheap thread for basting and Aurifil for sewing and appliqué.

  1. Cut a 5.5″strip from each of your background fabrics and sew together. I went from deep red to blue to get my heaven and earth feel.
  2. Cut out the templates for the three ‘persimon’, you will need twelve of each shape
  3. Pin the templates onto your chosen fabric, cut out with a 0.25″ seam allowance and thread baste onto the paper template. P1020327
  4. Sew the small triangular shapes onto the big wedge shape, then sew the wedge shapes together to get a ‘persimon’. Pollara Persimon
  5. Lay the ‘persimon’ onto your background and pin into place. I ironed a line into the background about 8.5″ from the edge and centred my ‘persimon’ on it. Pin into place leaving the papers in.
  6. Appliqué the ‘persimon’ onto the background with small stitches starting with the inside. Once they are sewn on it’s easy to take the papers out of the small and big shape before pinning the outside down again and sewing around.
  7. Trim your top to get nice clean edges. Mine ended up at 25.5″ x 40.5″.
  8. Lay out your backing fabric and lay your top face down onto it. sew around with a 0.25″ seam allowance leaving an 8″ gap so you can turn it inside out. Press well and close the gap with a ladder stitch.
  9. To hang, I sewed a bamboo stick onto the backing.

You could of course also quilt and bind it the traditional way.

Persimon Quilt Heaven and Earth

The Oakshotts look different in different lights, they are absolutely fascinating. I’ve hung my  ‘Heaven and Earth’ wallhanging over my bed and I love how goes from very dark to shimmering like a jewel depending on the time of day.

Persimon Quilt Heaven and Earth

I’ve absolutely loved working with the Oakshott Liparis!

5 May     Allison Dutton       allison-sews.blogspot.com
10 May   Nicholas Ball         quiltsfromtheattic.wordpress.com 
12 May   Helen Purvis          archiethewonderdog.blogspot.com
17 May   Lynn Harris            thelittleredhen.typepad.com
19 May   Kitty Wilkin           nightquilter.com (Now moved to 2nd June)
24 May   Jessica Skultety      www.quiltyhabit.com 
26 May   Karin Jordan           www.leighlaurelstudios.com
31 May   Elisabeth Vaughan  sharksdinner.ch

Dancing Squares

English Paper Piecing (EPP) is my biggest love although I love sitting at my sewing machine too. Dancing Squares is a really easy pattern which I came up with because I wanted something simple that I could sew while watching tv as there are only two shapes.

I started off with the low volume octagons before filling in the squares. I thought I would use my Oakshott Rubies for the squares but as I was stitching I thought it would be fun with a rainbow of colours too. In the end I wasn’t sure which to use and asked people’s opinion on Instagram. Funnily enough the rainbow and the rubies got exactly the same amount of votes so I went for my first choice, the Oakshott Rubies.

Dancing Squares

I decided to only use the red and pink Oakshotts. In the end this little piece ended up at about 13″ x 13″ and I’m not sure what to do with it. Cushion cover? Mini quilt? Continue and turn it into a lap quilt? That could take a while.

Dancing Squares

For now, I’ll just gaze at it adoringly from time to time.

Would you like to make your own Dancing Squares mini/cushion?  Click on this link for the pdf in three different sizes:

Dancing Squares Original

Dancing Squares Bigger

Dancing Squares Biggest

Oakshott Lipari Blog Hop

Yesterday was the start of the Oakshott Lipari blog hop that has been organised by Lynne from Lily’s Quilts. I feel truly honoured to be part of this blog hop as I love Oakshott fabrics and have quite a few in my stash. You’ll see what I’m making with my gorgeous bundle at the end of the month as Swiss customs decided they liked the Liparis so much they held onto them for 10 whole days! I was actually supposed to start the blog hop on the 3rd but as I didn’t get my fabric until the 5th that wasn’t possible.

You might be wondering why I didn’t tell you about the blog hop earlier but I have been really ill with a bad cough and a fever. I would like to ask you to go and check out Allison’s beautiful dress which she made with her bundle of Liparis and some yardage. I love it so much I want to make something similar.

Lipari2016_range_ruched1

I mean, just look at those gorgeous colours! They are even more beautiful in real life.

Right, here’s the schedule for the rest of the blog hop:

5 May     Allison Dutton       allison-sews.blogspot.com
10 May   Nicholas Ball         quiltsfromtheattic.wordpress.com 
12 May   Helen Purvis          archiethewonderdog.blogspot.com
17 May   Lynn Harris            thelittleredhen.typepad.com
19 May   Kitty Wilkin             nightquilter.com
24 May   Jessica Skultety      www.quiltyhabit.com 
26 May   Karin Jordan           www.leighlaurelstudios.com
31 May   Elisabeth Vaughan  sharksdinner.ch

So much talent. I’m really looking forward to seeing what the others are making with their little bundles.