March Row

Hello, hello

Ready for the March row? I’m not. I’ve started a new job and am continuing in my old on this month so my days are full and I have hardly any sewing time. Hopefully I’ll be able to finish the February blocks this week as I’m excited to start on this new row.

Right, here are the templates:

March 1

March 2

March 3

I really hope you’re enjoying this quilt as much as I am. This is a picture of my January row. I’d love to show you my progress but as that is minimal at the moment I’ll wait till next time.


Please let me know if you have any problems downloading the templates. I’ve been asked whether I would consider sending the templates by email. Of course I would. So if you’d like to receive the templates directly in your inbox, send me an email or add a comment to this post and I’ll put you on the list.

Happy sewing!

February Row

Goodness, time flies when you’re having fun. And it goes even faster when you’re organising a BOM and are way behind on your sewing. So much has been happening this last month and sewing has therefore not really been a priority. My gorgeous cat Flynn has been poorly and ended up at the vet’s twice. He’s not eating and for a cat who’s normally a walking stomach that’s really bad. He’ll eat anything and everything, even salad, so to see him turn away from food is disconcerting. He’s only two years old and should be stuffing himself with all the food, play and sleep but at the moment all he does is sleep and feel sorry for himself.

Secondly, I’ve found a new job. I’m moving away from sales and going into an office job. It’s scary and exciting all at the same time. I haven’t worked on the computer for quite a while so it’ll be interesting to see how long it takes me to get back on the ‘horse’. Going from a fabric shop into an engineering firm is quite the move. As I’ll be commuting to Berne I will have more time to EPP which will be fun and will hopefully help me get this BOM sewn.

Right, let’s get to it. Here are the links for the February Row:

February 1

February 2

February 3

As always: please let me know if there are any problems with downloading the templates and I’ll do my best to solve the problem.

Olive is the best little nurse. She’s doing her best to look after Flynn, cleaning him and checking on him every now and again. Although she’s also happy to steal his food and oust him from her favourite places…

Happy sewing!


On the Edge

How do you make sure your English paper pieced quilt has a nice edge that’s easy to trim and bind?

I used to get folded over bits of fabric and little holes but after a while I found an easy way to get a nice straight 1/4″ edge. I simply add a 1/4″ to the template and cut it out. I always cut the seam allowance at a 90º angle.


When I wrap the fabric around the papers I leave that edge unwrapped and trim the fabric flush with the paper.

Then I sew the pieces together with my usual whipstitch and end up with a wonderfully flat edge that is easy to bind without losing any of my points.

I hope that helps.

Happy sewing!


January Row

Happy New Year! I hope you’ve had a great start to the new year.

Let’s start this block of the month. I’m incredibly excited to get back to English paper piecing. I’ve been neglecting it as I’ve been focussed on the granny square blanket and a cardigan I’m crocheting. I’ve also done a lot of bag and pouch sewing but almost no patchwork or quilting.

Right, here we go:

January 1

January 2

January 3

You need to print out January 1 and January 3 once and January 2 as often as you need to get the width that you’d like. I’m going to print it out eight times which results in a quilt that is 60″ wide. The quilt consists of twelve rows and will end up being 72″ long. You can, of course, make the quilt smaller by making less rows. I might add some squaring up lines to the templates after a few rows.

As you’re printing, make sure you don’t scale the printout. Keep it at 100% and check the little square is 1″x1″.

I can’t wait to start this project and see what you guys make of it. Happy sewing!

Block of the Month 2024

It’s been a while but I’m excited to be back in this little corner of the internet to announce that I’m hosting a free Block of the Month next year. I’ve already talked about it on Instagram but let me tell you all about it here, too.

First, it’s not really a block but a row we’re sewing every month. Here’s the chart of the finished quilt:


I realise that it’s not easy to see the quilt properly in this little picture so the link for the chart is here: Chart BOM24

The chart will help you decide whether you want to join in and also make it easier for you if you’re a planner. I’m going to wing it (and probably be envious of everyone who’s planned their quilt in advance) and stick to my technique of choosing my fabrics as I’m sewing.

Every month you get three ‘blocks’ one centre block and two end blocks that square up the quilt.

The width of your quilt depends on how many centre blocks you make. Ten blocks in total give you a quilt that’s 60″ wide. You can of course make it smaller but the length, if you stick with all twelve rows is 72″. If you would like to make your quilt bigger, I can add more rows, but at the moment there are only twelve. Here’s the link to download the rows in the picture above: Chart Pieces BOM24

Every first of the month the blocks will be ready to download here on the blog. If you would like to join in and see what others are making you can check out the hashtag #sharksdinnerbom24 on Instagram. This is where I’ll be posting my progress.

And because you should always end every blog post with a cute picture, here’s one of Olive Nomura Shoulderhopper.


Happy sewing! Elisabeth

Bright Pink and Orange

I love bright colours and picked bright orange and pink when I started my latest project. It was slow going. More because I didn’t take the time to work on it, than because it was complicated or that I wasn’t sure about it. I loved it from the start and never got to that ‘meh-stage’ that I usually get somewhere in the middle of a project. All in all it took me more than a year.
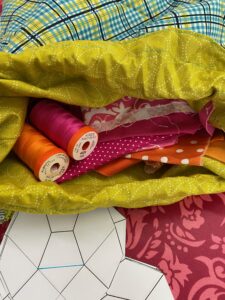
This project bag has been a blessing as my project was always ready to take to work, so I could sew whenever I had a minute or two.
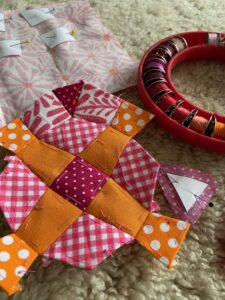
This piece doesn’t have a name yet, which is highly unusual for me. I usual call my patterns or projects something, even if it is really banal such as ‘The Purple Quilt’ or ‘The Green Cushion’.

On the day I was appliquéing the finished EPP piece onto the background, I was actually wearing an orange t-shirt, pink trousers and my mustard shoes. It did make me laugh and I was wondering if I should turn this into a trend and only work on my various EPP projects when I’m dressed appropriately.
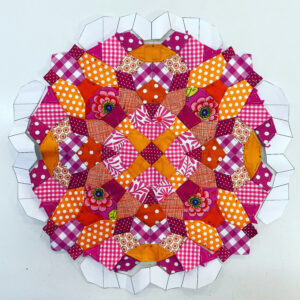
Almost Done

I enjoyed seeing this piece grow. I never plan my pieces in advance but just work in ‘rows’ or small sections, auditioning fabrics. It sometimes happens that I unpick and change fabrics but very seldom and I usually realise it before I’ve sewn on all the pieces.

Olive had to help, of course. This cat is driving me bananas! She’s the cutest, most loveable kitten one could wish for but she does destroy a lot. Together with her ‘brother’ she’s destroyed most of my plants and pots, she chews on all the pencils (I hide them), she finds and kills my woollen socks, hats and scarves (it’s a good thing I have an endless supply as my sister is a very talented and prolific knitter) and sits on every plate or bowl I get out to put food on. I do, however, forgive everything as her face lights up and she runs towards me with the cutest little meow whenever she sees me. She sleeps in my bed and every morning I’m greeted with enthusiasm.

I’ve attached the piece to the background and am now going to turn it into a tote bag. I always end up making cushion covers, but how many cushions do I really need?

The pattern for this piece is part of a very exciting project and will be available at a later stage.
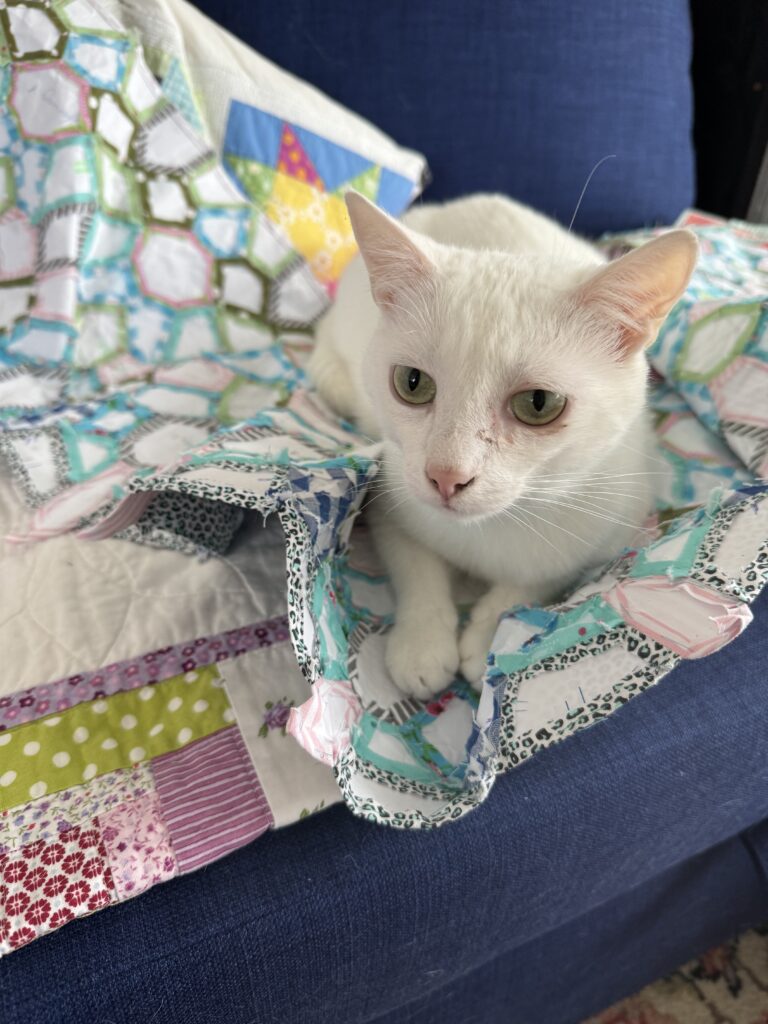
A Start

I’ve started on the Grenoble Quilt. I have to admit that I was naughty and started on it before having finished three WIPs. I simply couldn’t wait. However, I did go back to my pile of unfinished projects once I’d scratched that itch and finished three small projects.

I’ve cut up my template into small chunks of 6 x 7 squares which means I end up with blocks that are 7.75″ x 9″, a nice manageable size to work on while I’m out and about.

Once I finished the first block I sewed the little template onto it so I remember where the block goes.

So far I’ve only finished two blocks but I’ve decided that once I’ve sewed the first seven (which means one whole row). I will then sew them together before continuing with the next seven blocks. This method should make it easy for me to see my progress. I can get bored by projects if I don’t see enough progress.

When I started the block I thought I would go scrappy with the background too, but I haven’t really got enough different low volume scraps so in the end I decided to only use solid whites. As they are scraps they’re not all the same white but I don’t mind that at all; I think it gives it a bit of movement. So far I’m only using greens but I’m thinking of doing the zigzag in dark blue and the crosses in teal or even pink. I’ve got a bit of time before I have to decide what to do (twelve more blocks to be exact) and I rather like not planning ahead. Especially as this quilt will be completely made from my stash.

One thing I have to admit though is that basting and sewing squares is booooooring. Thank goodness for Netflix or this would not end up as a quilt but as a cushion or table runner.

Happy sewing!

A New Addition

We have a new addition to the family. Please meet Flynn Curlytail

He’s not going to stay an only cat. There’s a little girl coming at the beginning of April. By then he’ll be eleven months and she’ll be six months old. Olive is a white cat too and they are both hearing impaired.

Flynn is the sweetest little boy you can imagine, he loves to snuggle and is very clever. I’m grateful to have a sewing buddy again and I’m sure there’ll be lots of ‘cats on quilts’ pictures with him. Here are the first ones:

And just in case you’re wondering why he’s called Curlytail; his tail is very often curled up like that:


Grenoble, a Norwegian Quilt

It’s amazing what can inspire you. I was once inspired by some quilted toilet paper. This time inspiration was a knitted jumper. There’s a fabulous magazine in Norway called Hjemmet, which my mother has subscribed to for as long as I can remember. As I was reading one of their knitting supplements on classic Norwegian jumpers  designed by Dale Garn for the Olympic Games throughout the years I fell in love with the jumper designed for Grenoble in 1968.

Design by Dale Garn, Norway

I’m not a knitter, in fact all my Norwegian jumpers and cardigans have either been knitted by my grandmother or my mother, but I am a quilter. So I turned the Grenoble jumper into a Grenoble quilt. I changed very little in the snowflake as I think its beautiful the way it is but replaced the stripes with a zigzag as I loved the zigzag at the bottom but knew I didn’t have space for it in this quilt.

It’s going to be a long term project. I’ve decided to go for 1.25″ squares as this means this quilt will end up being 61.25″ x 73.75″. I think that’s a good size for a single bed. I might make it bigger but I think it’s good to start with a manageable size.

I’ve calculated that I need 2891 squares for this quilt, 1753 for the background and 1138 squares for the pattern. I haven’t calculated how much fabric I need exactly but I think it’ll be about 1.50m for the background and about 1m for the coloured fabric. I’m still pondering a few things before jumping in and starting this new project:

  • should I have one fabric for the background or go scrappy?
  • what colours to use. In the picture I used light blue but I’m wondering if I should go for greens as I’ve just made two blue and white quilts. Or maybe use reds, pinks and oranges for a modern look? I’m definitely going scrappy for the coloured squares.
  • I have a rule for this year: to finish three projects before I start a new one as I have a million WIP’s cluttering up my sewing room. I’m trying to find the ones that take the least effort and are finished the quickest…

If you would like to make this quilt, you can download the graph and use as a guide.

Norwegian Quilt

Happy sewing,

Elisabeth


Monster Hide and Seek

It’s always fun to make baby quilts and right now I’m making the most fun baby quilt ever.

It all started when I took a class at Quilt Con Together. Jo Avery was teaching her Journey to the Centre of the Earth block. I’ve always been bad at improv and this seemed to be a compromise as you design the block and then FPP (foundation paper piece) parts of the block. It was fun but also very hard and I had to watch the class twice to get a hang of the technique. Once mastered, though, it was incredibly liberating. I made one 12.5″ block and turned it into a cushion.

As I was doing the triangles/spikes I thought they look a bit like monster teeth. That was it, my imagination ran wild and this is what it came up with:

Isn’t that a fun quilt? I tried very hard to not make the monsters scary and I really hope I succeeded. The first monster I did was the green one, then the orange, yellow and purple one. I have to admit that my favourite changes all the time but I think it must be the yellow one. He looks a little worried and quite shy, I think.

As I was deciding what colour to do the last monster (I had planned on making a blue one but realised it would blend too much with the background), I laid the blocks on the floor and Holly became the fourth monster, even showing teeth. She was actually meowing at me, telling me she was hungry and to get a move on and feed her.

In the end it was my daughter who said that the last monster should be purple and I think it was a great choice.

I’m waiting on some basting spray as I want to try spray basting for the first time. I always like trying things out on small pieces and a baby quilt is perfect in that respect. For once I actually know how to quilt this, I usually struggle with it and often quilt in the ditch or echo quilt, but this time I’m going to have a sort of grid in the centre and leaves in the border. The monsters will get a bit of quilting in the ditch to emphasise hair, horns, teeth, nose and eyes but might also get some texture.