Fly, Robin, Fly!

Yeah, my internet, phone and tv have finally been sorted and I’m hoping that this means I can get back to blogging on a more regular basis. Somehow, it’s not much fun to write blog posts without being able to publish them.

Juliet, who blogs at Tartan Kiwi, is a very talented pattern designer who concentrates on foundation paper pieced blocks. I haven’t seen one yet that hasn’t impressed me so, please, go and have a quick look at her Craftsy store. It’s alright, I’ll wait for you here.

Ok, what did you think? Isn’t she wonderful? Well, she was looking for pattern testers a while ago and I put my name forward. However, with the move to Switzerland being more time consuming and stressful than I had anticipated I haven’t really had the time to test any of those gorgeous patterns…until now, that is. Check out this little cutie:
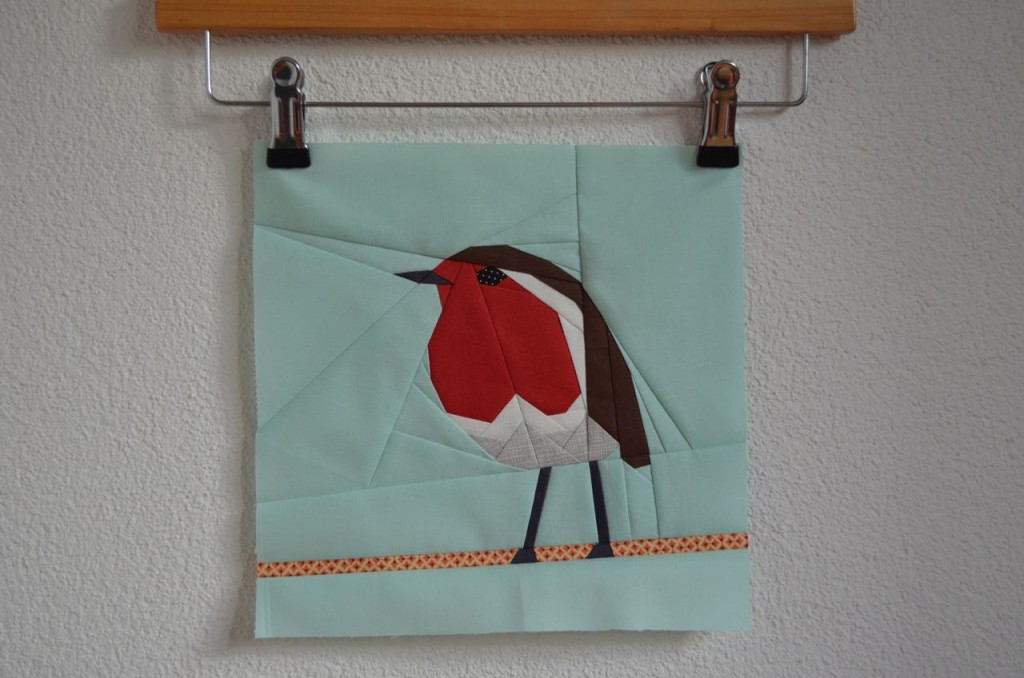
Paper Pieced RobinThe pattern comes together really easily despite some teeny tiny pieces. In fact I had the most problems with those long thin pieces around the legs and for the twig. Slippery little so-and-sos.
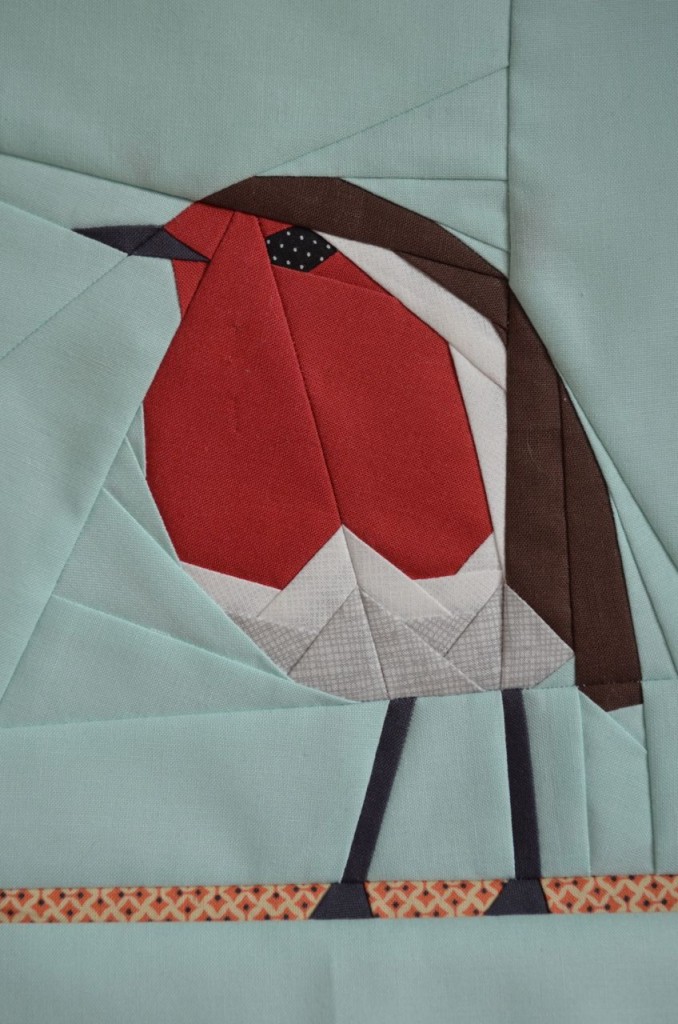
Close up RobinIf you like to FPP (foundation paper piece) and you love Christmas this little Robin is almost a must. The block finishes at 10″ so I’m now going to go and have a little rummage through my Christmas fabric to add a couple of borders before I turn him into a cushion cover.

By the way, go check out Amy of Amy’sCrafty Shenanigans‘ version out as well. It’s in the bottom row of her October mosaic. I wish I had some of that snowflake fabric so that I could make another one.

I used some Kona solids, a couple of prints from Carolyn Friedlander’s line Architextures and a little bit of Denyse Schmidt for my Robin. The fabric I used for the eye was a small scrap I had lying around. Pieced, as always, with my beloved Aurifil 50 wt.

I love him and I will be sad when he flies away to his new home as I’ve decided he would be a perfect gift for…whoops, I almost told you there, didn’t I? I’ll tell you some other time, don’t want to spoil the surprise, do we now?


Modern Mini Challenge

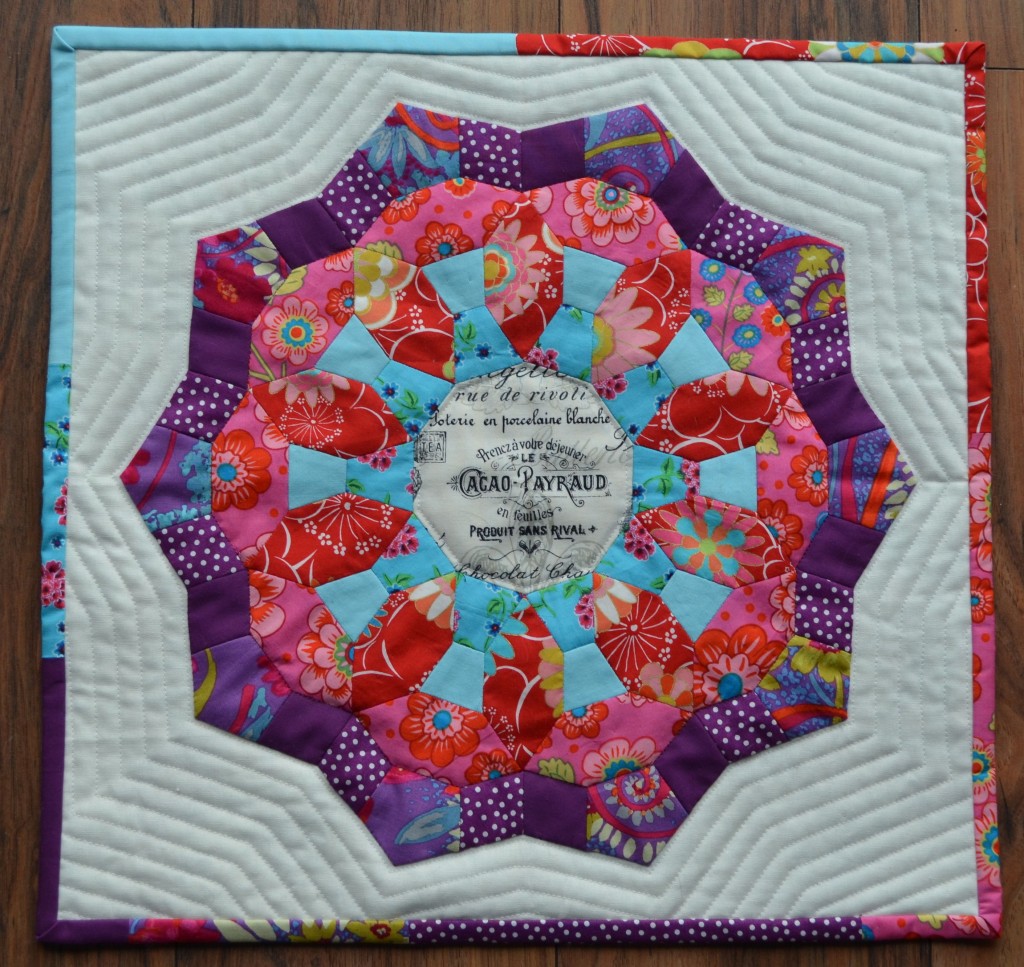
After a long debate with myself I’ve decided to enter my ‘Starflower’ mini quilt into the Modern Mini Challenge hosted by Ellison Lane Quilts. This little quilt is 18″ x 18″ and was made for the Doll Quilt Swap Round 13.

StarflowerI found a drawing of the ‘flower’ on the internet but couldn’t find either who had designed it nor a pattern for it so I sat down and started to draw out the pieces on a big piece of paper. The flower is English paper pieced and then appliquéd onto the white linen background. I then quilted it with some Aurifil 50wt by echoing the shape on the background and the centre and some stitch in the ditch between the pink and purple shapes.

The binding is slightly wider, finishing at about half an inch. I thought a border would be too distracting but liked the idea of using all the fabrics in the scrappy binding.

This was the first EPP patten I ‘designed’ and it was quite a challenge to get all the pieces to fit together and lay flat. It was quite a steep learning curve but helped me a lot with designing my next EPP mini, Athea. You could say this was the start to my obsession with designing EPP patterns. There’s another one in the works as I’m typing this.

Edited to add: I found the pattern, Girih Tiles by Endulzar, on Craftsy. If you would like to make this beautiful mini quilt you can buy the pattern here for $1.95. Although I drew my own templates for this mini I have now bought the pattern as I do not want to cheat this talented designer.  


Waste Not, Want Not

When I made Little Miss Bossy-Boots Tumbler Cushion, I used two charm packs to cut out the tumblers. This was my first ‘proper’ venture into quilting and I couldn’t bear to throw away the little offcuts. Last Sunday, I dug them out and made a little doll’s blanket for Little Miss Bossy-Boots’ babies.

Doll Quilt Front

As you can see the baby also has a tiny cushion made from some small scraps from Little Miss Bossy-Boots flannel quilt. The mattress, however, still needs a cover and that job is next on my list.

For the back I used some offcuts from the offcuts, and some Kona lavender. I then bound it in some Kona snow.

Doll Quilt Back

It’s only 12,5″ square but as a couple of the dolls are small this is more than big enough to cover them at night. Because that’s what we do at the moment, every morning we dress them and bring them downstairs and every evening we bring them back upstairs, put their pyjamas on and put them to bed. For someone who doesn’t like dolls and never played with them as a child, I’m quite proud that I help with the whole process without too much protest. I just hope she gets back into the train set soon….


Doll Quilt Swap

I hope you had a wonderful and relaxing Christmas. We had a very quiet Christmas Day which was just what I needed after recovering from the flu. It’s obvious though that I’m not quite back to normal as I didn’t take a single picture!

In other news, I believe I might have mentioned before that I signed up for another swap, namely the Doll Quilt Swap 13. I tried to get into this swap earlier and wasn’t picked; this time, however, I was. I’ve got my partner and she’s basically given me free reins. Not as easy as you might think. When your partner gives you lots of pointers it’s easier to pick colours and shapes. Having checked her favourites on flickr and mulled over it a bit I’ve decided to go for some English Paper Piecing.

I’ve come up with two patterns I like but simply can’t decide. Which one do you prefer?

Number one.

EPP Spider's WebOr Number two?

I’ve pulled some texty fabrics, some small florals and bright solids for this. I’m really looking forward to starting on it, if only I knew which version to pick.


Mindless Flannels

A little while ago Katy from Monkey Do posted a picture on Instagram of a flannel quilt she had “mindlessly” sewn in one morning. I commented on it and said that I had some flannel I had bought in Denmark lying around that I wanted to turn into a quilt and that maybe I should just sew it together “mindlessly” too. Katy encouraged me to do it, so I did. The flannel is by Leslie Grainger for Robert Kaufman and is called Pretty Paisley.

Mindless Flannel Quilt


Sorry about the Instagram picture. I’ll get some better ones once Little Miss Bossy-Boots has opened her present and I’ve actually washed the quilt.

Oh my, I had so much fun chopping up fabric without a plan. I had to get the seam ripper out a couple of times but am so happy with the result. The finished quilt finishes at 39″ square, the perfect size for a small girl who likes to snuggle on the sofa with a good film.

The backing is a lovely Cloud 9 print from the My Happy Garden collection which I bought together with the flannels, although it didn’t occur to me at the time that they match beautifully. As I didn’t have a big enough piece of fabric in a colour that matched the flannels I decided to go with a scrappy binding rather than wait as this quilt is a Christmas gift for Little Miss Bossy-Boots.

The quilting was a quick affair, mostly because I had to get it finished before I picked up Little Miss Bossy-Boots from school on Friday. I basically quilted a circle and a square in each panel. At first I had thought of doing an all over design but decided against it as I wanted the quilt to be soft and snuggly.

Fabrics for the next quilt are already on the chopping block. The plan is to make a patchwork quilt in green and yellow with a little sprinkling of blue.

British Quilt Swap 3 – progress

I really need to finish this mini quilt now as the mailing window opens in three (!) days. Yesterday I cut out the tree shape and attached it with bondaweb to the ‘field’ next to the road. Next came the leaves. I played around with them for a while before Master said: “Stop!” I ironed them on and left everything to cool down before basting.

I started on the quilting today but wasn’t sure how far I would get as I was fast running out of thread. Luckily, Master went shopping this afternoon so he got some more. I did quite a bit of unpicking as I didn’t like the quilting on the tree trunk or around the leaves.

I have now decided to leave it for today and start on some hand quilting tomorrow trying out some Aurifil for the first time. I’m really excited about it and a bit nervous. What if I’m disappointed after everything I’ve heard and read about the miracle thread that is Aurifil? Come back tomorrow and I’ll tell you what I think.

BQS 3 – A Start

You might remember that I entered the Brit Quilt Swap Round 3. Very early on I started stalking my partner but there wasn’t much to find out. I checked out the flickr page to see what quilts she liked and got quite confused as I felt she didn’t have a specific style that she preferred. So I went back to the email with her preferences and her mosaic. My partner’s style is quite different from mine but that’s part of the fun when you enter a swap.

This is what I have come up with so far:

Autumnal colours and nature are two of the things my partner likes so I’ve decided to make a road that disappears into the distance and a tree. The tree will be raw edge appliqué, something I haven’t got much experience with. This whole little quilt, which should finish at 18″ square, has been so much fun to plan and I’m really enjoying the fact that I’ve come out of my comfort zone and tried something new.

Mailing window opens in nine days so I better get a move on.


Brit Quilts Swap 3

Not Sure

Last year I bought a layer cake of the same fabrics I’d used for Little Miss Bossy-Boots’ tumbler cushion so that I could make a quilt for her bed. I decided not to make a tumbler quilt as I thought it would be a bit too coordinated. This last few months I’ve been looking at the fabric having no clue what pattern to use. Sunday I did something that is completely out of character for me, I jumped in and just started cutting strips to make wonky log cabin blocks. There was no planning, just taking strips and sewing them together.

I finished the first block and didn’t really like it. Thinking it was too late to change my mind I persevered and made another block. I liked it a bit better and continued. I have now made four blocks and I’m still not sure that I like them. I feel they are rather busy. However, I’m hoping I will like the quilt with a nice neutral sashing and wide border.

Sorry about the bad picture, the weather here is simply atrocious. July? The weather gods must be having a laugh…

What do you do when you don’t like something you’ve started? Do you persevere and finish or do you just put it aside? I really want to finish this quilt for my daughter.

London(e) Star

Hurrah, I finished my London Star cushion cover and I’m really pleased with it. There are a few things that niggle at me but I won’t share what they are as I don’t want anyone to study the picture too carefully and find the flaws. I quilted it by following the star shape twice. I thought about continuing to echo quilt but liked the way it looked now, so I stopped.

I learned a lot from making this project. First, designing your own block is daunting but a lot of fun and once you’ve started you see quilt blocks everywhere. I’ve got a few sketches in my little notebook but before I can sit down and translate them into fabric I have to finish a few WIPs.

Second, think about how to iron the seams before you start sewing and stay consistent. Because I only thought of this as a trial piece I didn’t really care and ironed some seams open and some not. It makes it all a bit awkward.

Third, I realise that I’m not a fan of white as a background. After my Summer Luv mini quilt and this cushion cover I can honestly say that it will be quite a while before I sew with white again. Cream or light grey I would use anytime but not white.

Fourth, I really, really want to make a whole quilt with different size London Stars. Again, I have to finish a few things before I can think about that but when I do I might try to write a pattern. Biting off more than I can chew? Probably, but if I don’t try I can’t succeed, can I?

This cushion cover is coming with me to Switzerland next week and will be given to someone special.


London Star

I’m really chuffed today.

One of the classes I took at the Fat Quarterly Retreat was the Designer Challenge where Katy and John got us to think about shapes and design quilt blocks. Most of my drawings were just blah but when we had to think about stars I designed a block that I quite liked. When John said he hadn’t seen anything like that before I took a quick  picture before handing over my drawings.

Back home I couldn’t get my star out of my head and decided to try and sew it up. I sat down, did the math and got it all wrong. When I sewed up the parts that make up the block they ended up way too big. Back to the drawing board….

I decided to actually cut out the components and go from there. I had to adjust my measurements quite a bit but plodded on too stubborn to give up (one of my most prominent traits according to Master). I’m so grateful I did as this is what I ended up with:

Do you like it? I love it. It’s not quite like my drawing but I think I actually prefer it like this. There are so many tiny pieces it takes forever to cut them all out but I think that time is worth it. Now, my math still didn’t quite work the way it was supposed to and the block ended being 11″ rather than 12,5″. Mmmh, not sure if I should just leave it at that or try again. This block will be turned into a cushion for a special person. One day I may even go back to it and make a quilt. Would be fun, wouldn’t it?