Jewel

When I designed this EPP pattern I named it ‘Jewel’ because I thought it looked like a square cut precious stone (very original, I know…).

Jewel

However, once I started sewing I really liked the way it looked without the corners and, thus, it now looks completely different.

Jewel You may also have noticed that I changed the way I used the colours. I often start with a plan and then deviate from it. It does mean the piece looks very different to what I had originally planned. I like both versions and may still go back to the rainbow version one day.

Jewel being hand quiltedThis is the first time I’ve hand quilted any of my EPP minis and I really like the look of it. I think there may be a few more in my future. I’m hoping to have this finished tomorrow as I need a few more colours of thread for the quilting. It’ll get its proper ‘ta dah’ moment then.


Plus, Plus, Equal

My nephew turned eighteen at the beginning of February and a few days earlier I decided that I was going to make him a quilt. A bit last minute, I know. It had to be a quick make and I thought a wonky plus quilt would be fun.

My stash has a lot of girly fabric in it so finding proper ‘man fabrics’ was a little difficult. I managed, however, to find some Architextures by Carolyn Friedlander and Curious Nature by Parson Gray. Some Kona solids in blues, greens, greys and off white, Sketch in two different greys and two fat quarters from my LQS meant that I had enough for a biggish quilt.

Plus, plus, equal quiltI really enjoyed making the plusses, eighteen in total, and the one equal sign. At first I was going to make all wonky plusses but after making nine or ten and laying them out, they were too busy for my liking. I decided to make eighteen plusses and leave the rest of the squares plain. In the end I added the equal sign; just because I can.

Equal Sign

The quilting is straight lines 0.5″ on either side of the seam and then another two lines 1″ apart throughout the middle of the squares. I wanted to keep the quilt modern and, by not quilting too many lines, keep it nice and soft. The quilt was quilted with Aurifil 50wt in 5004, a dark grey, on the top and 2600 in the bobbin.

Plus, plus, equal

The backing is the oh so popular Britten numbers by Ikea. I thought it would fit this quilt perfectly. The binding is Pearl Bracelets by Lizzie House in Hi Ho Silver which I bought at Simply Solids.

Plus, Plus, EqualI love this quilt and I really hope that Leon will too. He’s a great lad who asked me to teach him to sew before I moved to Switzerland. We managed to make a pin cushion and cushion cover which he literally finished minutes before the removal company arrived to collect all my boxes.

Plus, Plus, Equal

The quilt is a little smaller than I would have liked (Leon is tall) but I ran out of fabrics. In the end it finished at 57″ x 66″.

Fly, Robin, Fly!

Yeah, my internet, phone and tv have finally been sorted and I’m hoping that this means I can get back to blogging on a more regular basis. Somehow, it’s not much fun to write blog posts without being able to publish them.

Juliet, who blogs at Tartan Kiwi, is a very talented pattern designer who concentrates on foundation paper pieced blocks. I haven’t seen one yet that hasn’t impressed me so, please, go and have a quick look at her Craftsy store. It’s alright, I’ll wait for you here.

Ok, what did you think? Isn’t she wonderful? Well, she was looking for pattern testers a while ago and I put my name forward. However, with the move to Switzerland being more time consuming and stressful than I had anticipated I haven’t really had the time to test any of those gorgeous patterns…until now, that is. Check out this little cutie:

Paper Pieced Robin
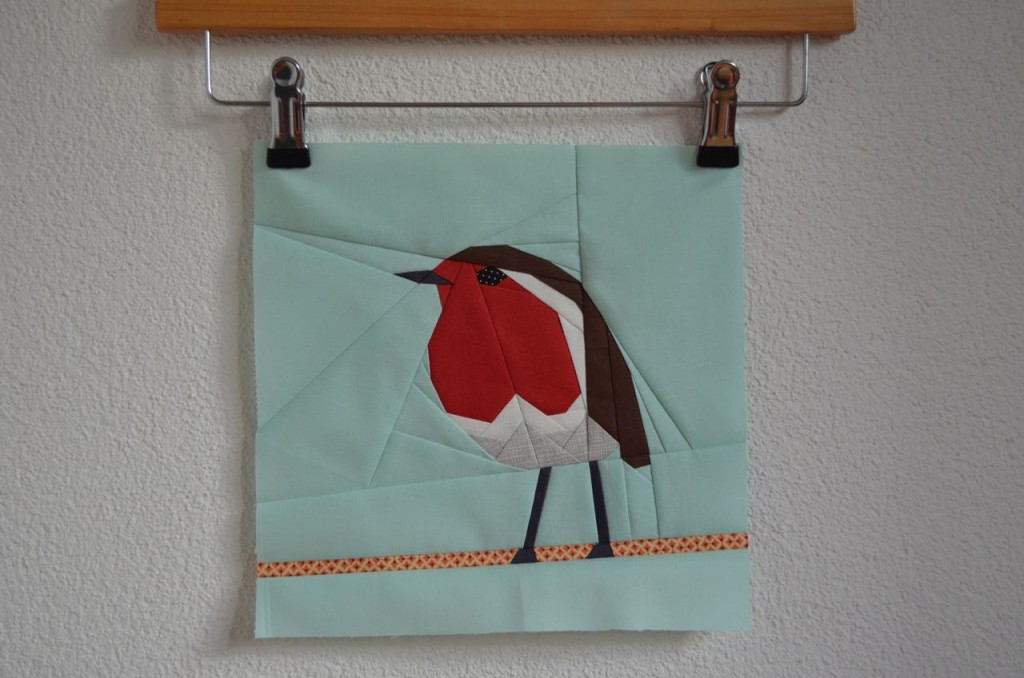
The pattern comes together really easily despite some teeny tiny pieces. In fact I had the most problems with those long thin pieces around the legs and for the twig. Slippery little so-and-sos.

Close up Robin
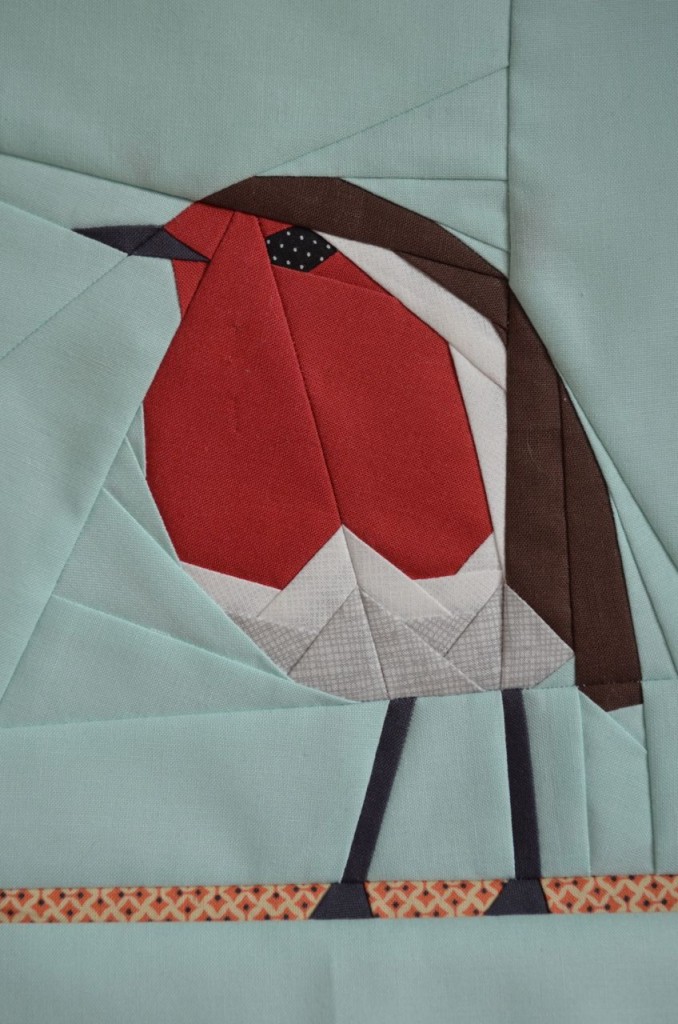
If you like to FPP (foundation paper piece) and you love Christmas this little Robin is almost a must. The block finishes at 10″ so I’m now going to go and have a little rummage through my Christmas fabric to add a couple of borders before I turn him into a cushion cover.

By the way, go check out Amy of Amy’sCrafty Shenanigans‘ version out as well. It’s in the bottom row of her October mosaic. I wish I had some of that snowflake fabric so that I could make another one.

I used some Kona solids, a couple of prints from Carolyn Friedlander’s line Architextures and a little bit of Denyse Schmidt for my Robin. The fabric I used for the eye was a small scrap I had lying around. Pieced, as always, with my beloved Aurifil 50 wt.

I love him and I will be sad when he flies away to his new home as I’ve decided he would be a perfect gift for…whoops, I almost told you there, didn’t I? I’ll tell you some other time, don’t want to spoil the surprise, do we now?
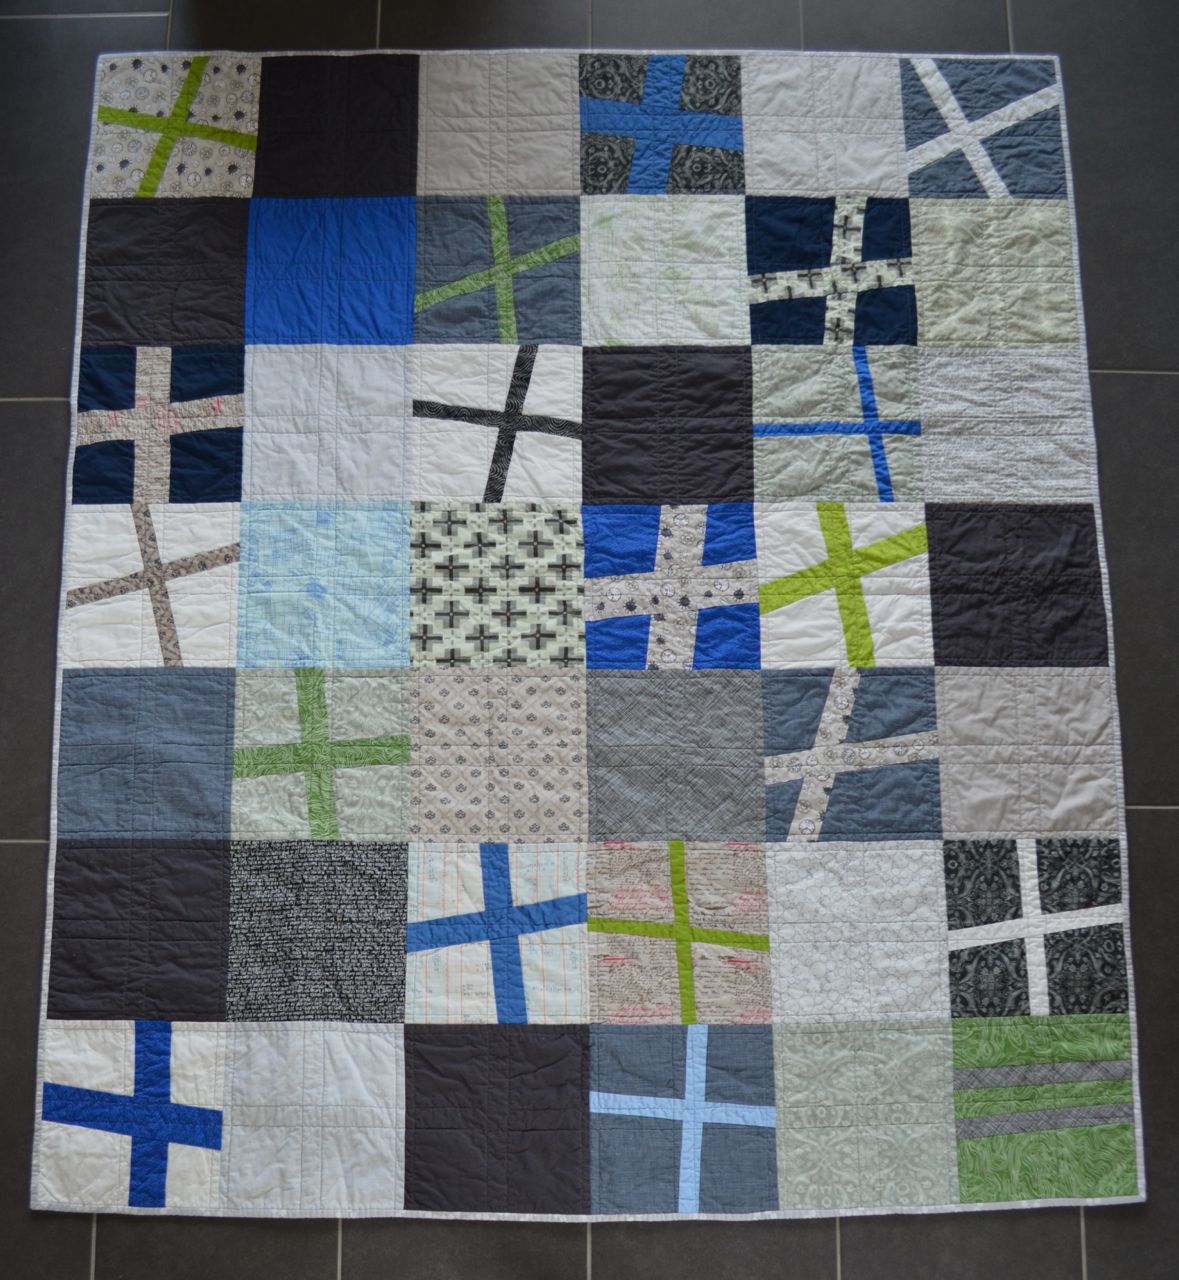
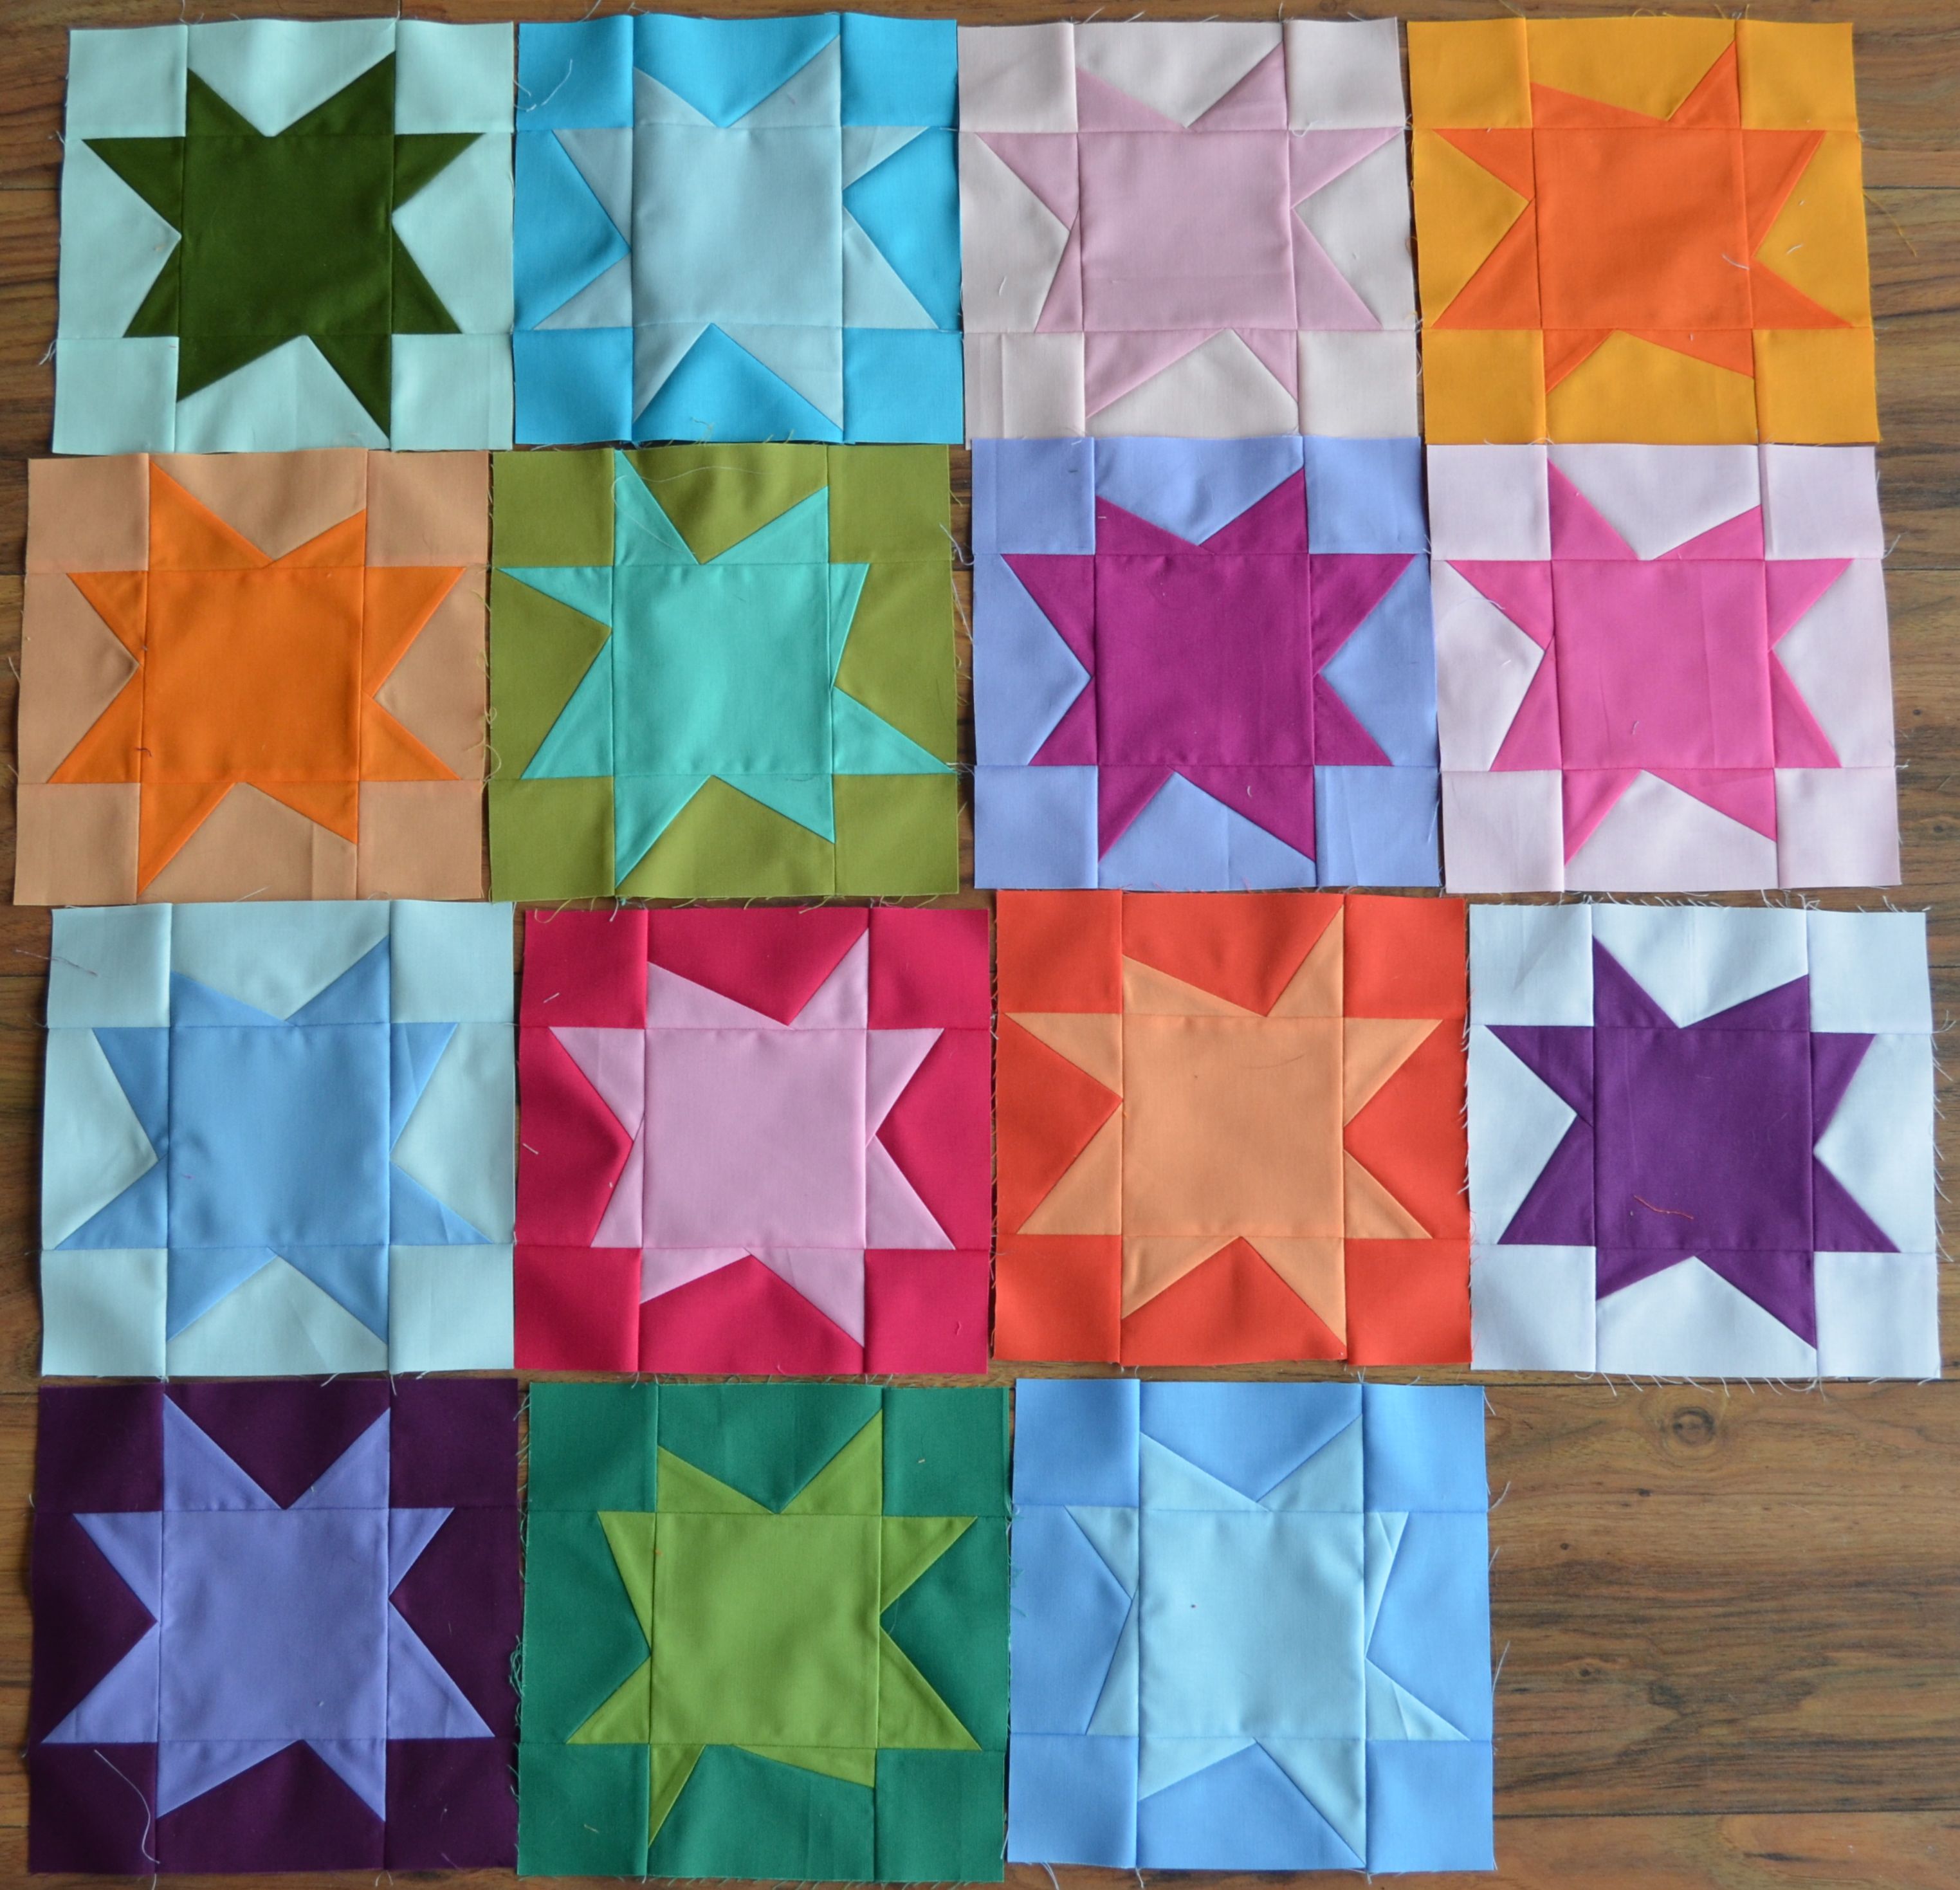
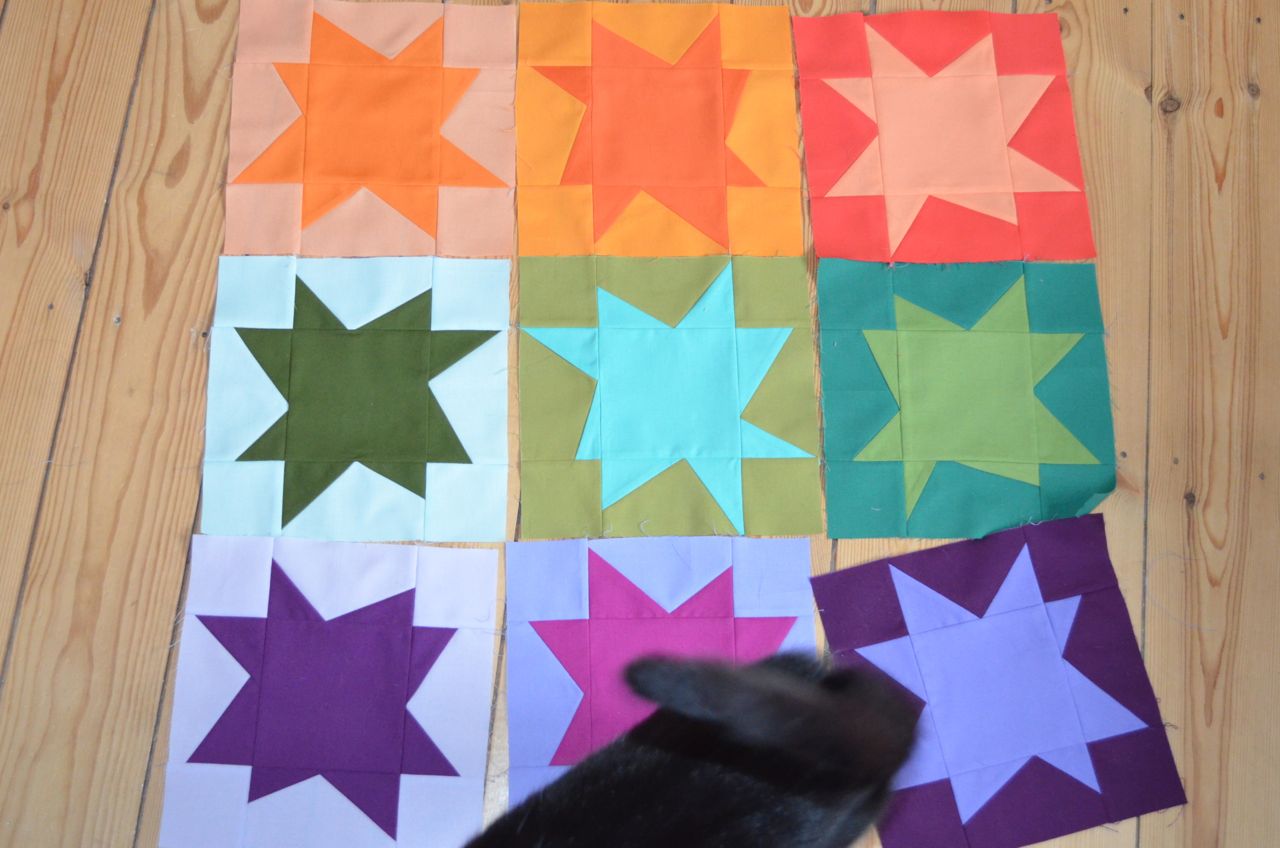


Wonky Princess Bee

Hello again, I decided to seize the fact that mojo was lurking in a corner and started on my wonky stars again. Stellar is the wonderful pattern some of the Sew Solids Crew Stash Club are using for the Sew Solids Quilt-Along. You can see the posts about my first stars here and here. Because I was lagging behind I had two colours to sew stars from, pink and blue. To be honest the most difficult part of this sew-along is pairing up the colours to get enough contrast between the star and the background.

Stellar Sew-AlongDon’t look too closely please. The blocks have lots of stray threads hanging off them and my floor is…. let’s just say it needs a good clean. This quilt is definitely going to be colourful and I’m not sure how much I like it yet.

Something I love, however, is the fabric that arrived today from Simply Solids. I know a lot of people prefer prints to solids but I really enjoy working with solids.

SolidsNext month it’s my turn to be the Princess Bee of the Sew-Euro-Bee-ans. For a long time I didn’t know what to ask for but then I decided to go for colour rather than block. This means that my fellow bees are allowed to make any block they like, in any size they want to make (I’m sure I’ll regret that decision later) and with any extra scraps (solids or prints)  they want/need. I’m only asking them to stick to this colour palette. I would like the blocks to be something they enjoy making and that, I suppose, therefore represents them.  Now that the fabric has arrived I’m really excited about sending it out to everyone.

It’s good to have you back, mojo.


Shining Bright

I’ve finished my Pantone 2013: Emerald Quilt Challenge mini quilt and I’m very happy with it.

Réalt Glas Finished

As it’s name Réalt Glas means Green Star in Gaelic, I decided to quilt some wandering clover on the grey Essex linen. It’s not my first time free motion quilting but it’s still rather wobbly and I realise that I have to practice a lot more. I used the same grey Aurifil 50wt  (2605) that I used for piecing.

Réalt Glas Finished

Except for the centre, the star (stars?) itself isn’t quilted. I did stitch in the ditch around the grey pieces but left the green pieces alone. I could tell you it was because I wanted them to stand out but in reality it’s because the inner star was too pouffy and I was worried that I would have lots of little pleats if I quilted it.

Réalt Glas Finished

The pattern tweaking is still going on for this but I should be finished by this weekend. All I need then is a little help from Master to turn it into a PDF file.


Stellar Update

Hello! This week a lovely orange bundle of six fat quarters arrived on my doorstep, courtesy of the Simply Solids Crew Stash Club. I was feeling a little bit low due to missing a lovely meal in a lovely restaurant on Sunday so decided to cut into it straightaway. You might wonder what a meal has to do with sewing and the answer to that is…nothing. Sewing does cheer me up, though, so that was good enough for me to get the rotary cutter out instead of the duster and hoover.

Stellar OrangeA couple of hours later I had three bright orange stars to cheer me up. As mentioned before Stellar is a great free pattern on the Simply Solids website and although it was designed for the quilt-along I’m sure it would look just as great in patterned fabric or a combination of the two. I love making these stars and can’t wait for the March bundle.

Stellar PhotobombI think Charlie likes the stars too.


Teacher Gifts

I admit it, I struggle with teacher gifts. I never know what to give them, after all how many pencils, fridge magnets or bits and bobs with “Best Teacher” on them do those poor teachers need? This year I decided on chocolates as I’m fairly sure that you can never have too many chocolates. However, I’ve decided to put them in some lovely fabric baskets.

Fabric baskets

I cut four charms into 2,5″ squares and used one for each basket. The charms are all from the Japanese Charm Swap and I picked out the ones which had a food theme: strawberries, cakes and baking implements. The main fabric is Essex linen and the lining is some Kona in Robin Egg.

I can see lots of these fabric baskets in my future as I’m just totally in love with them and I can see so many different uses for them. First I’m going to make one for my sister-in-law for Christmas which I will fill with some candles and nice-smelling body lotion. Then I’m going to make one as a thread catcher for when I’m hand sewing. At the moment I’m using a yogurt pot….

Swimming!

Yes! It’s the last swimming bag. I’ve finally managed to finish it.

The colours didn’t come out right in the photos. The purple fabric is a Kona solid, which is a little darker than in the picture. The red fabric is a deep red cotton/linen mix which was a dream to work with. I just completely loved the texture and feel of it and am so happy that I have some left over.

The appliqué fish was a silvery fabric I had in my stash. I believe it was used for a costume I made for our theatre group at uni. However, I cannot for love or money remember which play it was for. A sure sign of the passing time, isn’t it? Anyway, ramblings aside, the fabric has a lovely sheen to it and reminded me of sardines. Hence the longish body of this fish. There isn’t a lot of detail on the fish, which honestly was because I didn’t have the time. Looking at it now, I actually really like the simplicity of it. I feel a new trend coming on…

The eye of the fish are two buttons, a small blue one on top of a dark grey one. The brief for the bag was purple and red with a glittery fish and the letter “C”. As the fish is more shimmering than glittery, I thought I’d add a sequin “C” for the bling effect.

As with the two other swimming bags I added an inside pocket for goggles, hair ties and other bits and bobs.

In this picture you can also see the bright red zip that closes the bag. I used to be quite scared of zips before I got the “Bag Making Bible” by the lovely Lisa Lam. Her book is just so fantastic I cannot praise it enough. It is packed with tips and tricks for making fabulous bags and although I haven’t made one of the bags in the book yet, I cannot wait to find some time to make a bag for myself. I even have some fabric for the lining ready.


Shark!

Here are some pictures of the second swimming bag I made. I forgot to get more pictures of the first one, all I have is the fish from the previous post but I hope that Julie will be so kind to take a picture or two for me. The bag is for a little boy, Richard, and I think I might have missed the mark a bit. After I finished the bag I did think that maybe the colours were a little girly. A quick word with Master confirmed that the bag could not be called boyish. In fact, he thought the only thing that saved it (just about) was the shark. Well, I told Julie that if she or, more importantly, Richard didn’t like it I would make a new one in more manly colours.

Right here are the stats. The bag is 45cm by 40cm with a zip closure and one long handle (86cm). I used two of my favourite colours from the Kaufmann Kona solids range, spring and delft, which was probably why it ended up more girly than it should have.  Next time I make something for a boy I’ll get Master to chose the fabric. The lining is an off-white fabric that I had in my stash. I like using light materials as lining because it is easier to find things in the depths of your bag when the lining isn’t too busy or dark.

I took the pictures minutes after I finished the bag and literally seconds before I handed it over to Julie hence the midday, dappled shade pictures.

There is an embroidered letter “R” in the same grey colour that I used for the shark. There’s also a handy inside pocket for goggles and stuff.

I love this bag and I secretly hoped that Julie would say that it was too girly and that she wanted me to make another one that was more boyish. All I would have had to do is take the “R” off and use it myself. She didn’t.

I think I might have to make another bag in these colours…once I’ve finished all my other projects.

I’ve almost finished the last swimming bag but have to first get another zip as the one I have is too short. Hopefully I’ll have another reveal tomorrow.

another pink bag

Are you ready for it? Yes?

Here’s the last of three pink and girlie bags for three little girls. I didn’t have time to go fabric shopping before Megan’s birthday. My solution was to make a patchwork bag. I took all my pink scraps, added a few girly blue heart scraps and cut them all 10cm high. I varied the width to make sure it wasn’t too uniform. To calm the busyness of the bag I added a pink panel and a pink flap (Kona baby pink). And just because I can, I added a fabric flower made from a long, gathered strip of the pink fabric I used for the lining and handle.

Continue reading another pink bag