A Bag

I’m always happy when someone appreciates handmade gifts but realise that not every one does. This week I made a bag for my running buddy as it was her birthday.

I used some dark blue waterproof rucksack fabric that I had leftover from when I made my sister a bag, some waxed fabric from Ikea (my Christmas table cloth) and some red webbing and produced this:

Steffi's Bag

I loved it but was ever so slightly nervous when I handed her the present. I needn’t have worried, she loved it too and it’s already in use.

I still have some of those polka dots and some turquoise rucksack fabric. I may just have to make one for myself…..

I did the boxed corners in a new-to-me way and I loved how quick and easy it was. I’ll show you what I mean on the next one I’m making as I didn’t take any pictures this time. That’s what happens when you finish a gift five minutes before you leave for the party.

Bag Handles

You know that feeling when your bag handles are cutting into your hands because you’re carting around lots of stuff for your kids or you bought more than you expected?

Last year Little Miss Bossy-Boots and I went to the swimming pool as often as we possibly could and even though we left some of our things at one of the lockers there, I was still lugging around towels, a picnic lunch, swimming costumes, toys, sun cream and lots more. The bag I used had very narrow handles and they were cutting into my hands or shoulder depending on how I carried it. So I made a padded bag handle whatsit that I could wrap around the handles and close with velcro.

Bag Handle Whatsit

I kept misplacing the pad whenever I took it off to open the bag so I added a little ribbon that I could attach to one handle. Then I rounded off the corners and added some stitching down the side so it wraps around more easily. Now I’m really happy with the result and I’ve made one or two for most people in my family. I usually have one in my handbag so that I’m always prepared.

I was asked to make some for my sister’s mother-in-law and one of her friends so I sat down and made a whole stack of them.

A Stack of Loveliness

I’m hoping to rent a shelf in one of our local fabric shops and sell some handmade goodies, including these. So I made a basket to display them in:

Basket

I had to take off the button and sew it on again as I couldn’t live with the wonkiness…

I thought that maybe you would like to see how I make my handle whatsits, which really need a catchy name, so I’ve prepared a tutorial and am just waiting for better light to take some pictures. Hopefully that will be done by this weekend. It’s snowing again today which makes it quite dark in my sewing room. I don’t want to complain, though, as I really like the snow.

Bag Lady

Before I became bitten by the quilting bug I used to make bags. Shopping bags, hand bags, big bags, small bags and pouches. I’ve had to go back to my roots as the handbag I’ve been using for the last few years became very scruffy.

Boho BagThis is what it looked like when I first made it. I’ll spare you a picture of what it looked like only last week before I took it apart. The fabric on the outside was faded and frayed and I felt embarrassed every time I grabbed it. The lining, however, still looks fine and is made in one of my all time favourite Summersville fabrics by Lucie Summers. So I’m keeping the lining and making a new outer and strap.

The problem is, I can’t decide what to make. Should I go for another patchwork bag? Use leather or rucksack material? Should I make the strap or use webbing? What colours should I use? The lining is off-white and red. I’m not good at making decisions at the best of times but this one is killing me.

Meanwhile I’m using a bag I don’t like and feel comfortable with…..

A LOUD Birthday Present

It was my sister’s birthday on the 6th and, although we agreed ages ago not to give birthday gifts anymore, I made her a bag. I had already made her one earlier which she loves (no pictures as it was one of those finished-seconds-before-gifting projects)  However, after using it she thought it would be even better if it was a little taller so her knitting doesn’t fall out.

When I was at the Fat Quarterly Retreat I bought some Cotton & Steel with lions on which I knew I wanted to use for the bag.

Cotton & Steel

Then I remembered some laminated Amy Butler fabric that I thought would work well colour wise. It wasn’t quite the match I had hoped for but I liked it together nonetheless. I added a very bright blue lining with neon green, pink, purple and white dots and some bright green handles.

Lining

It ended up being a very LOUD bag. It shouts LOOK AT ME and I really like it despite the clashing colours and patterns. Or maybe because of them?

Kris's Bag

I will give it to her with the words: “If you don’t like it I’ll make you a different one.” Because I’d be very happy to keep it.

The Bloomsbury Bag

During my long non-blogging break due to my health problem (sounds worse than it is), I couldn’t resist answering a plea for pattern testers by Florence of Flossie Teacakes. Florence’s blog was the first one I discovered and followed on a regular basis. So imagine how I excited I got when she sent out a request for people who would like to help her test the pattern for her Bloomsbury bag which comes in two sizes. Quick as a flash I sent off an email and within minutes (that’s how it felt anyway) I got an answer telling me that I had been chosen!

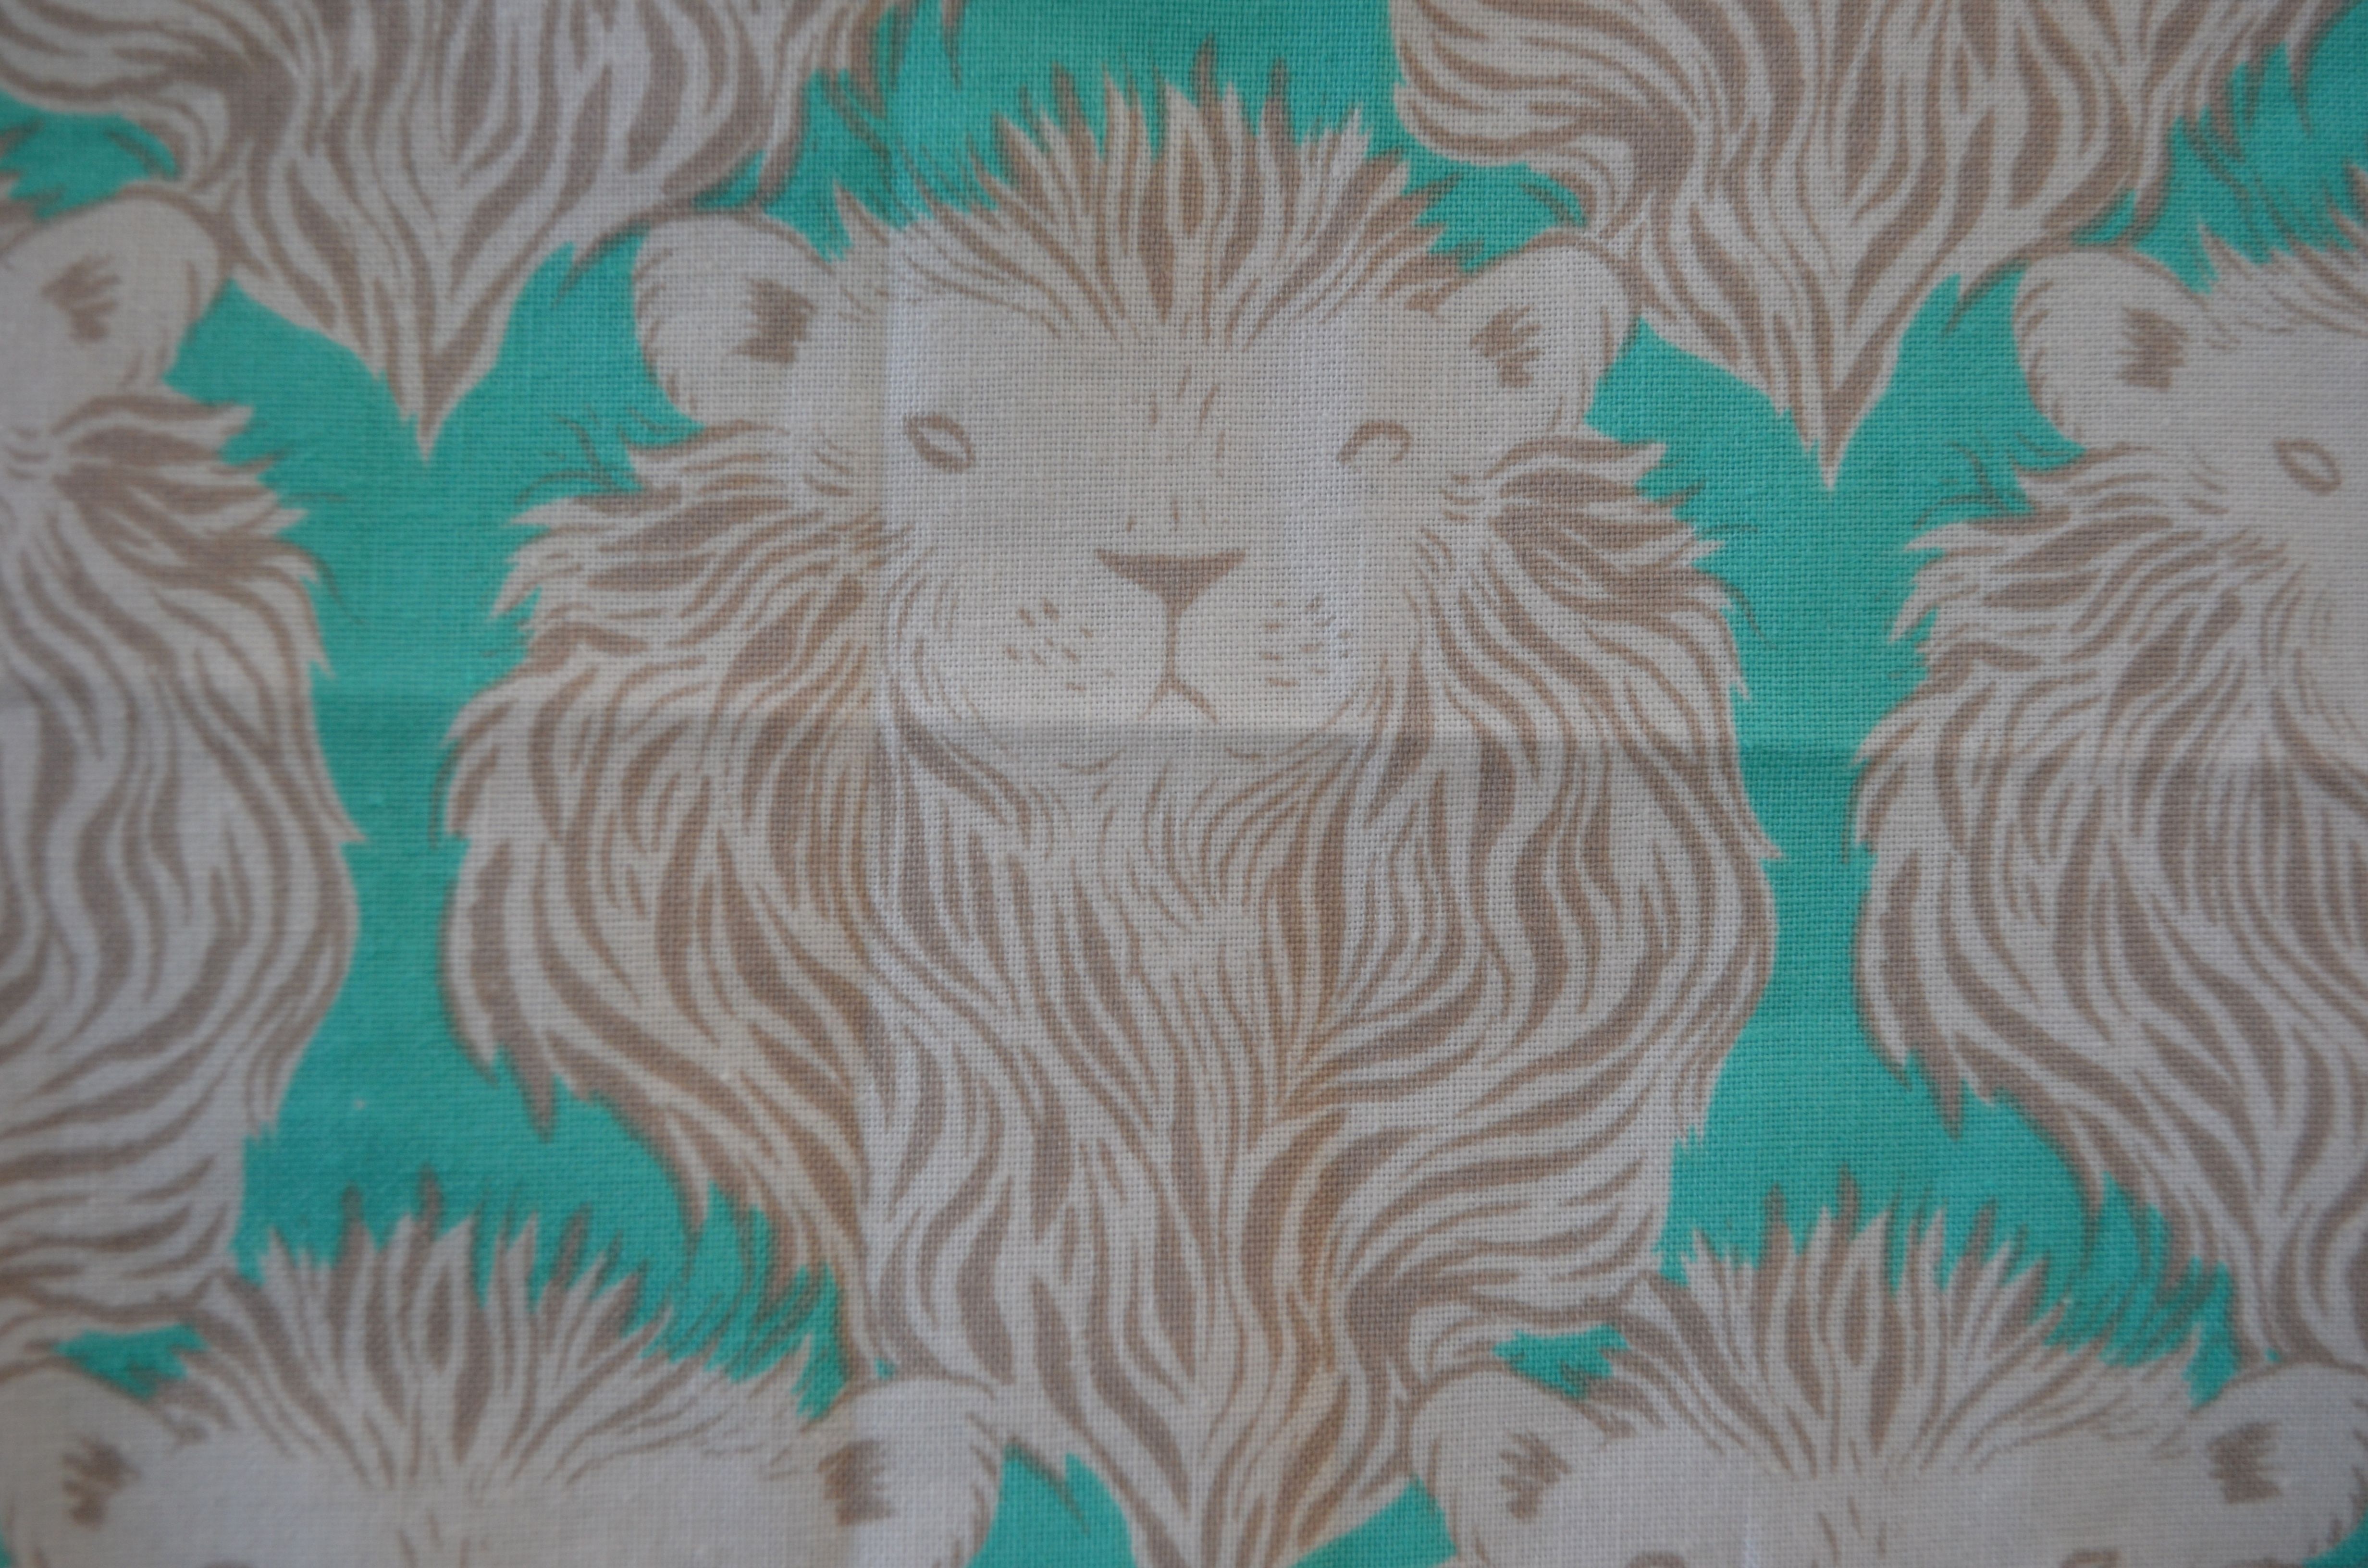
Florence sent me the pattern and some supplies, so all I had to do was choose some fabrics from my stash for it. I quickly decided to use some of the Liberty scraps I’d ordered from Ali’s shop and pair them with Master’s torn trousers that were lying on the recycling pile.

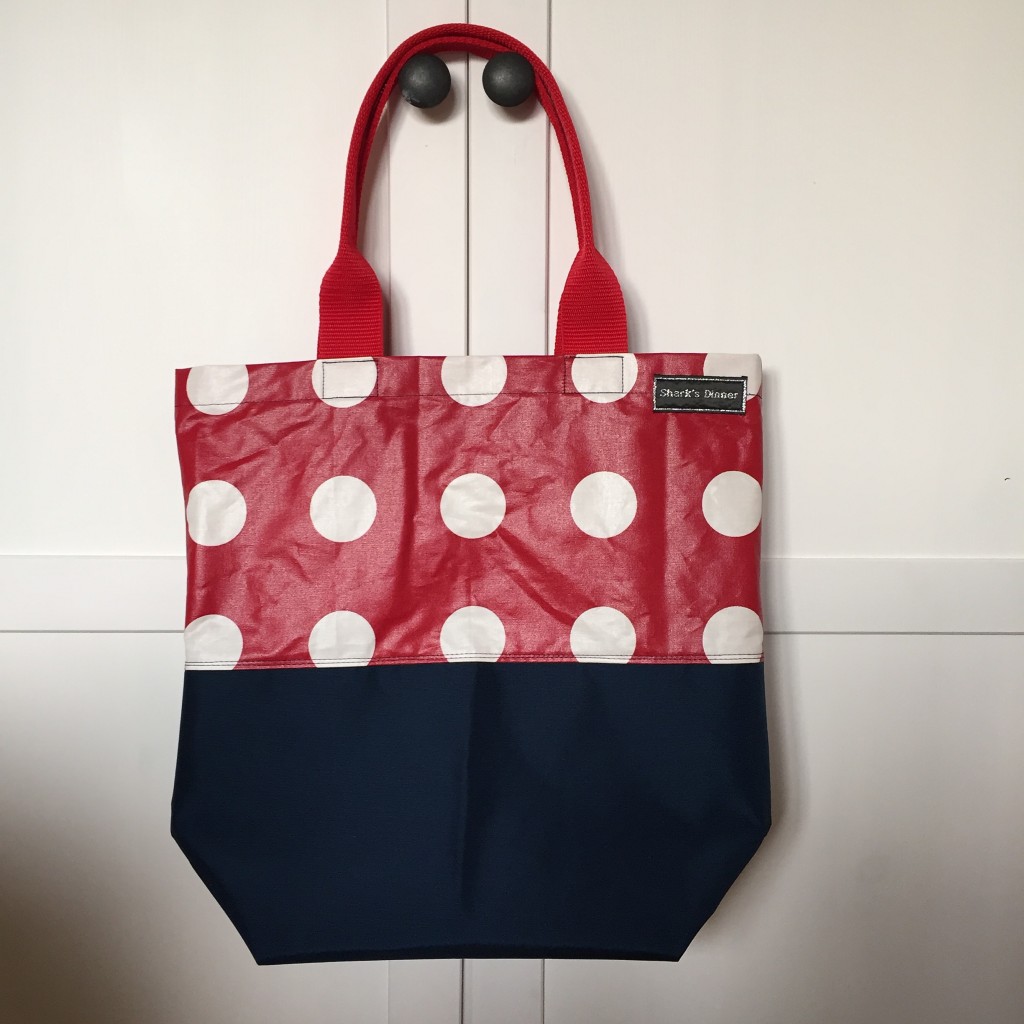
Because I couldn’t really sit at the machine for a whole day I sewed the bag in three sessions. I took my time trying to forget I’d ever made a bag, going through every step of the pattern to make sure the instructions were clear and easy to follow. They were and I ended up with a beautiful bag which, by the way, is the bigger version:

Please excuse the quality of the pictures. The light outside makes it rather difficult to take pictures that aren’t washed out.

The bag came together quickly and easily and I love all the gorgeous details such as the elasticated side pocket in which you could keep a bottle of water, tissues or your mobile. The Dresden petals and piping look sophisticated

and the little zippered pocket inside a zippered pocket is simply adorable.

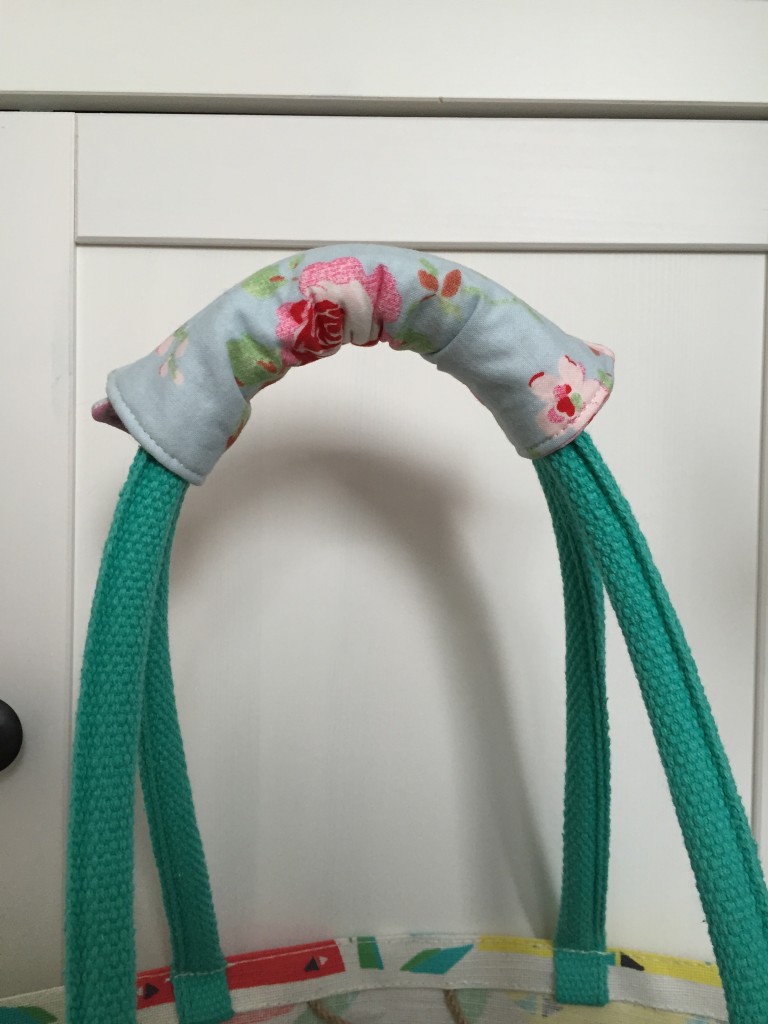
I wanted quite a long strap as I wanted to be able to wear the bag over my winter coat. Master’s legs are long but the trousers weren’t quite long enough for this job, so I had to piece the strap. This is now my favourite part of the bag.

I love the extra glimpses of Liberty.

Now I have to admit that not everything went according to plan. However, none of the problems I encountered had anything to do with the pattern and everything to do with my lack of patience and rubbish cutting skills.

First, the Dresden petals are supposed to follow the curve of the flap exactly and if you look at Florence’s beautiful example bags they do. I found the Liberty Tana lawns really slippery and awkward and as I wasn’t feeling my best I decided after a while of cutting, checking and swearing to just make do with what I had and leave the petals the way they were.

Second, my machine did not enjoy making the piping. I don’t own a piping foot so made do with my zipper foot. The piping is quite wrinkly but again I didn’t feel inclined to faff about and try to get it perfectly smooth. I’m hoping Santa will put a piping foot in my stocking so that I can try again and make perfect piping.

Despite these little problems I love the bag. It’s so practical with enough pockets for everything to have its place. I’m sure I will make another version for the summer, maybe even two. The smaller size would be perfect for walking the dog while the bigger one is great when I’m about and about with Little Miss Bossy-Boots.

If you would like to make a Bloomsbury Bag pop over here and have a look at Florence’s beautiful bags with perfect Dresden petals and piping. Once you scroll to the end of her blog post you can buy her pattern and get sewing.


Sigh

May I have a quick little moan, please? For a while now I’ve been experiencing pains in my hip which have kept me from crafting and sleeping properly, hence the long blog absence. It’s only a niggle as long as I move but when I sit down it starts to hurt and seems to get worse as soon as I go to bed. Last week I was limping home from the school run and I thought “This is ludicrous, get yourself to a doctor, girl!” So I did and the diagnosis is Trochanteric bursitis or Greater Trochanteric Pain Syndrome as it’s now called. Apparently it’s quite common in middle aged ladies with slightly wider hips which, of course, makes me feel really good. Not.

Anyway there’s not much you can do as it’s one of those things that should go away by itself after four to six weeks. However, it’s a bit of a nuisance as I feel it most when I sit still which has made me avoid my sewing machine a bit. Not the best tactic as I’m planning on a mostly handmade Christmas.

Right, moan over. I have been sewing a little something which has been a real treat. I’ll tell you more about it at the end of the week but will leave you with a little sneak peek.

I will try my best to get back into blogging on a regular basis again as I have really missed it. More importantly I have lots on my to do list which I’m really looking forward to showing you. See you soon!

The End is Near

Wow, it’s the last day of October and the last day of Blogtoberfest. I’ve missed two posts (three last year!) which I’m a bit sad about but all in all it has been a lot of fun again. I’ve enjoyed discovering new blogs during this month, some of which have ended up in my reader. I’m not sure that I will continue to blog every day in the next couple of months but will try my best to keep it fairly regular. As I’ve said before I really enjoyed it.

The last day of October is, of course, also Halloween and I just want to show you what Little Miss Bossy-Boots and I created this afternoon. I realised that she didn’t have a bag for trick or treating (she has lots and lots of bags, just not a Halloween one) so I got out my orange and green fabrics and quickly made a “pumpkin” bag which she then decorated with the fabric marker I bought for our Bee’s siggy blocks.

Here’s a close up of the people she drew on the bag:

From left to right: me, Sarah (her best friend’s mum), Lily (her best friend’s little sister), Katie (her best friend) and Little Miss Bossy-Boots. We are all wearing witch’s hats except for Sarah who has curly hair.

The bag was quite full at the end of the evening despite a wet and miserable Halloween. I’ve “borrowed” some candy corn from it after Missy went to bed and hope she won’t remember she had two little packets….

Bella’s Book Bag

Right, I missed one day of blogging. Yesterday felt like one quick blur and before I knew it I was in bed and too tired to even think about a blog post. Never mind.

Today Little Miss Bossy-Boots is invited to her little friend Bella’s fifth birthday party. Now I don’t know about you but my go-to gift for kids is always books. I love books, always have, and believe that it’s very difficult to be bored when you have the ability to read.

We got Bella “The Snail and the Whale” by Julia Donaldson (which is one of my favourites!) and I made a quick and easy reversible book bag to put it in. The stripy fabric is a vintage pillow case, the glittery Disney Princess was given to me by a friend.

The stripy side has a big pocket for a library card or some tissues.

Stripy handles and a little stripy flower finish it off. The princess fabric is more see-through than I realised. The stripes shimmer through even though I used some sew in interlining. Never mind.


Danish Loot

We have just come home from a week in Denmark and I need to show you what I brought home with me.

The first three days we walked around Copenhagen, visiting Tivoli (where we had lunch on a pirate ship), the Zoo and the Botanical Gardens.

All things that are fun for a four year-old on a city break. Little Miss Bossy-Boots loved every minute of her fun-packed holiday where the toy shop had a free (!) roundabout and children were welcome everywhere. Master and I revelled in the fantastic architecture and wonderful food. Portions are of absolutely gargantuan proportions and full of fabulous flavours.

However, what I really want to show you is the gift I got from my friend Dorte. We stayed with her, her husband Leigh and their children for five days and it was bliss. Master jokes that she’s my Danish twin as she’s just as fabric and wool obsessed as I am. She’s incredibly talented and a real allrounder. She quilts for her children, friends and family, knits jumpers and cardigans, sews beautiful bags and makes the most wonderful teddy bears.

When we arrived at their house the first words she said were: “There’s a gift for you on the bed!” I opened it excitedly and this is what I found:

The perfect project bag! I love the owl and the fact that the bag’s huge and can take a whole knitting or crochet project. It’s even big enough for my EPP box which is enormous so as to fit in all my ferris wheels. I love it and can see it following me around the house and garden all day every day so that I can quickly knit a few rows or sew a few stitches whenever I have a couple of minutes to myself. She also gave me some wool and scraps.

Here’s the inside of the bag. As you can see I got some help which resulted in a slightly bizarre pic.

Dorte also took me to a cute quilting shop and this is what I came home with:

Some Kaffe Fassett, text prints, lemons and chicken. These pieces are all a bit smaller than a fat quarter so I don’t have any selvages.

Flannels by Robert Kaufmann.

A metre of My Happy Garden organic cotton by Cloud 9 Fabrics.

All this loveliness cost me about £22. Isn’t it unbelievable? Apparently the Danish quilters aren’t into flannels and this is why I got all the flannels you see in the picture for the grand total of £3.50. There’s definitely enough there for a baby quilt.

UFO’s and the BQS 3 swap first, though.


Fireworks

A little while ago there was a picture of some gorgeous fabric on the Fat Quarterly blog: Katharine’s Wheel by Nel Whatmore. The fabric came with a Designer Challenge to make blocks inspired by circles, swirls and fireworks. Before I could engage my brain I had left a comment to enter the draw. Can you imagine my excitement when I was picked?

Five fat quarters arrived and the fabric was even more beautiful in real life than it had been on the pics; the colours were incredibly rich and zingy. I had had a few ideas buzzing around my head while I was waiting for my parcel but the minute I saw the fabric I ditched them all. No way was I going to cut these beauties into small strips and circles.

I quickly googled Catharine Wheel Fireworks as I have to admit that I know nothing about fireworks, never having bought any myself. Swiss national day (1st August) is celebrated during the school holidays and we were always away. The pictures were lovely and I soon drew some blocks with lines coming from a circle in the centre. I wasn’t quite convinced and started drawing curves. Bingo!

After a few variations and some serious trial sewing I found a curve I liked and started cutting up my lovely fabric. I think the big pieces really showcase the bold flowery prints and rich colours.

I made cardboard templates of my two sections and cut out four of each. Then I sewed together one section a to one section b making quarters, two quarters into halves and then the halves together making sure all the points meet in the centre. After I finished the first block where I used the five different designs I decided that the stripy one was stopping the block’s flow and made another one.

I then wondered what to do with the two blocks I had made and on a whim decided to make a bag. A few weeks ago I bought three different green Konas from Florence‘s pop-up shop on Etsy. Sadly I didn’t make a note of the different names but one of them was a perfect match with Katharine’s Wheel.

There’s a stripy pocket for a mobile phone or key and some fabulously stripy handles.

I also cut off one of the selvages and sewed it onto the lining to remind me of the challenge.

I’m really happy with this bright, swirly explosion of colour and hope that I’ve fulfilled the brief of the challenge.