Fly, Butterfly, Fly!

This little butterfly was designed with one specific task in mind: to use up even my smallest scraps of Liberty Tana lawn.

ButterflyThe butterfly finishes at about 9″ x 12″ when printed out at 100%. For my purpose, however, I printed it out at 75% as I wanted to make sure I could use up even the tiniest of those blue and green scraps. The antennae are free motion quilted in a variegated Aurifil 40wt (no 4669) which I bought to quilt my Churn Dash quilt. The butterfly itself was pieced with Aurifil 50wt (no 2000) which is a perfect match to many of the Liberty lawns. I appliquéd it onto a red cotton/linen fabric that I’ve had in my stash for a few years. I auditioned different colours for the background but found it nicest on the red. Funnily enough, when I popped it onto some white, the butterfly looked really washed out.

All of the Liberty lawns came from Ali’s shop Very Berry Fabrics on Folksy and I already have plans to buy more (don’t tell my bank account, I can already hear it groan) as Ali sent me some scraps with my last order and I’ve completely fallen in love with one of them. Sadly she doesn’t seem to have any in her shop at the moment but you can be sure that I will be stalking her in the next few weeks.

This is my third finish for Q1 of the FAL and I’m very happy about that. I really would like to make one of these butterflies in solids as I think it would look stunning in a rainbow of colours too but I’m going to be good and continue with my list before starting something new.

So far, I’ve made my EPP patterns available for free and I want to do this with my last two, Butterfly and Liberty Bloom, too. They just need a little more work before I can upload them to the blog. Hopefully, they should be done by the end of this week. Afterwards, however, I’m thinking of opening a shop on Craftsy or Etsy and asking for a small contribution for my patterns. What do you think? Would you pay a couple of pounds for my EPP patterns?
 

A Triceratops with Cellulite

When Juliet from a Tartankiwi asked for testers for some of her new foundation paper piecing patterns I jumped at the chance. I love the robin I did before Christmas even though he’s still not been turned into something useful. This time I got to try sewing a triceratops, one of my favourite dinosaurs.

Triceratops Head

Being a mostly female household (Charlie the cat doesn’t really count, does he?) I pulled out some fabric in pinks and oranges but changed my mind at the last minute and went for purple Liberty Tana lawn instead. Purple is Little Miss Bossy-Boots favourite colour at the moment and I thought it would be fun with a purple triceratops.

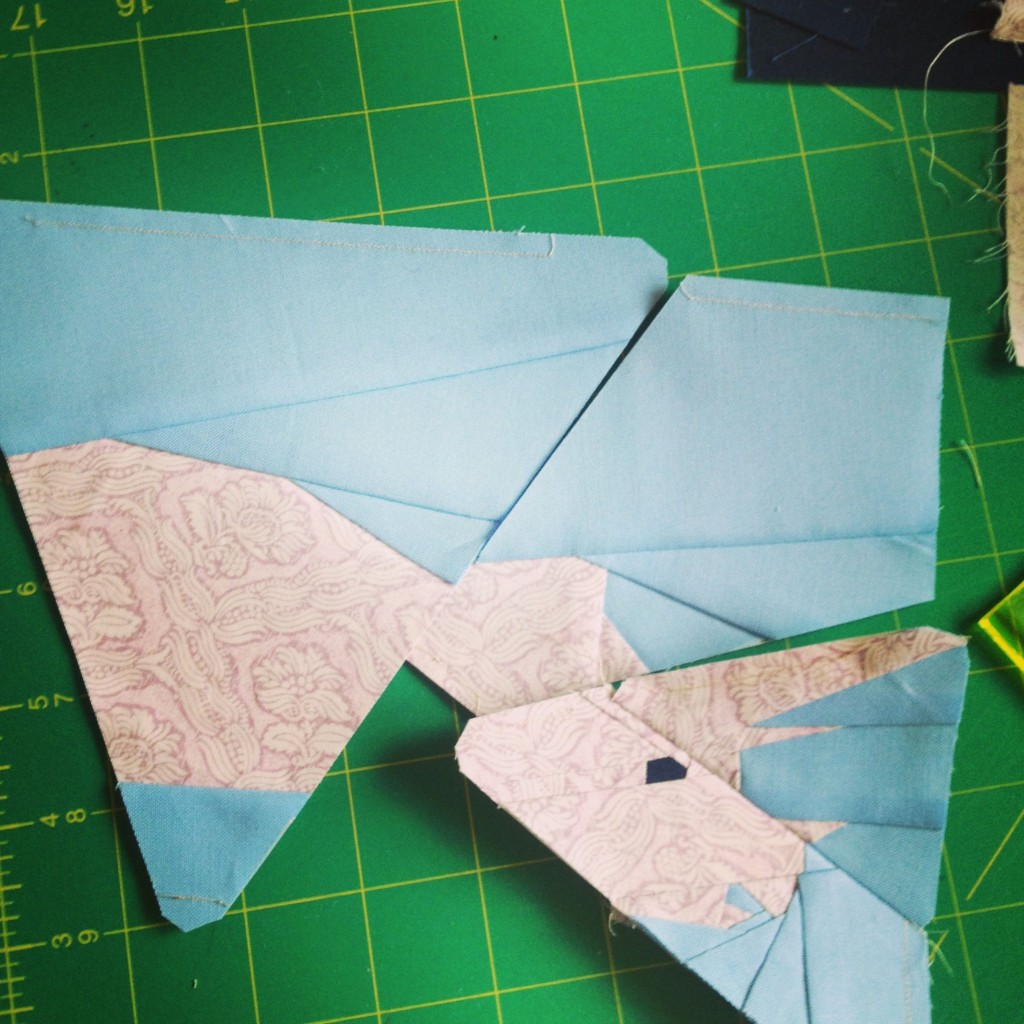
Half a Triceratops

This pattern contains a gazillion minute little pieces and the lawn fabric really helped with reducing the bulk. Once I’d finished the head I admit that I did breathe a sigh of relief. I don’t know about you but I stop breathing when I concentrate really hard. The detail is fabulous, though, and I was happy to continue with the legs, giving my triceratops red toe nails (don’t look too closely, though, as I managed to forget one).

Triceratops

Wondering about the cellulite? Wonder no more. I was a bit tired at the end and didn’t line up the bottom quite as well as I could have. As this one is for us I didn’t worry too much and left it the way it was. I’m sure she isn’t too bothered about her lumpy bottom.

Triceratops Cushion

I didn’t want this lovely dinosaur to end up as a WIP (especially as it is on my FAL list) and started quilting it straightaway. The bulk of all the seams in the head made it too difficult to quilt so I just did two clouds in the sky and a few plants in the grass. Quilting and piecing was, as always, done with Aurifil 50wt. A bit of dotty fabric and, hey presto, we have another cushion for the sofa.

This pattern hasn’t been released yet but I’ll let you now as soon as it’s in Juliet’s shop.

Edited to add: Get the pattern here.

Liberty Bloom

I’ve finished my Doll Quilt Swap 14 mini quilt and I’m really very happy with it.

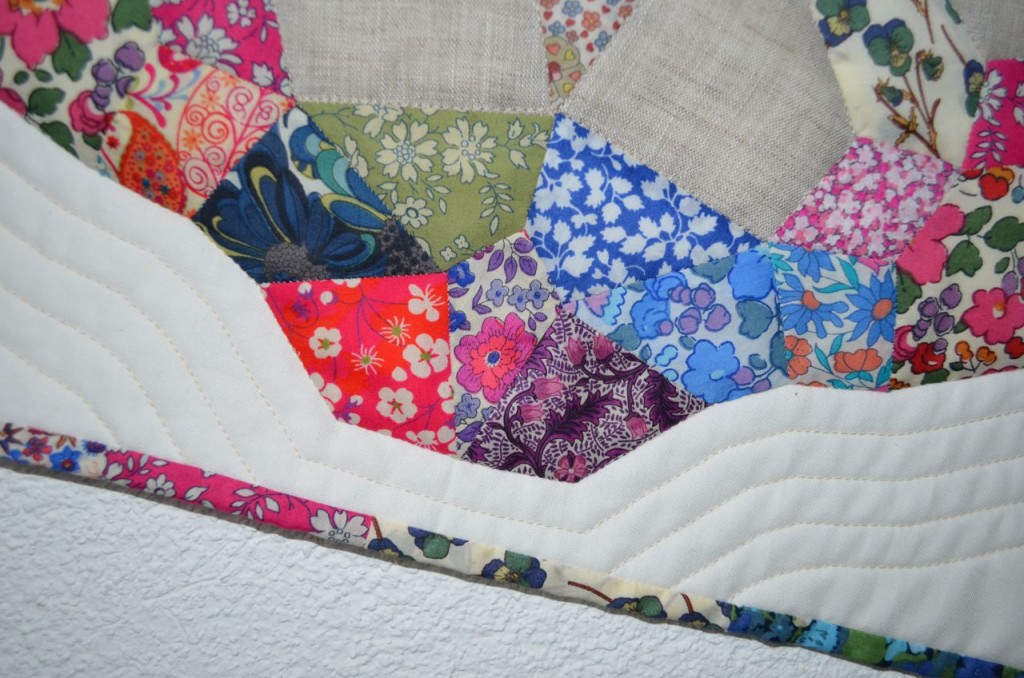
The only thing I’m a little disappointed with is that I couldn’t do more quilting on it. Once I’d finished stitching in the ditch around the ‘bloom’ and the linen pieces my back gave out to me. I realised that I wouldn’t be able to sit at the machine much longer and therefore simply echo quilted around the bloom a few times. I quite like the simplicity of it, it really lets the fabrics do the talking.

Liberty Bloom

The mini’s progress was stalled when I ran out of Liberty scraps that were big enough to finish the last few pieces. I ordered a mini bundle from Ali’s shop Very Berry Fabrics on Folksy and it arrived promptly a couple of days later. Thank you so much, Ali, for such quick service!

The Liberty Bloom is pieced and quilted with Aurifil 50wt, my favourite thread of all times.  It finishes at 19″ x 19″ and has a scrappy Liberty binding which I am very partial to. I just hope my partner loves Liberty Bloom as much as I do.

Scrappy Liberty Binding

The pattern for this mini will be added to my tutorials once my partner has received it as I’ve named it after her. I don’t think she reads my blog but it’s better to be safe than sorry and I don’t want to spoil the surprise for her. One of the fun things about theses swaps is that you don’t know what you’re going to get until you hold the package in your hands.

This was another projects on my FAL list and I’m so happy to be able to cross it off.

Doll Quilt Swap 14

I enjoy a good swap and one of my favourites so far was the Doll Quilt Swap Round 13. The mini quilt I got was absolutely stunning and was one of the first things I hung up in my sewing room. When I saw that registration for round 14 opened I jumped at the chance to get another little beauty as those ladies are a talented bunch.

The mini quilt I did was an English Paper Piecing project that I found on the internet. As I couldn’t find the pattern I copied the design and drew the templates myself. I have since found and purchased it on Craftsy as I truly didn’t want to rip off the talented designer, Endulzar.

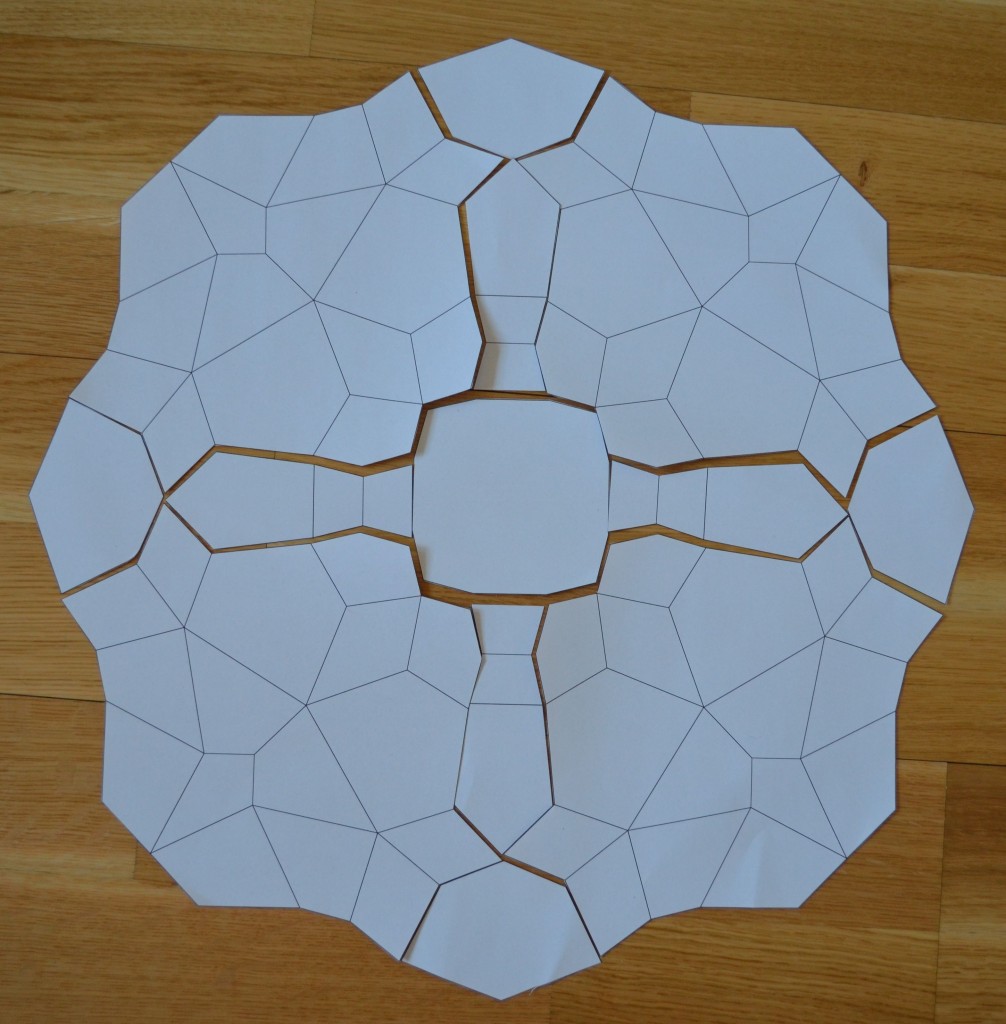
Anyway, I decided to go for another EPP project as I knew I was going to spend Christmas in Ireland and it would be great to sew a bit between eating turkey and Christmas pudding.   I designed my own pattern on TouchDraw for iPad and will be adding the templates to this blog once I’ve finished the mini and am sure that everything fits and looks the way I want it.

EPP for DQS 14

This year I went for the classic combination of linen and Liberty Tana lawn. As I only had scraps, I went for a scrappy but ordered approach and got to the last two pieces before I realised that I didn’t have enough scraps to finish it.I have now ordered more from Ali‘s gorgeous shop on Folksy where all my other scraps have come from too. I can’t wait to get them and finish this mini.

DQS 14 Mini


Pieced, as always, with my favourite thread: Aurifil 50wt (colour no 2000).

The Bloomsbury Bag

During my long non-blogging break due to my health problem (sounds worse than it is), I couldn’t resist answering a plea for pattern testers by Florence of Flossie Teacakes. Florence’s blog was the first one I discovered and followed on a regular basis. So imagine how I excited I got when she sent out a request for people who would like to help her test the pattern for her Bloomsbury bag which comes in two sizes. Quick as a flash I sent off an email and within minutes (that’s how it felt anyway) I got an answer telling me that I had been chosen!

Florence sent me the pattern and some supplies, so all I had to do was choose some fabrics from my stash for it. I quickly decided to use some of the Liberty scraps I’d ordered from Ali’s shop and pair them with Master’s torn trousers that were lying on the recycling pile.

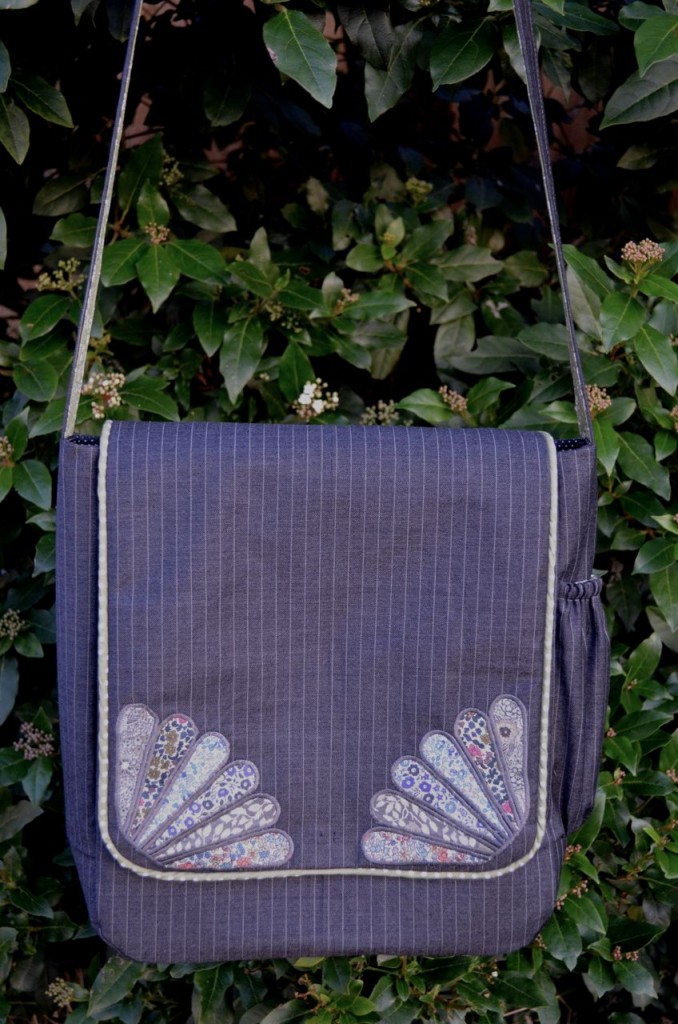
Because I couldn’t really sit at the machine for a whole day I sewed the bag in three sessions. I took my time trying to forget I’d ever made a bag, going through every step of the pattern to make sure the instructions were clear and easy to follow. They were and I ended up with a beautiful bag which, by the way, is the bigger version:

Please excuse the quality of the pictures. The light outside makes it rather difficult to take pictures that aren’t washed out.

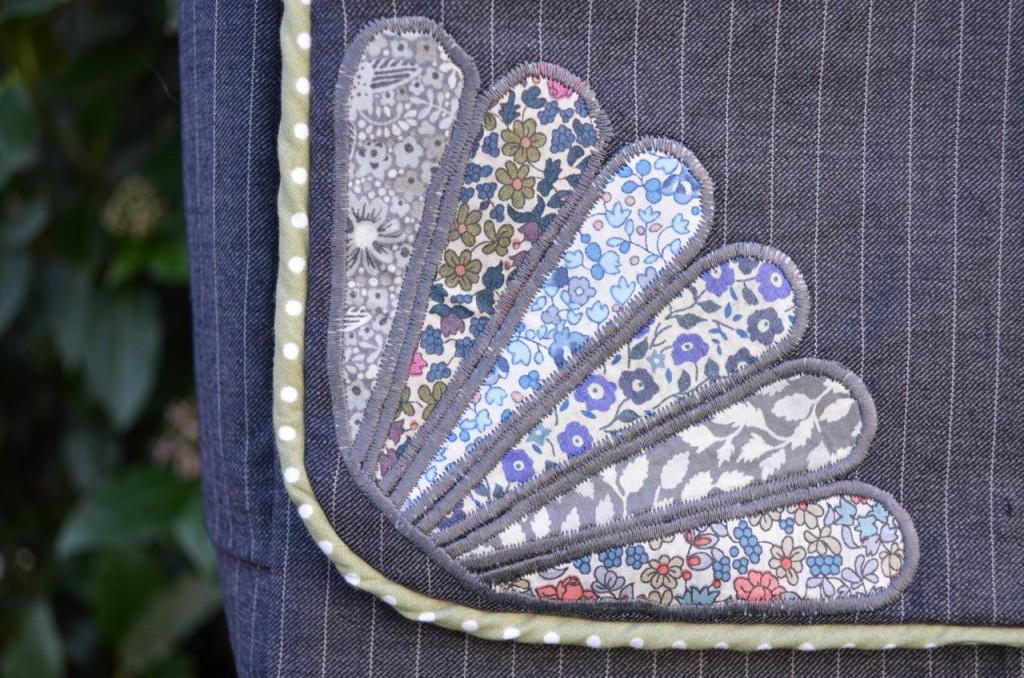
The bag came together quickly and easily and I love all the gorgeous details such as the elasticated side pocket in which you could keep a bottle of water, tissues or your mobile. The Dresden petals and piping look sophisticated

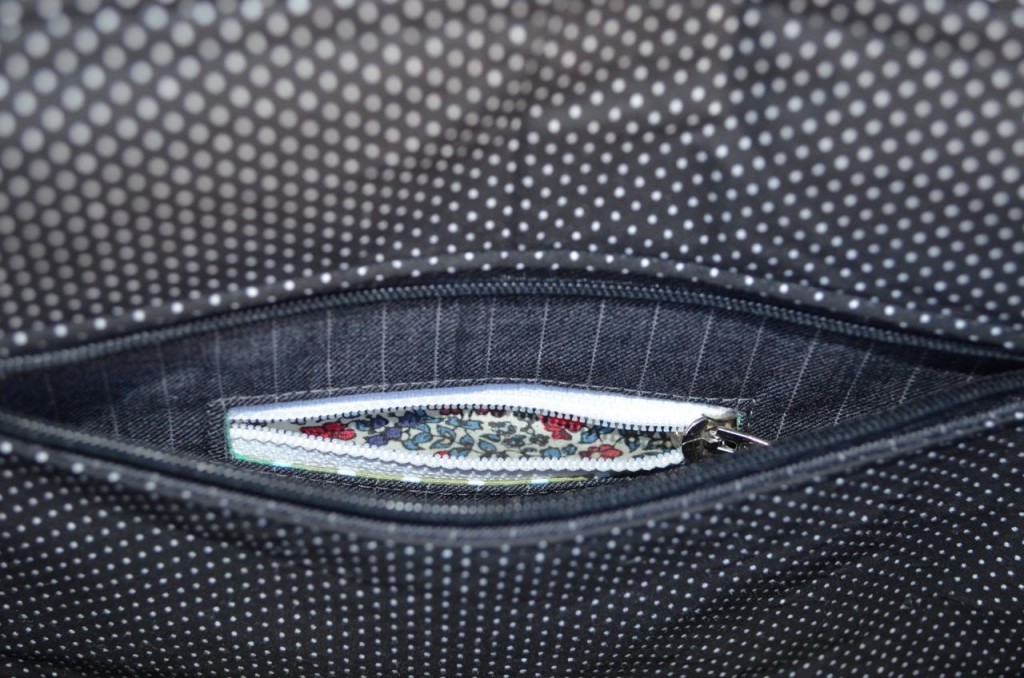
and the little zippered pocket inside a zippered pocket is simply adorable.

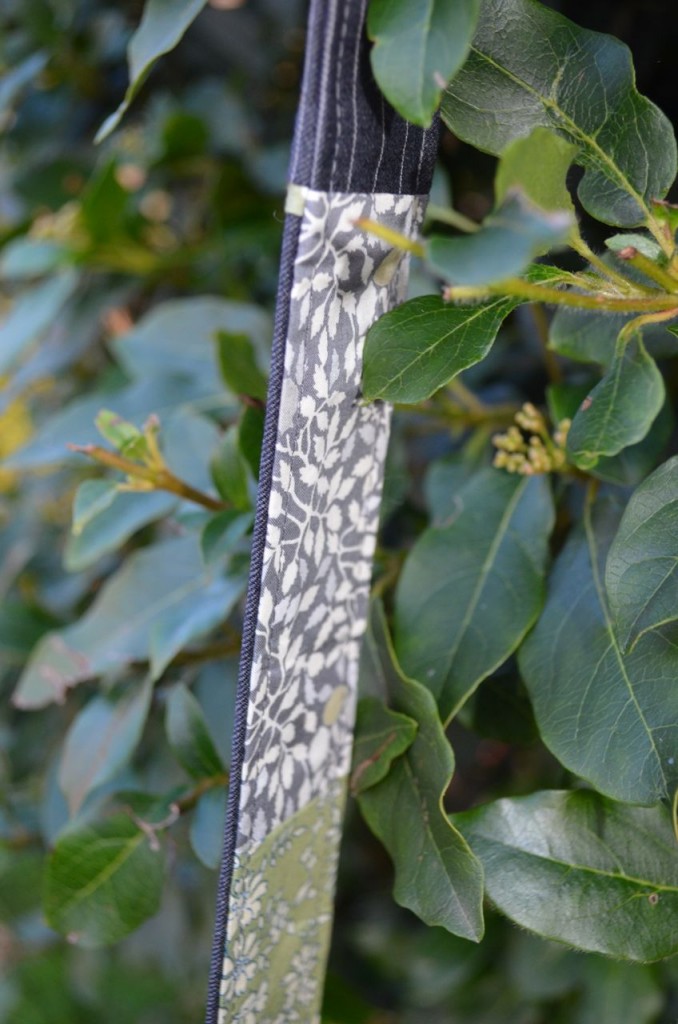
I wanted quite a long strap as I wanted to be able to wear the bag over my winter coat. Master’s legs are long but the trousers weren’t quite long enough for this job, so I had to piece the strap. This is now my favourite part of the bag.

I love the extra glimpses of Liberty.

Now I have to admit that not everything went according to plan. However, none of the problems I encountered had anything to do with the pattern and everything to do with my lack of patience and rubbish cutting skills.

First, the Dresden petals are supposed to follow the curve of the flap exactly and if you look at Florence’s beautiful example bags they do. I found the Liberty Tana lawns really slippery and awkward and as I wasn’t feeling my best I decided after a while of cutting, checking and swearing to just make do with what I had and leave the petals the way they were.

Second, my machine did not enjoy making the piping. I don’t own a piping foot so made do with my zipper foot. The piping is quite wrinkly but again I didn’t feel inclined to faff about and try to get it perfectly smooth. I’m hoping Santa will put a piping foot in my stocking so that I can try again and make perfect piping.

Despite these little problems I love the bag. It’s so practical with enough pockets for everything to have its place. I’m sure I will make another version for the summer, maybe even two. The smaller size would be perfect for walking the dog while the bigger one is great when I’m about and about with Little Miss Bossy-Boots.

If you would like to make a Bloomsbury Bag pop over here and have a look at Florence’s beautiful bags with perfect Dresden petals and piping. Once you scroll to the end of her blog post you can buy her pattern and get sewing.


Liberty Done

After my little melt down yesterday I felt a bit silly this morning. Some of my lovely readers suggested I put a cream border on to make it bigger and so I did.

In hindsight I think it’s probably a good thing because it means the corners, which I always find are the first to go, are now in the Klona quilting cotton rather than the wonderfully soft but maybe more fragile Tana Lawn. I kept the quilting to an absolute minimum, I didn’t feel it needed any more.

I like to put zips in my cushion covers but I didn’t have one in the correct colour so instead of waiting for an opportunity to go into town I made a simple envelope closure. With the 1″ cream border it finished at the required 36 x 36cm (14″ x 14″) and is now all wrapped up and ready to wing its way to Switzerland.

I fell in love with it so badly that I’ve started another one for myself with the rest of the 4″ Liberty squares. I might change up the layout a little but then again I might not.

Liberty Squares

Today I cut some Klona cream 4″squares to pair with the Liberty charms I ordered from Ali’s shop. I had decided to make some half square triangles (aka HST) for my aunt’s cushion cover. Everything went really well and I even enjoyed all the trimming.

I quickly decided on the placement…

… and then realised that the size was all wrong. My aunt asked for a cushion cover that’s 36 x 36cm, my cushion cover finishes at 32 x 32cm. Math obviously isn’t my strong point and I made a mistake when I converted the centimetres into inches. Arrgh! What to do? Should I keep this version and make a new one for my aunt in different fabrics? If I do, keep it I mean, should I add another round of HSTs to increase the size? Should I go back to my original plan of making a Dresden plate for her? So many questions.

I think I’ll have to sleep on that one.

Liberty

This morning I brought Little Miss Bossy-Boots to school, came home to take the dog out and quickly walked into the kitchen to find his ball (no idea how it got there!). I looked at my cooker and thought: “Wow, it’s really dirty”. As I started cleaning the cooker, the dog completely forgotten, a drip nearly ended on my nose and when I looked up I had the shock of my life. The ceiling was bulging and dirty water was dripping down on my cooker.

I called the plumber who came within about ten minutes (he’s a friend!). He took the plasterboard down and started looking for the leak. Nothing. I flushed the toilet, ran the bath and sink taps. Nothing. I now have a big hole in my ceiling that I have to check every now and then.

Not a good start to the day. However, it got better once the postie had been: An envelope full of Liberty squares and a mini bundle arrived from the lovely Ali from Very Berry Handmade. She has a little shop on Folksy and specialises in Liberty Tana Lawn fabrics. Just check out how cute those packages were:

I can’t wait to try that recipe for Ginger Scrunchies. They sound delicious.

Would you like to see what was in those cutesy parcels?

The mini bundle that was on offer on Monday and

these lovely 4″ squares.

Psst, don’t tell her but these fabrics were ordered for my aunt who told me that the cushion cover I had made for my grandmother about 20 years ago has ripped. The plan is to pair the Liberty with Essex linen and make some HSTs.

As soon as I’ve sorted my kitchen ceiling out.